Bamboo Tips - Contraptions Ovens |
|
< Home < Contraptions < Ovens
Here are some pictures and/or drawings of ovens from various makers. If the name of the submitter is underlined, you can go to the submitter’s web site.
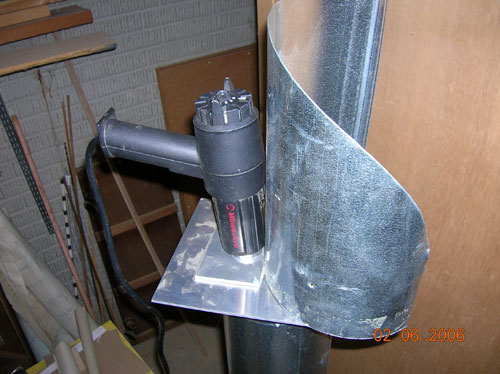
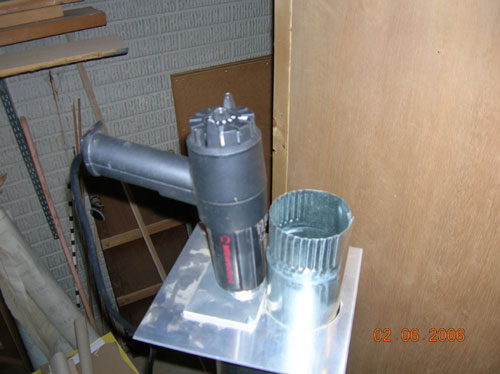
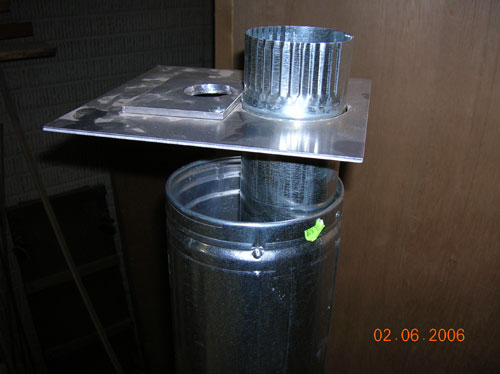
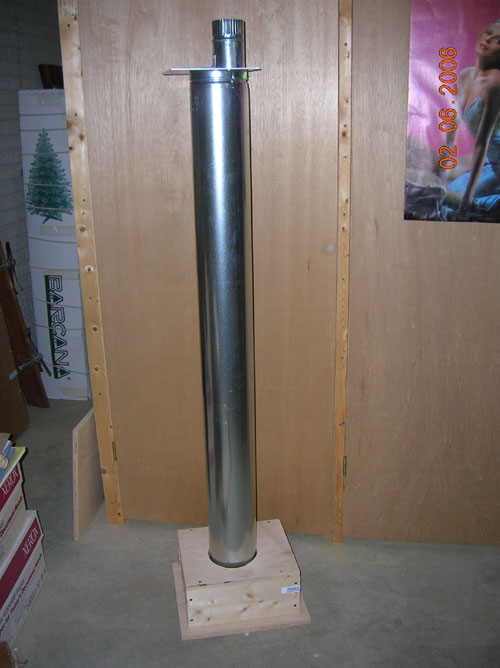
Kearney, Ian - Heat Gun Oven
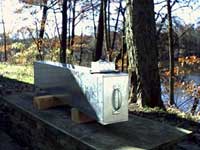
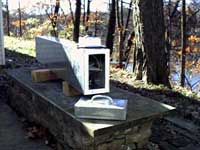
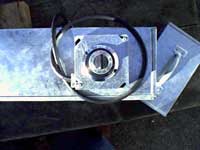
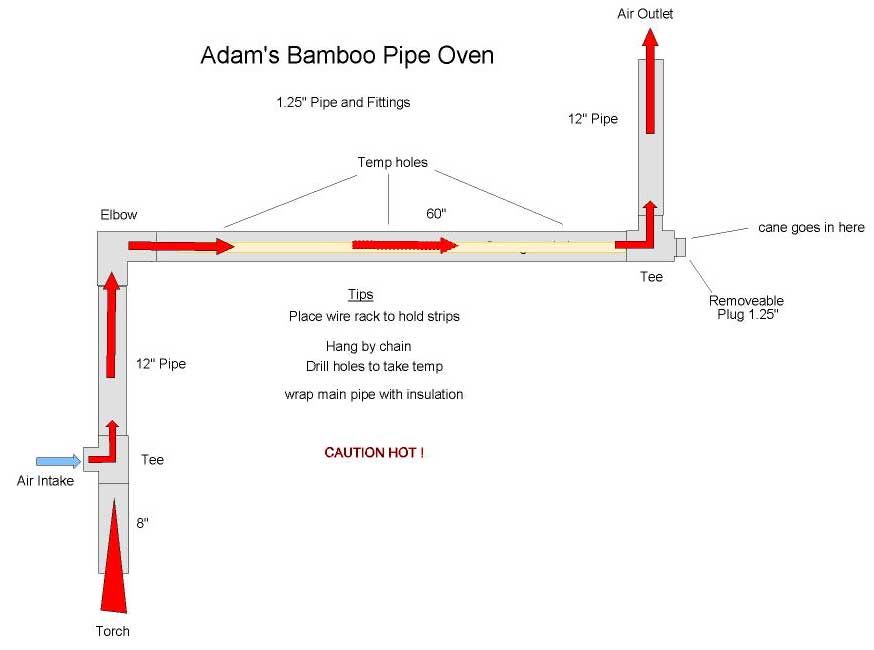
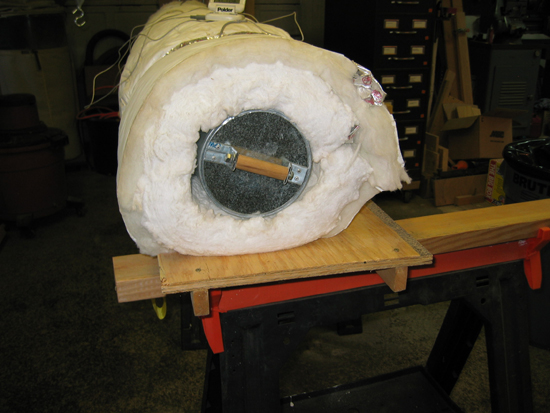
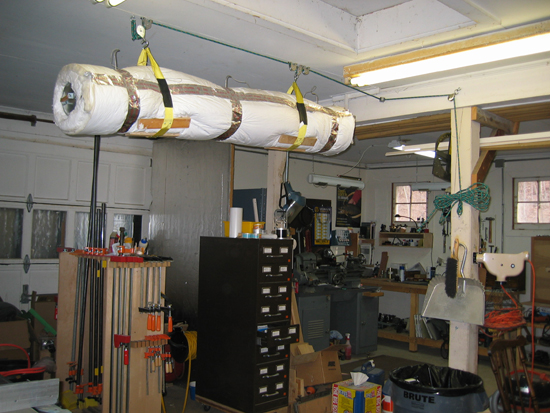
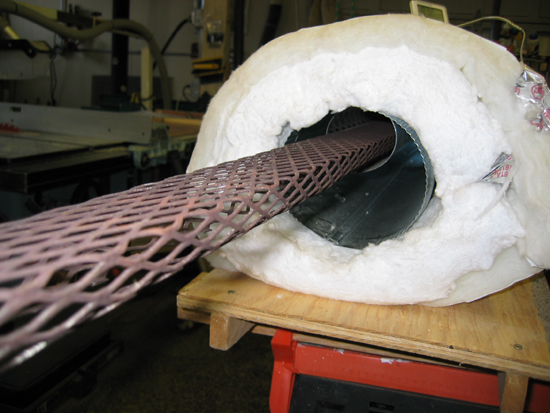
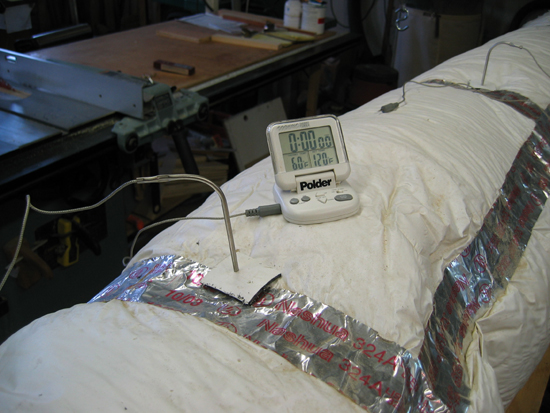
Vigil, Adam - Bamboo Convection Oven
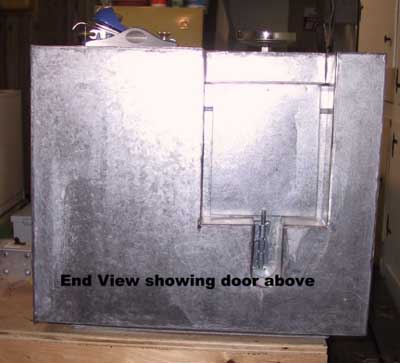
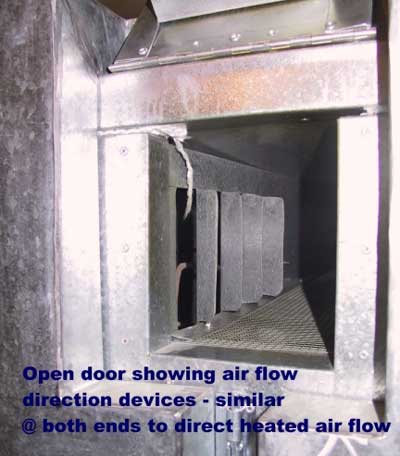
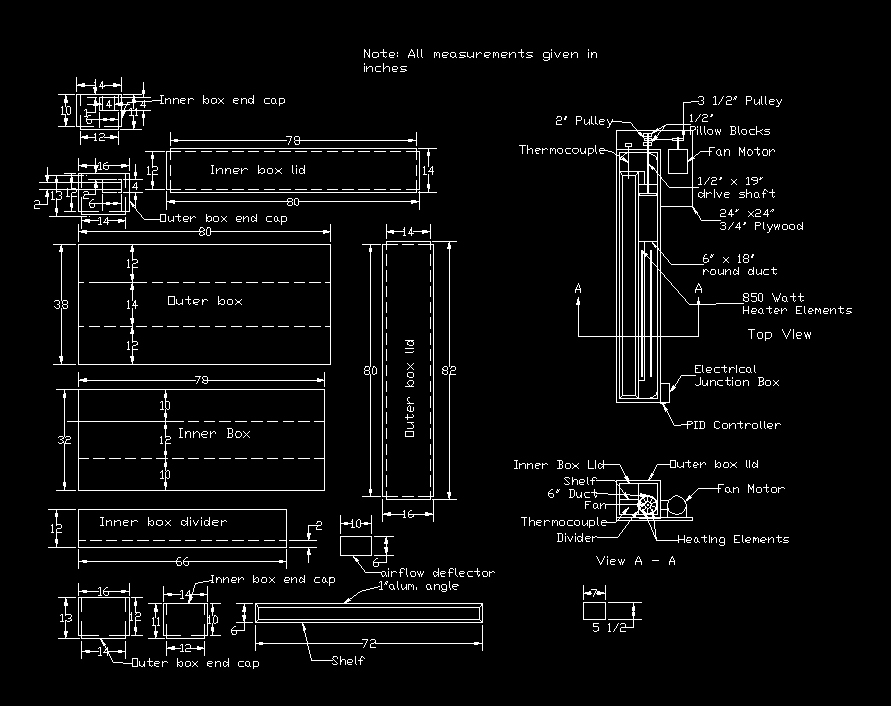
Anderson, Don - Oven
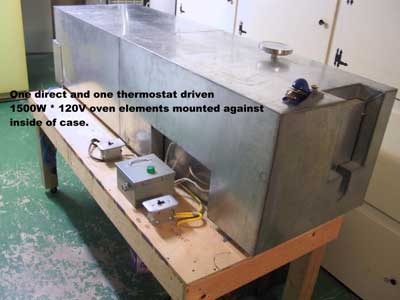
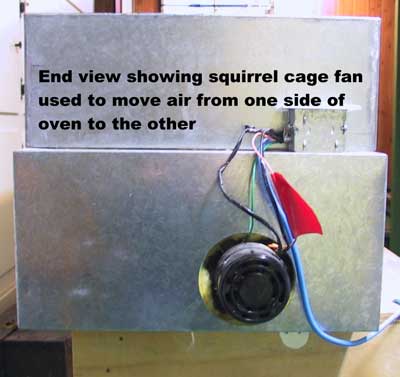
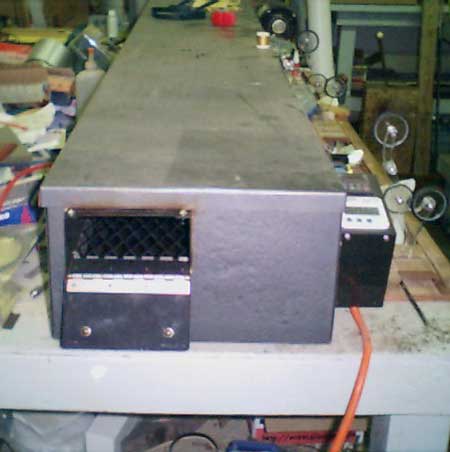
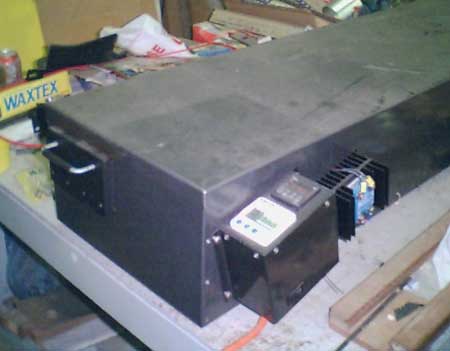
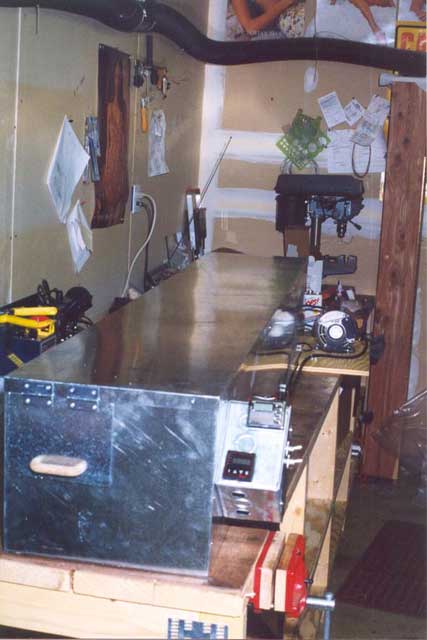
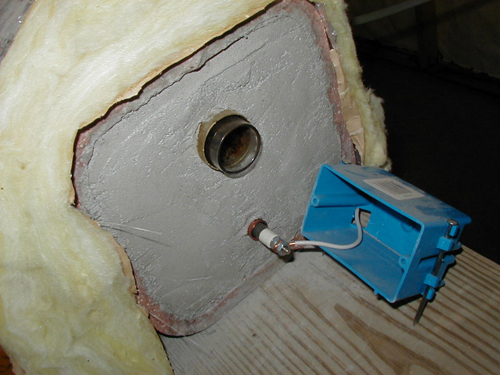
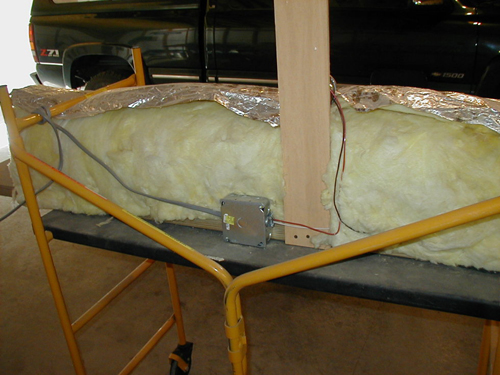
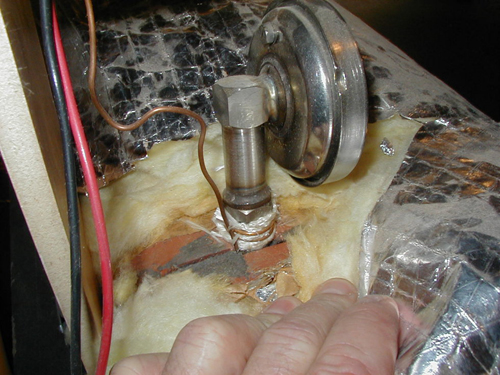
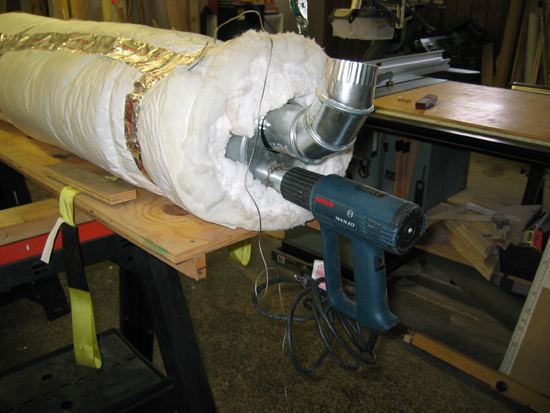
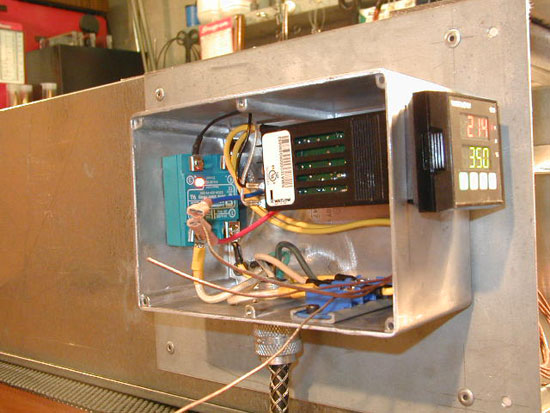
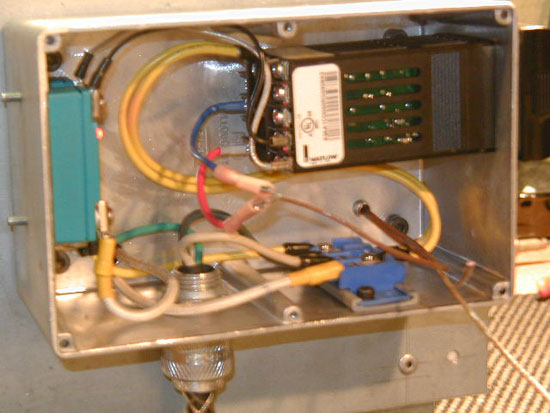
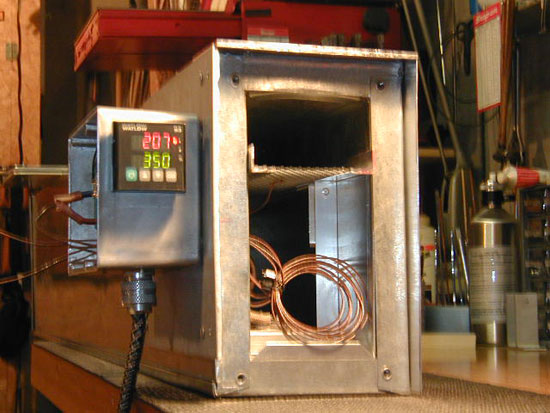
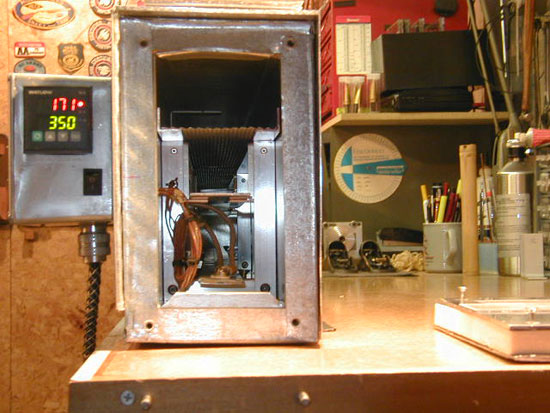
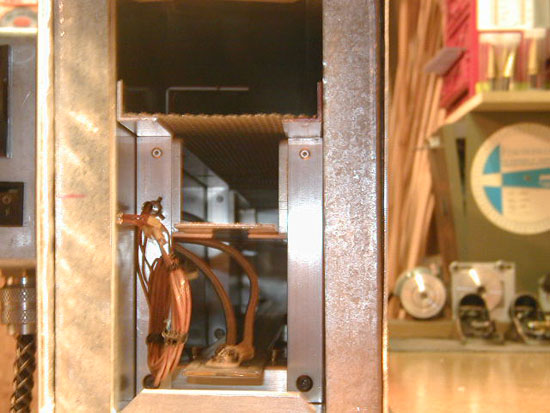
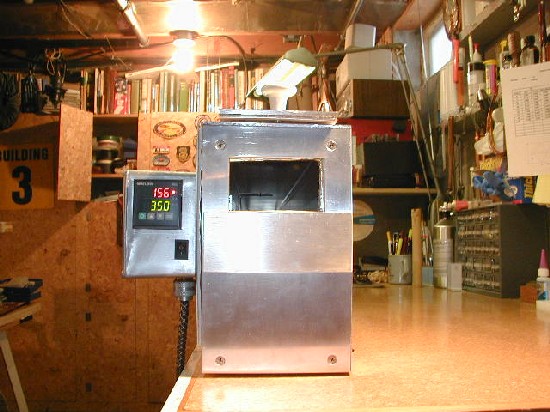
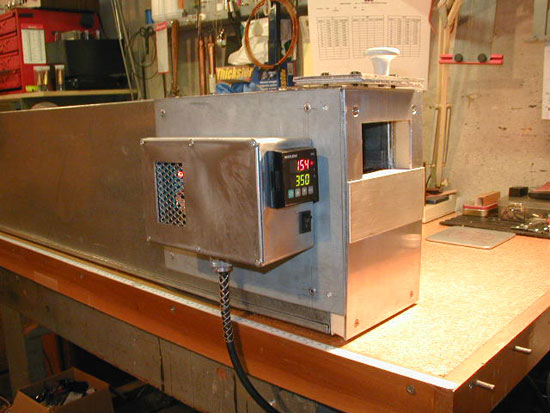
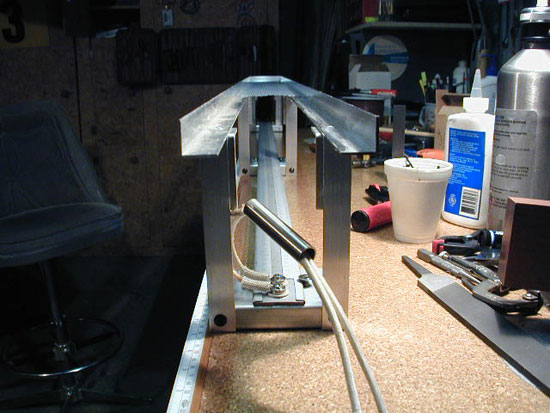
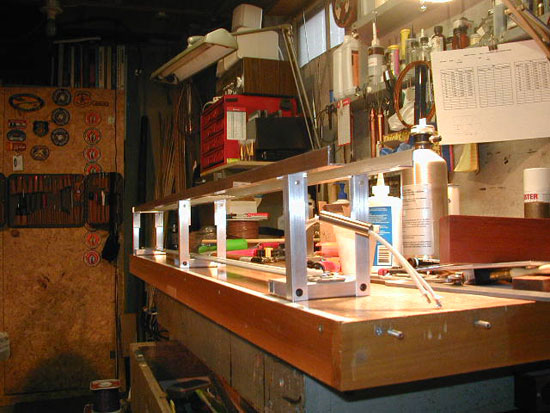
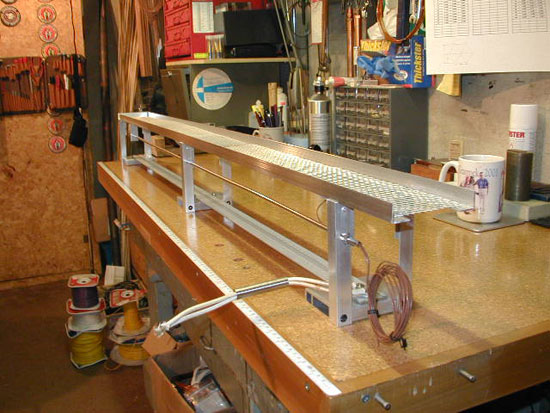
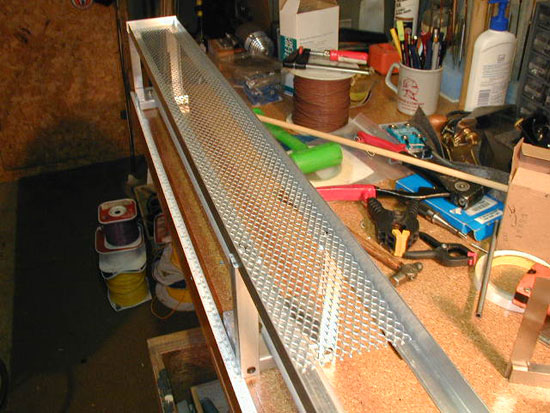
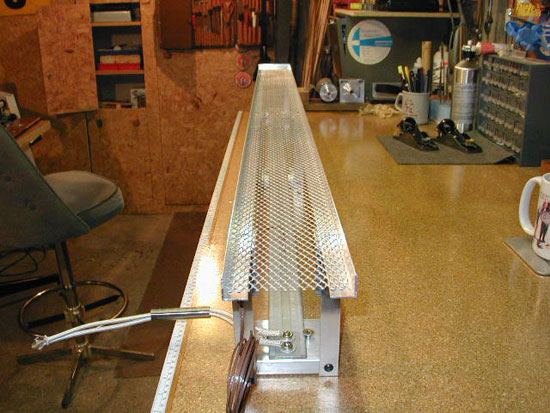
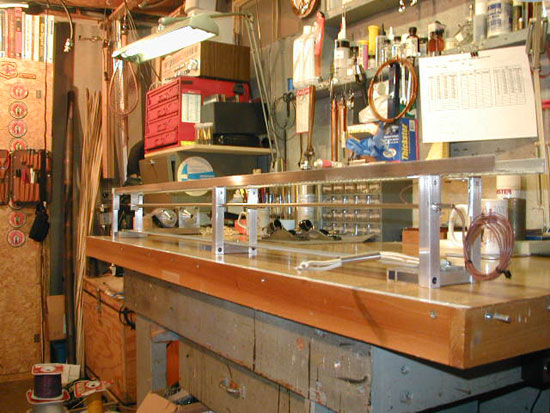
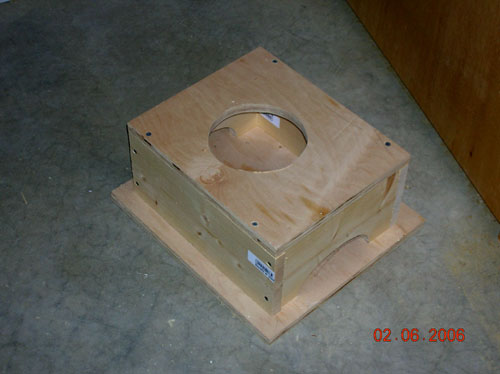
Smith, Brian - Oven
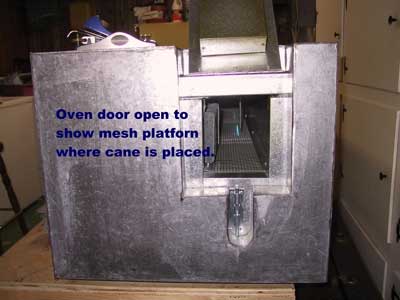
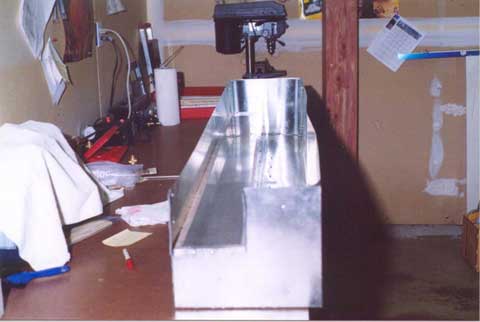
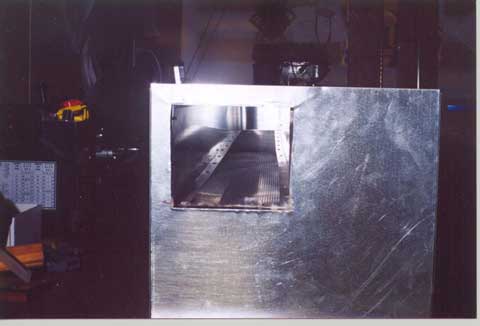
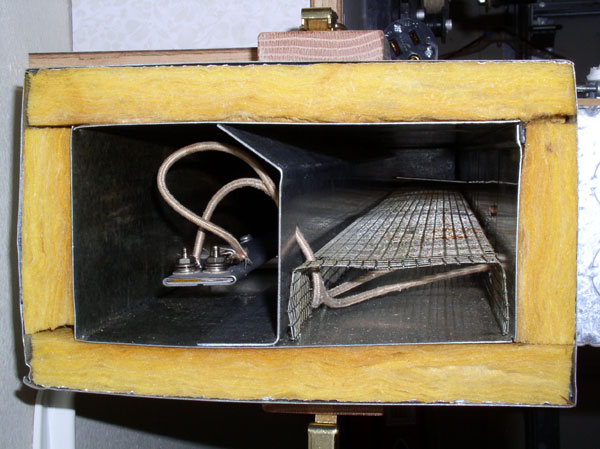
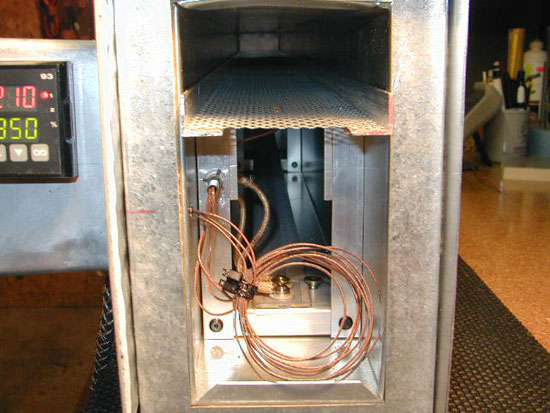
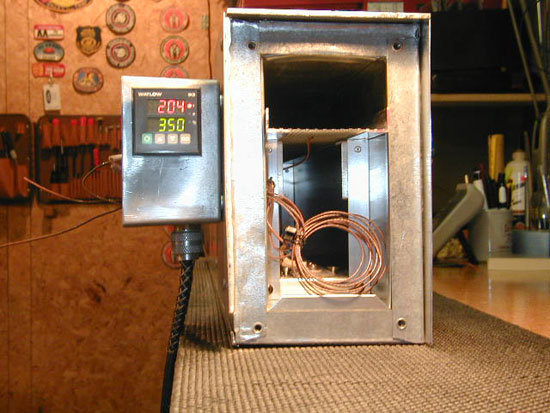
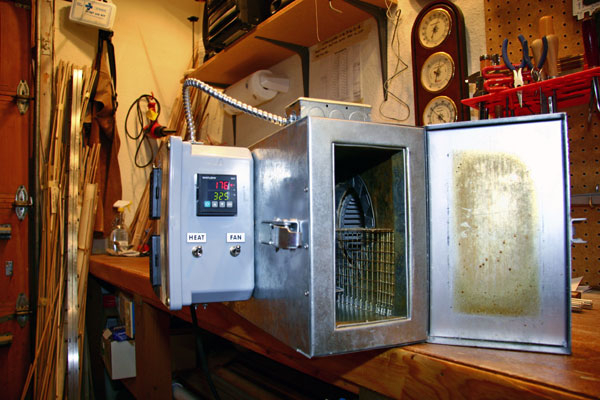
This photo is of the front of the oven with the door open. You can see how small the opening is, only 3”x 6”. Note that there is expanded metal for the rack, which is barely visible.
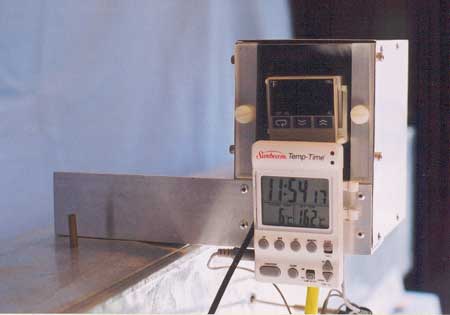
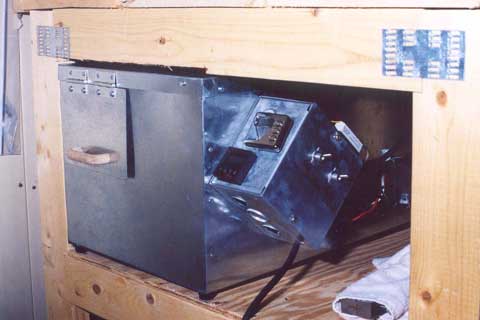
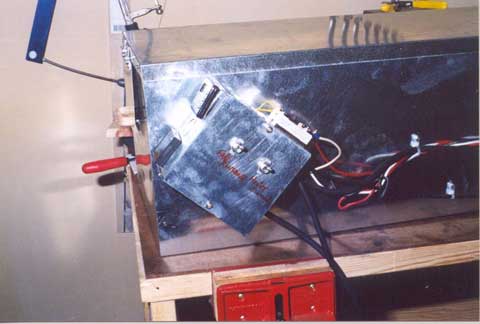
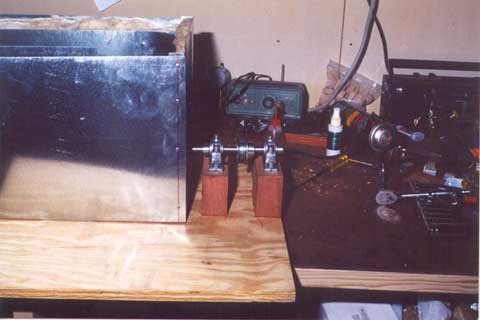
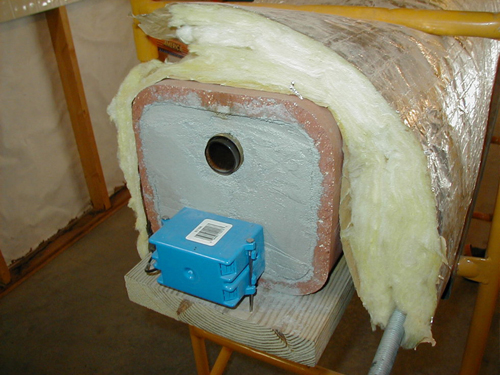
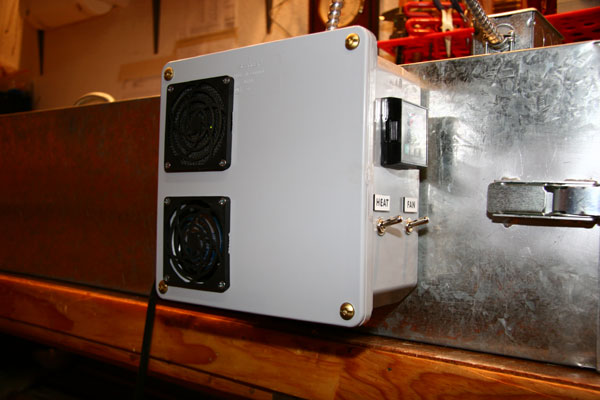
This photo shows the little PID, the timer and the relay. The PID is the small square above the white square that is the timer. The relay is behind the box for the PID/timer.
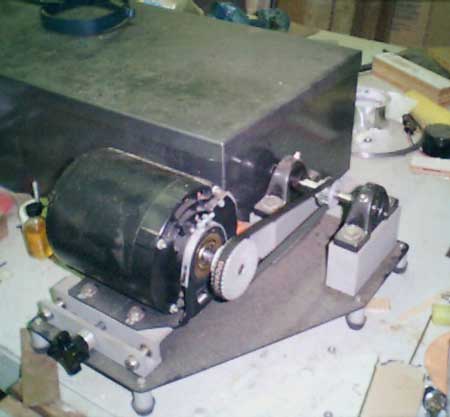
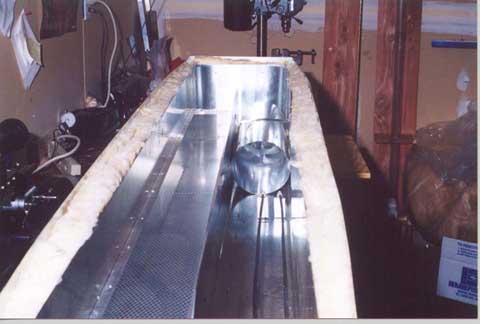
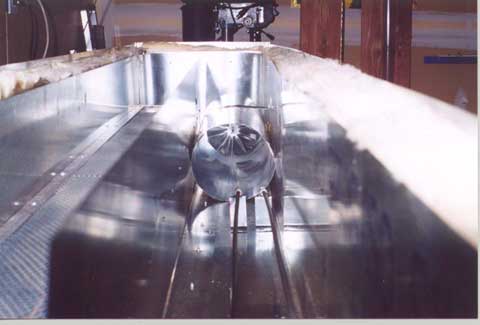
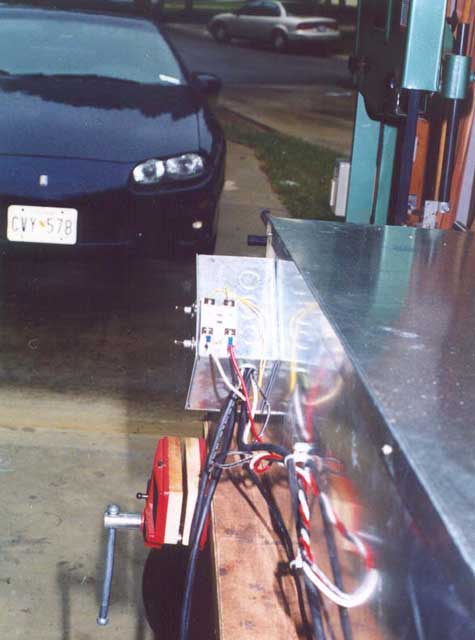
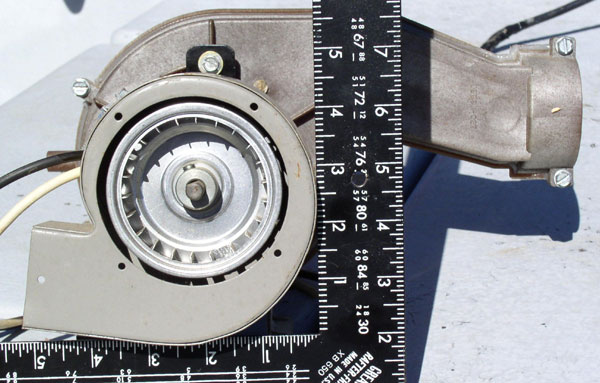
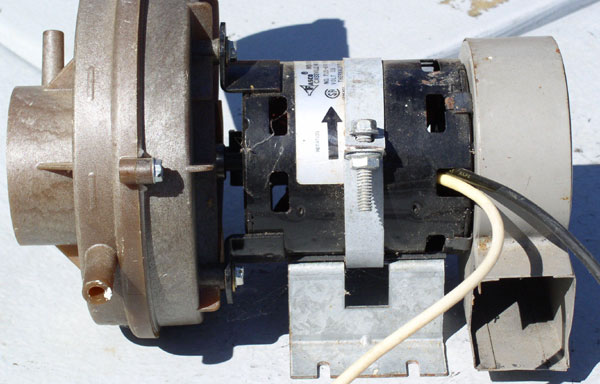
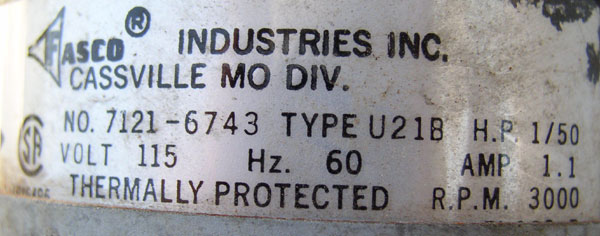
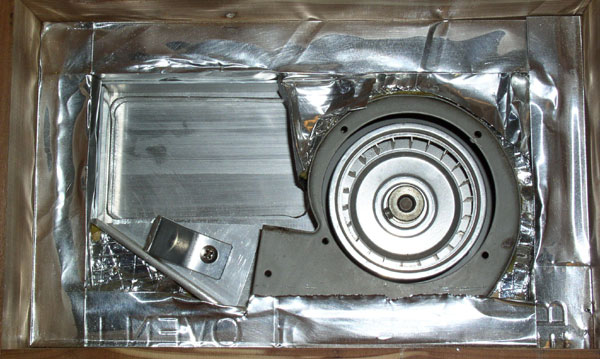
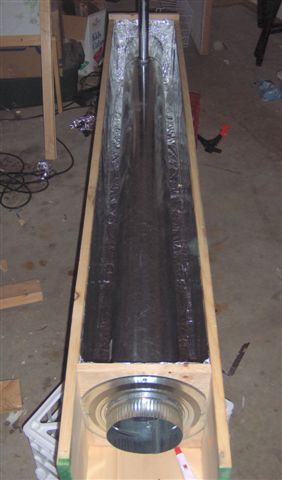
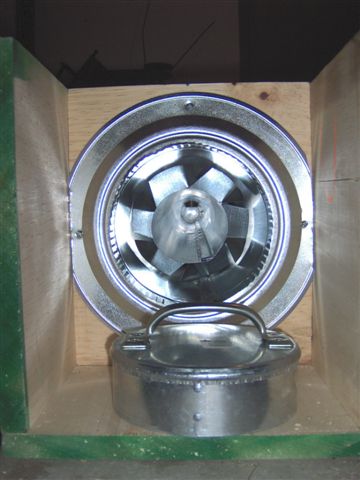
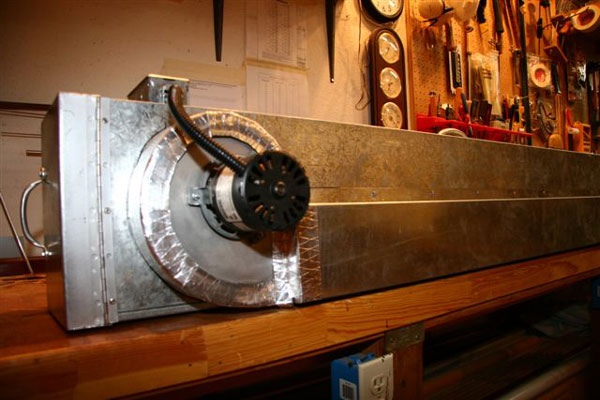
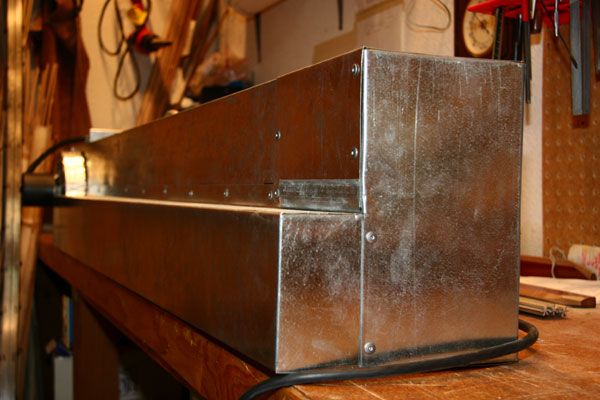
This photo shows the motor, adjustable motor mount, bearing blocks, fan shaft, etc. I’m not sure, but you may be able to see a small bolt sticking out of the oven near the top of the motor. This provides a block on top of the motor, so that it cant tilt in when tightening the belt with the motor mount. It really takes a little of both do make it work and run quietly. I really need to add an idler pulley so that the belt vibration would be diminished. I used 1/8” steel plate underneath the motor/bearing blocks. This is too thin, and I had to put in a cross-member to keep the plate from flexing when the belt is tightened. My fan blade was so close toleranced inside the duct that any deviation caused it to strike the duct -- not a good thing. If I was doing it again, I would use 1/4” plate, but I still think the cross-member would be required. You’ll note that on my oven, the fan blows down the length of the oven, rather than across it as Don Anderson’s does, from whom I got the idea of the convection oven, and who contributed his input. Still, it’s just a personal choice, though I think a better way to do it, as the fan blows across the elements, then into the chamber with the bamboo. Note that there is a divider down the center of the oven, on the inside, with a 6” opening on each end. Also, I put a thin piece of stainless around the ends and into the corners, giving them a radius, so as to facilitate the air flow.
Gary Jones’ - Oven
Barry Mayer’s Oven
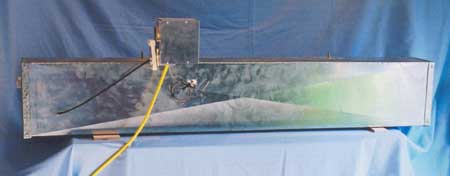
The unit I built was inspired by Frank Neunemann’s design in the Planing Form Issue #20 Mar/Apr 1993 and reprinted in The Best of the Planing Form I, page 80. The principle and construction are as he proposed. I couldn’t find a good place to put such an oven vertically in my shop and still be able to conveniently insert and pull out the bamboo. All other ovens I had seen were heated by electric strips and were operated horizontally, were square or rectangular and required sophisticated circuitry. And, they were pretty expensive. I had bought a 5 foot mica strip from Kevin Callaway in Tigard, OR when I lived in those parts and still had it here in Vermont when I started tooling up. Kevin built a very nice oven for Ed Hartzell to replace Ed’s old one. It looked great, but they were having some difficulties with controls. I wanted something simple, inexpensive and easy to put together. I figured I would try it lying flat and would have to deal with the problem of verticality if it didn’t work the way I hoped. I no longer own a mica strip. The unit is two 72” long round galvanized ducts, one 6” and the other 3” in diameter. The inner is fastened to the outer with blind pop rivets. I bought two 6” caps for the ends. On the inflow/outflow there is a 3” hole for the inner duct and a rotating 90° elbow to deflect the exhaust away from the heat gun. I had a metal fabricator cut that hole and another below it to mate with the business end of my heat gun. They made a sleeve and soldered it in place where the gun inserts. On the other end I made a simple handle out of a piece of dowel and bent metal electric conduit. I bought hardware cloth for a rack but couldn’t get it lay flat. I asked my friendly (and they are) metal shop if they had any other ideas. They said they had some stainless expanded metal they could cut and bend for me. I brought in the 3” duct and they did it while I waited, $23 for the whole job. It provides a very sturdy shelf. I wanted to be able to monitor the temperature at both ends and the middle so drilled three holes along the top of the unit where I could insert a probe from digital cooking thermometer. I bought the thermometer and two extra probes for reasons that will be clearer below. Because the oven is horizontal and because I wanted to conserve heat, I wanted to wrap it in insulation. I worried that fiberglass batts wouldn’t withstand the heat. I happened to mention the need for insulation at the plumbing supply place where I got the ducts. They referred me to a glass manufacturer in town who had some heavy duty insulation they used around their very high temperature ovens where they temper and bake on screened decorations or measuring numbers on beakers and the like. I bought a roll of it from them, too expensive to relate here, especially since it turns out that fiberglass would have been fine. I still have quite a bit of the $$$$ stuff if anyone is interested and is willing to pay the shipping. I had to buy a long roll. The stuff weighs a good bit too. After wrapping the metal I had 3” of insulation and finding the holes for the probes became a problem if they fell out. I cut squares of PVC from a thin 6” piece of scrap and drilled holes about 1/32 smaller than the diameter of the probes and pressed them on holding them in place and helping to seal the holes. I am using a Bosch heat gun model 1943 LED with a wide temperature range but up to 1100°. There are 15 numbers on the control wheel. Set at about 8 gets the oven to 375° and holds it pretty well. There is up to about 5° variation end to end, but I turn the strips after half the time I plan for them to be cooking. I have seen no noticeable difference in color of the cane from one end to the other. I expect the insulation provides some if not a lot of stability of the temperature during tempering. Overall I would guess the project cost about $200 including the expensive insulation. Barry Mayer Shaftsbury, VT flyh2o@adelphia.net
Larry Blan’s Oven
Neil Savage’s Oven
Curt Hugenot’s Oven
Tom Vagell’s Oven
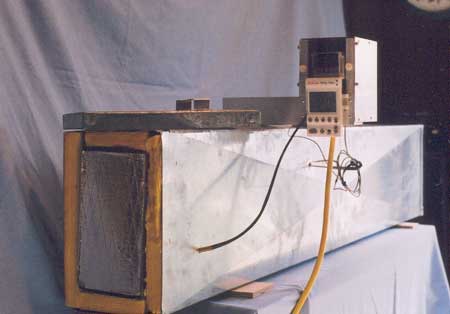
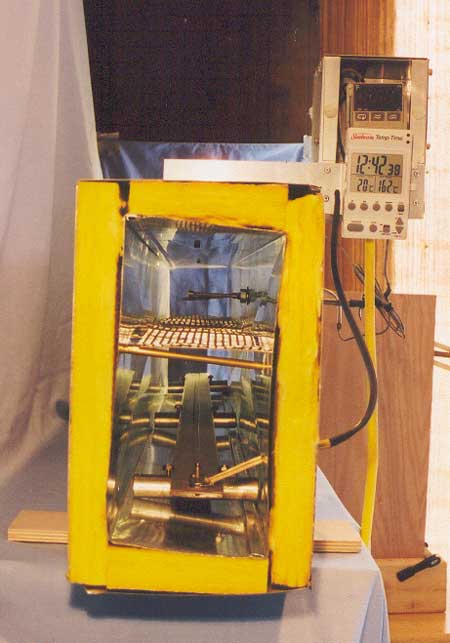
Here are the pictures of the oven I modified from the original Cattanach style radiant oven that I made about 4 years ago, and converted to a convection oven. I thought I would take this approach instead of building a new oven from scratch, simply because so many rodmakers have originally built this design. Basically I took my oven built from Wayne's specs, put a fan/blower unit taken from a Tappan commercial microwave, and added the double insulated duct channel that you see running down the side. By extending the oven another six inches, I was able to allow for the 2 3/4" x 1 1/2" discharge into the back of the oven, a section of metal egg crate (think waffle pattern, 1/2" squares)about 4" in front of the inlet (this breaks up the air), and a 4 1/4" x 2 3/4" turning vane between the elements and the discharge. I originally had (1) 600 watt element, but added a second and wired them in parallel to speed heat up time. By much trial and error, I got the temperature delta from front to back of the oven down to two degrees, even with using M-D's fixtures, proving to be the biggest challenge. Larry Blan's help with the design, particularly the PID controller wiring, programming, and help with oven design in general was insurmountable. It took more than a month and probably twenty emails back and forth to get this project done. I am greatly indebted to Larry for his help. I want rodmakers with similar ovens to be able to convert them to convection ovens if they wish without having to put the time into it that I have. There should be no reason to reinvent the wheel. Anyone wanting exact dimensions and materials can email me for more info. Tom Vagell
|