Bamboo Tips - Tips Area |
|
< Home < Tips Area < Finishing < Varnish < Sutherland Wells
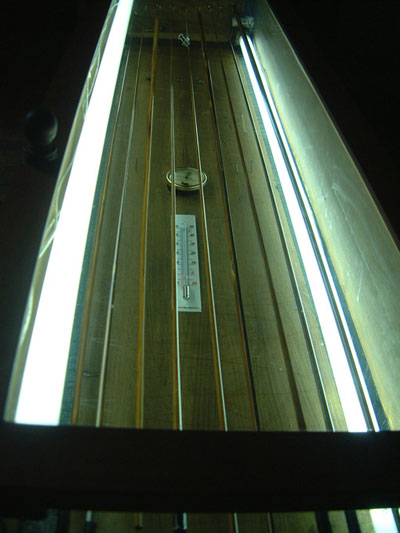
I bought a can of Sutherland Wells Marine Spar. I poured it into multiple small glass containers and went to use the first one today. There is a layer of solids on the bottom of each container. I think I read somewhere NOT to stir spars but am looking to the experts on this list for advice. PS it is for wraps not dipping. (Dennis Aebersold) It sound to me like you may have gotten hold of a semi gloss or satin spar. Gloss spar varnish should not have any particulate matter. However, if it has settled out, I see no reason you could not use it, but don't stir! (Ralph Moon) I've heard again and again that one should not shake or stir varnish. But why not, other than the obvious problems caused by bubbles? (Bill Harms) The obvious reason is the primary reason. Bubbles. In the case of Dennis, however, if there were suspended solids in the varnish, they were there to control the gloss, Settled out, he would have a material that was pretty much gloss spar varnish, Stirred up the particulate matter will lower the index of refraction and make a semi or satin finish. Hence don't stir. I worked in the paint industry for a lot of years, and to the best of my knowledge, shaking and stirring of varnishes does little else except suspend air bubbles. Since the material is partially thixatropic, it takes a long time for those bubbles to dissipate. Even when they are not observable, they may still be present and will probably mar the finish coat. (Ralph Moon) Yep, that's pretty much what I had thought. But I shake and stir anyhow (don't know why - it just seems like a good practice), and then let the bubbles dissipate over half an hour or so. No problemos. (Bill Harms) That makes sense. Now, with this in mind, for those of us that use drip tubes, where bubbles seem to be introduced every time we fill the tube, what ingenious methods have you all come up with to pour the spar into the tubes, minimizing the bubbles during the pour? (Mark Wendt) For some time, I filled my dip tube each time and then returned the varnish to the can. Now I leave it in the tube. The present tube has had varnish in it over a year. I did once have to thin a little as the varnish began to get a little too viscous, but otherwise no bubbles. I use a 1 1/4" PVC with simple friction caps. (Ralph Moon) I store varnish in fluorescent light bulb protector tubes with PVC caps. I drill a tiny hole in the top of the PVC tube cap (friction fit) that is just large enough for the nozzle extension that comes with Bloxygen. After the cap is on, give it a quick shot then cover the small hole with a piece of duct tape. It drives the oxygen right out, and seems to keep it out very well. No problems in the six months I have been storing it this way. (Jeff Schaeffer) That would work fine, but the problem isn't necessarily with the storage, but with refilling the tube, whether it's the first section to finish, or after draining the tube for each section. I get air bubbles almost every time I refill the tube, and have to wait sometimes 15 minutes to a half an hour in between sections. I'm envisioning a closed system for the drip tube that will use pressure to fill the tube, and a controlled vacuum to drain the tube, with an in line filter to catch the tiny bits of crud that might gravitate into the tube. I've got the basic idea in my head, now I have to put it on paper (software actually). I think it will work quite nicely. The only thing I'm worried about right now is whether the paint can will hold up to the pressure/vacuum cycles. I've seen what happens when you bring a can of finish from a warm area to a cold area, and vice versa, so I may have to come up with a different storage container. (Mark Wendt) I guess you could have a reversible pump with a VFD and PID Loop control or a storage container connected to the tube with a flexible tube. Raise and lower the storage container and the liquid will seek it's own level. Lower the container about 4" per minute and you have a nice smooth finish. Could this work? (David Dziadosz) Mark, my friend, all good things come to those who wait. I don't think 15 minutes to a half hour is a long time to wait in between sections. However, if it is, then do what I did and build two drain tubes. I fill them both up at the same time, wait for the bubbles to clear and then dip the butt section in one tube and the tips in the other, draining them at the same time. Also, I think it was mentioned on this list that you can run a hairdryer up and down the length of the tube for about 5 minutes and the heat from the dryer clears the bubbles up quite nicely. It is what I do anyway and it seems to work. Also the drain tubes only cost me about $20 to build, so I did not incur a large cost to build the second one. (Robert Cristant) I mentioned using a hair dryer. It only takes about a minute to clear the bubbles. I have been warned about using the hair dryer in a confined space because of arcing of the brushes and the varnish fumes. Judgment should be used. (Tony Spezio) As you know I use the drip method as well and find that I can speed the bubbles dissipation by applying a little heat to my drip tube. (Bill Bixler) As I follow the thread of the "spar varnish methods" and because you like to play with tools and new ideas, I like to tell you how I make the process. As I told you many times here in Argentina we don't have all the stuff to make the things mechanical. I used a PVC tube where I put my varnish slowly over one side slowly to prevent the making of bubbles.
I also used a drying cabinet where the rod pieces comes from the tube at a constant temperature of 26 (grades centigrade) and 30 of humidity. When I finish my dipping process I use a nylon with the tube cup. I put the nylon near the varnish and when I pull the cup the little air in talked of making a sort of vacuum pump activity. I don't have any problem with my varnish. Also the cabinet have two air extractors, two fluorescent tubes of 60 to maintain temperature and is perfectly closed to don't let the dust go in. (Marcelo Calviello) I haven't had too many problems with dust in my finishes as of late, because I've started using a new filter at the beginning of every stage of pouring the finish into the drip tube. The bubbles are what drive me crazy, though not on the rod sections, but rather in the drip tube waiting for them to all rise to the surface. I just get impatient with that stuff. I'd like to devise a closed system, where the finish sits in some kind of container, that can hold a vacuum when not is use, but also can handle a slight rise above normal atmospheric pressure to force the finish into the tube when ready for a new section. I envision having a filter in line, one that I can take apart and replace the filter between sections, and the ability to evacuate the line between the holding container and the drip tube in between sessions. I'm thinking I can adapt a pressure cooker to hold the finish, and put a couple of fittings on it, one for the positive pressure, and one for the vacuum line. I'd have another fitting on the top, connected to a hose that would go to the bottom of the drip tube, which is where the finish would fill and drain the tube from. At the end of the finishing session, I could evacuate all the finish from the line, close a valve, and use the vacuum pump to suck all the air out of the pressure vessel, it's own built in Bloxygen. It's all just ideas right now, I need to sit down and draw it out on paper. (Mark Wendt) You've got a spigot at the bottom of the tube, right? Put one at the bottom of the varnish storage container also, connect them with 5 feet of rubber hose. To fill the tube, open the appropriate valve(s), lift the storage container up in the air, and the varnish flows into the tube; set the storage container on the floor, and adjust the valves, and the varnish slowly drips out of the tube, through the hose, and into the storage container... (Claude Freaner) I'd thought about doing something like that, only to worry about not being able to filter the crud out of the varnish. I know that when the varnish runs through the filters I'm using, it's taking every last bit of nit out of the varnish, but I'm sure dust particles will always settle in the tube, and every once in a while, I worry that flakes of dried varnish might make it into the closed system. The other problem would be not being able to get the finish out of the drain/fill tube when the drain operation is complete, without using some form of pressure from the other end, or vacuum from the container end. Hmm, ya got me thinking on this one. I just had an idea. I'll have to ponder this one for a while, and draw out some diagrams. Thanks buddy! (Mark Wendt) I tilt my apparatus over on an angle while I fill. It forces the varnish to run down the side of the tube instead of dropping four and half feet and splashing all around as the tube fills. I pour SLOWLY into a large funnel and even then, let the whole setup rest for at least 15 minutes afterwards before I insert a section. Bubbles aren't a problem for me. Try it next time. (Brian Smith) I've tried that before to, but the Nunley in me kinda created a catastrophe once... Picture a polyurethane skating rink on my garage floor... I use a reeeeaaaaally fine mesh filter to get all the tiny nits out of the finish, and it drains very slowly. I was thinking of making a combo vacuum/pressure apparatus, with a machined filter holder in line with the hose. Claude's idear got me to thinking about this one. (Mark Wendt) Will your filter work if you use it on the drain-end of the system and filter as the finish exits the tube/valve? If you can get permission, try finishing in the bathroom Vs. the garage (from one of our listers I believe in the southern hemisphere). You'll need to clean it all up. Make sure you get the floor really good. Dust it all down-getting major points all at the same time. With door closed, turn the shower on (hot water only) until the room steams up. Then let it settle out on it's own taking any dust in the room with it. I cover the forced air vent so that if the heat/air kicks on it won't refill the room with dust. I work in the bath with the door closed as much as possible and have had really good results with my last 2 rods done that way. When they come out of the tube, I clean up the guides a little and put the sections into the drying cabinet which has a Plexiglas front and back that I charge up with a buffing cloth. Just be sure that the valve is CLOSED when you fill the tube. And yes, I know all about the skating rink on the garage floor. Isn't it amazing how fast varnish can flow out of and open valve ? The worst part for me was just staring at the puddle, stunned in disbelief, trying to think of what would be the fastest way to get it cleaned up as I watched it slowly migrate it's way across the garage floor seeking a low spot. For some reason I don't have a problem anymore making sure the valve is closed when I fill. Good luck with your pressurized/vacuum apparatus, keep us up to date, and I hope you don't blow a gasket in the process. (Brian Smith) Oh man! With all the shop disasters, there's no way the SWMBO is gonna let me do something like that in the house. ;^} She was there when the shop turned into the varnish skating rink. Dust hasn't really been causing me any problems as of late. The filter that I've been using has pretty much taken care of that, and when I do my finishing, I haven't down much else in the shop for a few days anyway. Yeah, this closed system finishing apparatus has me intrigued. I have most of the major components from other projects, just need to find a good pressure vessel, fittings and hose. Probably have to machine a filter holder that I can disassemble to clean after use, but that shouldn't be a big deal. See what this list does! Gets me all excited about playing around and making new toys! And I really gotta give a big thanks to Kyle Druey for all the help he gave me on making my own little fluting machine. Used it for the first time this past week while making my whiz bang salmon/steelie rod, and it works quite nicely. Thanks Kyle for putting up with my questions! (Mark Wendt) Why not use a piston and cylinder arrangement attached to a dip tube at the bottom. By pushing the piston you would force the varnish into the tube and then by pulling the piston you would withdraw it. It would be enclosed inside the cylinder thus not exposed to air and if completely sealed no bubbles would get entrained. Use Teflon piston seals for a tight system. An alternative would be to use a closed bladder in a push-pull system. (Larry Puckett) I've heard the same Bill for gloss varnish however P&L state on the Varmor can to stir thoroughly. Semi gloss and satin of course must be stirred. (Dave Norling) I was told by my supplier that there is no need to stir GLOSS varnish even if stated to do so on the can. (Marty DeSapio) Most of the cans I read said, "Do not shake, stir before and during use". Zar exterior and Helmsman says do not stir. That's why I chose Helmsman. I couldn't imagine how I was going to stir the finish in a 1"x4' tube during use! Ha! I understand that the UV absorbers had to remain mixed up. (David Dziadosz) I won't speculate on what it means, but if you take a trip to the art supply store, where everything is in glass bottles, you will find a small amount of precipitate inside almost all of the varnishes. Interestingly enough, this applies to the various thinners as well. The only brands (by limited observation only) that do not exhibit this to some extent happen to be the most expensive samples. I have seen this precipitate in all of the varnishes to some extent, not just the satin/matte varnishes. (Larry Blan) This is another reason I own a vacuum pump - stir, shake, agitate varnish all you want, pull a vacuum on it for a few seconds and all the bubbles are gone. If I have occasion to use epoxy on wraps (yes, I do sometimes), a vacuum pulls all the bubbles out of epoxy too. (Darryl Hayashida) Great idea, but what kind of vacuum pressure do you need to remove the bubbles. I have a couple of small vacuum pumps that will probably pull up to 20 pounds of pressure, would that be enough. Or would something like a shop vacuum give you enough to remove the bubbles? (Gary Jones) It doesn't take much vacuum to take bubbles out, depending on how picky you are. Large bubbles come up and pop first, and of course more vacuum gets smaller bubbles out. With the rather high end vacuum pump that I have a few seconds is all I pull on my varnish and all visible bubbles are gone. With a lower vacuum just hold it on the varnish longer. As long as you don't hold it on too long and start drawing off the lighter components of the varnish. A vacuum is the absence of air - at sea level the highest pressure differential you will see is 14.7 PSI, I'm not sure what you mean by your pump would pull 20 pounds of pressure? A shop vac would not work. A shop vac is made to move large volumes of air, not to produce a good vacuum. A cheap way to get a fairly good vacuum is the aspirator I mentioned in the silk line refinishing message a couple days ago. (Darryl Hayashida) I have vacuum pumps here too. What kind of set up are you using to pull the bubbles out of the finish? And how are you doing it on the epoxy wraps? (Mark Wendt) This is the result of their polymerizing process. Have had the same thing once and they will replace the varnish at no cost to you. Very nice people to deal with. If memory serves me, talk with Mary. (Jerry Young) This is an interesting discussion. Several years ago I called Minwax and spoke with a technical representative regarding the "satin" helmsman spar urethane. I found a layer of solid material in the bottom of a new can I bought. Since, at that time I was considering using it to dip my rods, I called Minwax to inquire about this. The representative told me that the solids I was seeing were additives to the urethane to "dull" or "flatten" normally gloss finish. He also told me that the "gloss" spar urethane finish contained no additives and that there should never be any solids in the bottom of the can. no stirring or mixing required, period. I now wonder if this holds true for spar varnish as well. (Dave Alexander) Okay, so you got Varnish in a can that you're not to shake or stir and you want to thin it before using in a dip tube. What's the procedure for adding the thinner? (Tim Wilhelm) Osmosis. (Mark Wendt) Osmosis huh? That seems logical. That's what got me through school too! (Tim Wilhelm)
Not sure if anyone else out there is looking for their spar varnish, but I contacted the company that produces Sutherland Wells and this was the reply I received: Scott "Due to a supplier issue last year, we had to reformulate and we are still in product test phase. Hope to release it in the next month, but for now we have nothing to ship." Thank you for your interest in our products. Mary Goderwis Golden Witch no longer has it in stock and neither did one of the other sources so I started to investigate. (Scott Bahn) I recently needed a small fresh supply of spar and stumbled on the RustOleum Original Spar Varnish at Lowes. I don't think they had it in the larger cans, but a quart was less expensive than Varathane or Helmsman... tried it and it worked quite well... straight from the can. The story (advert bs) on the lid says RustOleum was originally developed by the company founder when he discovered that the whale oil (ship was a whaler) stopped metal from rusting in the salt water environment. I know it's not the same as Sutherland Wells... just thought I throw this out there for someone needing a quick substitute that they don't have to experiment with. Seems a LOT of manufacturers are undergoing the reformulation process for these things. (Mike St. Clair) Don’t give up on the old standards like MOW. After moving to Asheville I checked at a local hardware store here and sure enough they had the MOW gloss in stock even though the McCloskey website didn’t list them. So I’m sticking with the MOW instead of moving over to the dark side of urethanes. (Larry Puckett)
|