Bamboo Tips - Tutorials Plane Tuning |
|
< Home < Tutorials < Plane Tuning Plane Tuning By Tom Smithwick
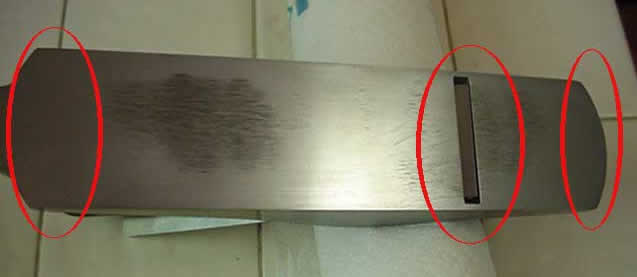
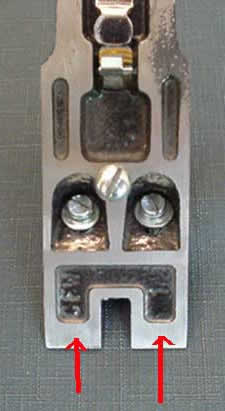
The first step in tuning a plane is leveling and polishing the back of the blade. So much has been said here and elsewhere on sharpening, I'm not illustrating that. The second step is flattening the sole. I usually grind the plane on 220 grit paper on my jointer table. Others use a piece of plate glass as the flat surface. The photo is of the sole of a Stanley #3 smooth plane that is almost done. The gray area in the middle of the rear sole is a hollow patch of the original rough ground surface, about .001 deep. Note that a shallower patch still remains around the mouth of the plane. The area in the middle of the sole is of no consequence, but the area around the mouth needs to be very flat, which is why I'm not quite done. The front, back, and mouth of the sole need to be flat. These areas are indicated by the red ovals. The remainder of the sole is unimportant. Some woodworkers actually grind hollows in these areas to reduce drag.
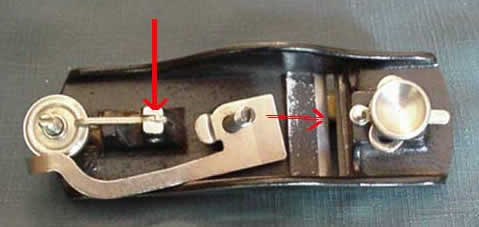
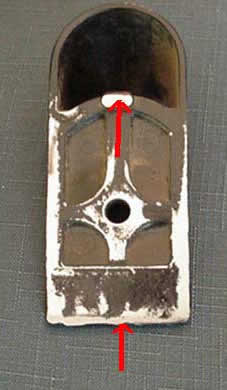
After the sole is leveled, the next task is to eliminate blade chatter. Many times you will find unevenness or bumps in a casting that will prevent the blade from being fully supported. The photo is of the inside of a block plane. The arrows indicate the areas which need to be filed to assure good blade support. Remove lateral the adjusting lever and the adjustable front part of the sole to allow access with a small file.
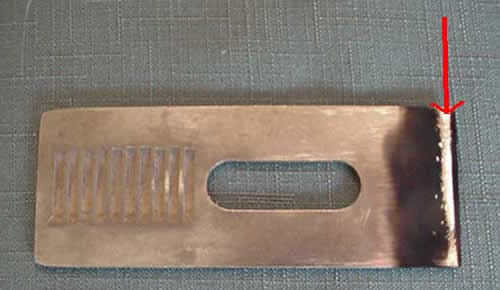
Since you can't see inside a block plane to determine if the blade is seating well, you can resort to an old gunmaker's trick. Hold the last inch of the blade in the flame of a candle until there is a coat of soot. Mount the blade in the plane, and move the adjustment lever back and forth. Remove the blade, and observe where the soot has been rubbed off. This will tell you where the high spots and hollows are. The red arrow in the photo indicates a bright band just back from the edge, indicating solid contact all the way across the blade.
On a smooth plane, the next step after flattening the sole is to level the edge of the chip breaker on a bench stone. You should have tight contact with the blade, to prevent chips from jamming into any gaps, causing tear outs.
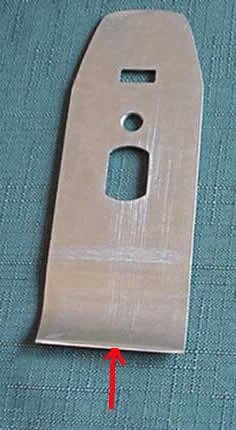
Make sure there is no roughness on the surface of the frog, particularly in the area that supports the end of the blade, as indicated by the arrows. If you get a really bad one, you may need to detach the adjustment levers and level the frog, just as you did with the sole. The lateral adjustment lever is riveted, the vertical adjustment lever is held by a pin that will drive out, usually in one direction only.
On a block plane, stone the cap iron until the front edge and rear support button are parallel with each other, and contact the blade well. These areas are indicated by the red arrows. On a smooth plane, do the same to the lever cap, concentrating on the front edge. There are a few other tricks that can be done, but the illustrated steps will greatly improve the function of any mass produced plane. On the other hand, no financial interest, etc., etc., but there's a company called Lie-Nielsen that makes planes that come out of the box ready to go to work. |