Bamboo Tips - Tips Area |
|
< Home < Tips Area < Finishing < Drying
For a better finish let your varnish fully dry between coats. My habit had always been to allow 24 hours or so between a coat and steelwooling (is that a verb?) and a new coat. Having had a very busy week, I allowed the last coat on the current rod to cure for 5 days before taking up the rod again last night. I found that with the more fully cured varnish (I use Helmsman) it was easier to slice off fuzzies and drips, the steel wool could cut more evenly leaving a smoother more satiny texture, and the next coat went on much better over this smother more satiny texture. So cure that varnish before prepping for the next coat. (James Piotrowski)
I came up with another tip that I wish someone had shared with me when I was starting out (hell, I'm still just starting out). The tip is, for a better finish let your varnish fully dry between coats. My habit had always been to allow 24 hours or so between a coat and steelwooling (is that a verb?) and a new coat. Having had a very busy week, I allowed the last coat on the current rod to cure for 5 days before taking up the rod again last night. I found that with the more fully cured varnish (I use Helmsman) it was easier to slice off fuzzies and drips, the steel wool could cut more evenly leaving a smoother more satiny texture, and the next coat went on much better over this smother more satiny texture. So cure that varnish before prepping for the next coat. Since I'm far too human to wait 5 days between every coat, I think I'll build a drying cabinet this weekend to get a better cure in a day or two. (James Piotrowski) I'd like to warn you about a using a drying chamber and Helmsman. Don't put a wet rod into a warm or hot chamber because it will orange peel. Wait 8-12 hours. Just another voice of experience speaking here....... (John Long) I put dripping wet rod right into a drying cabinet warmed with a light bulb to 90F, and never had a problem with orange peel. I have smoked a few from drips on the bulb, but that’s a whole other story. I wonder what we do different? (Taylor Hogan) I haven't had that problem before?? I take my rods right from the varnish into my drying cabinet. (Shawn Pineo) I dip my rods in Helmsman, then hang them in a dust-free drying cabinet heated to 80 degrees F. and have never had a problem. The tube of varnish and the rod sections are preheated in the cabinet for a day prior to dipping. Humidity in the heated cabinet is around 50 - 60 percent most of the year in southern British Columbia. I re-dip once after 3 - 4 hours, then let the sections dry for a day before a light sanding and dipping again. I will sand and re-dip until I achieve a glossy, unblemished finish, usually 4 - 5 coats. Guide wrapping is done after the rod is varnished. (Ron Grantham) I also put guides on after varnishing but I try to get away with 3 coats. The first coat I rub in with my fingers. Don't know if I get better penetration that way but I'd like to think so and it sure is easy to do. The second coat I sometimes thin maybe 10-20%, sand with 400 grit and the third coat goes on full strength. My finishes don't hold a candle to many of the rods out there but I'm satisfied. I think the sanding between coats, especially before the urethane is hard, reduces the "cheese cloth" porosity between coats and gives a better moisture barrier. Anyway, that part is just a guess. Have you ever sanded too soon between coats and had the peeling and rolling? (John Long) I had the problem of the varnish rolling, but I was impatient and tried sanding the same day. One rod gave me a problem and required sanding and re-dipping seven times before I was happy with the finish (I'm REALLY fussy). (Ron Grantham) I've been using Helmsman and a drying cabinet. I haven't had a problem with that. Maybe the temperature is too hot. Try keeping it under 120° F . (John Kenealy) Mine only goes to 92 degrees. Now you have me wondering...(John Long)
After several years of planning and collecting the tools, I made my first two cane rods this winter. I thoroughly enjoyed the process and I plan to make more rods next winter. Both of the books that I read on the subject say that you need to let the varnish cure for 3 to 6 months before taking them stream side. I live in northern Minnesota and there hasn't been too much temptation to try any casting with snow on the ground. Now it is spring time and the snow is melting fast. Will I thoroughly screw things up if I take a few casts on the lawn (once it appears)? Your opinions would be greatly appreciated. (Mark Lenarz) Oh God. I may be an idiot (no comments), but I would have already fished them after the first two weeks! Have no fear. The worst that will happen is you will break one on a big fish or catching a tree on the back cast. If you were doing anything more than drying them at room temp (a drying cabinet would be fine), you should have a decent cured finish. I usually test cast them before varnishing so that I can tape the guides on and not worry varnishing a lousy rod. (Bob Maulucci) I am an idiot too. I had a rod in my dip tube yesterday, and was test casting it this morning. Will be auctioned off Saturday for the youth group at church. Not a bad caster, maybe I'll bid. :) (Rob Clarke) If you used polyurethane, I'd say wait four days. If spar, wait a coupla weeks minimum, and a month is even better. Either way, you should be okay. (Harry Boyd) Who has the discipline to wait longer than it takes to be able to handle em without leaving finger prints in the varnish???? I have never waited more than a week to try em out. (John Channer) I am generally out fishing a new rod about a week after the last coat of varnish. Can't wait much longer! I have no idea whether I am doing the wrong thing or not, but so far there have been no problems. The rods are only for my personal use so I am happy to take the risk. (Callum Ross) Every couple of days or so grab the butt section in the area where the grip or reel seat will be and squeeze it and see if you leave a thumb print. If you don't, it's ready! (John Long) Pratt and Lambert says not to recoat after 24 hours with their R10 Varmor. That's good enough for me. With my compulsive addictive behavior I am in my front yard with a stopwatch in my hand. sometimes I cast it a few seconds before. (Dave Norling)
I just dipped a rod in Varmor, and then suspended the butt section in a fluorescent tube guard, and the mid and tip are inside a capped section of 4" PVC pipe. I put them in closed tubes to drip clear and dry as a hedge against dust particles, but they seem to be taking forever to dry. The closed tube obviously lets no air flow, but will they dry inside a closed vessel? Should I open either the top or the bottom to let in an air change or two, or just wait? (Greg Kuntz) The solvents are heavier than air, but they will still have an effect on the varnish, as you are obviously experiencing. Open the tubes up and let some air in. (Martin-Darrell)
Now that you've been able to get past the subject, I noticed on Todd's tips page that the temperature to shoot for in our drying cabinets is somewhere between 90 and 120 degrees. Let's say I have a drying cabinet whose interior dimensions are almost 6" square, and from top to bottom is about 7 - 1/2 feet. To fall somewhere in those two temperature settings, what wattage of light bulb should I use? (Mark Wendt) My drying cabinet is a tall box made from 10x1 pine boards with a Plexiglas door that I can rub to generate static to attract interior dust. The bottom of the box is a compartment with a porcelain light fixture (you know those cheap things you can find at the hardware store) connected to a dimmer switch. I use a 150 watt "Kitchen" bulb. The dimmer is mounted almost at floor level so I can punch it with my foot to turn it on or off and can spin it with my toe if I want the light hotter or cooler. I insulate the bottom compartment with some fire proof silver faces foam and made an aluminum plate with lost of holes for a grate or heat deflector over the bulb. I don't know if I need the heat deflector, but it will protect the bulb should I ever drop a rod section. This setup gets over a 100 degrees easily. I like to keep my cabinet at about 90 as I only use it for drying Interlux Schooner. (Chris Lucker) That is almost exactly the dimensions of my drying cabinet. I use a 100 watt bulb in the normal porcelain base. I hang a thermometer about halfway down from the top and it will normally read about 95 degrees. The bottom a little hotter, the top a little cooler. Make sure you put a vent in the top, mine is about 3/4" round. I have tried 150 and 200 watt bulbs. be careful! I almost set my cabinet on fire with a 200. the bottom foot or so was badly scorched but never "caught" Besides the temp was too hot anyway I think, around 160 as I recall. Chris, I am in your debt, thanks for turning me on to "Schooner," I like it very much! (Mike Shay) I would suggest starting with a 25 watt bulb and progressing on up until your cabinet gets to the range you desire. Mine is made from a eight inch PVC tube and the bulb is in the bottom. I use a 60 watt bulb. It depends on a lot of factors. How warm is the room, material your drying cabinet is made from, etc. Just play with it and I am sure you will arrive at a solution. (Dennis Conrad) My drying cabinet is 6"x6" and has a 200 watt light bulb at the base which puts the temperature at 110 degrees F. (Ray Gould)
I have a rod that I've had for about a year now, the tip is an impregnated Phillipson. The butt is a replacement from a Gene Edwards blank and is varnished. The varnish always feels kind of tacky. Any suggestions on clearing this up? (Pete Van Schaack) Two rods that seem to suffer from melt down most often are Heddon and Edwards. I have done this before successfully and unsuccessfully. Tung oil or linseed oil mixed with Japan drier and rubbed in with my fingers. Let dry a week and polish out. I also have just removed the varnish from the rod and wraps with liquid stripper (several gentle applications needed) and revarnished. I kind of like this way best. (Marty DeSapio)
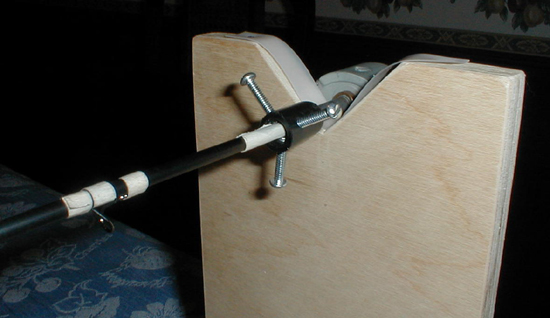
I'm making a 4 section rod turner and need some advise. What do you recommend for holding the rod sections short of 3-jaw chucks. I've tried different types of foam with a hole to plug the section into, but am not satisfied with the results. I'm thinking of using rubber lab stoppers, if that is the correct term, with different size holes to accommodate different size ferrules. The stoppers will plug into driven 3/4" copper end caps. If there is something that can be put in the end caps that will fit all sizes, that would be ideal. (Don Schneider) Drill chucks would be a lot cheaper than 3 jaw lathe chucks and probably simpler to hook up. You can get replacement drill chucks at any decent hardware store for around 10 bucks. (John Channer) I use clock motors and barbecue motors, but I hold the rod sections in little "chucks" made from 3/4" PVC caps with three nylon thumbscrews in drilled and tapped holes around the periphery of the caps. A screw or rod epoxied in a hole in the end of the cap secures the assembly in the turning device. (Steve Weiss) I use one inch pieces of rubber tubing from a medical supply shop. The two sizes for male and female ferrules are 3/16 and 1/4 inch ID. Seems to hold the ferrule and the 1/4 motor shaft very well. (Bob McElvain) I've built a four section unit. To hold the rods and turn them, I use latex tubing available from medical suppliers or gas line tubing used for model airplane gas lines. I made up a number of aluminum couplings that were internally threaded 1/4" NC. Each of the couplings has a "nipple" about 1/2" long. The latex rubber tubing slides over the nipple and is clamped utilizing small electrical tie-wraps. Each piece of tubing is about 1" long. The tubing does 2 things, acts as a universal joint meaning you only have to support one end of the rod and 2 - is easily removed and installed. To use, I slide the latex over the ferrule section and screw the aluminum couplers to the 1/4" output shaft. Each of the 1/4" shafts are threaded 1/4". The whole device is driven from one low-rpm motor with power to the output shafts using 1/8" "0" rings. The only caution: make sure that the motor rotation screws the couplings on rather then off the shafts. (Don Anderson) Another easy connector between the turning motor shaft and a rod blank is to use a rubber (or plastic) nipple commonly found on the end of tent poles or other rods to protect someone from poking their eye out. These are usually round in the hardware stores near the chair feet pads or other protective pads for hardwood floors (or in a sporting good store - or in your attic on that old tent!). I drill a hole in the closed section of the nipple (slightly smaller than the motor shaft). and three small holes near the mouth of the nipple (for three plastic screws that make a "chuck"). You can epoxy or dry fit the nipple on the motor and insert your rod into the nipple (this is sounding yucky), and tighten with the three plastic "set screws".
A close up photo of this setup above (ignore the plastic stick in the chuck, I knew not what I was doing at that time - forgive me Father for I have sinned): (Scott Turner)
I unfortunately discovered that MOW spar varnish does not like warm temperatures while drying. Its been about 100F+ in my drying cabinet for the last week due to the elevated temps here in the West, and orange peeling was the result. I had to strip off the varnish and wraps for a redo on my current rod project. This got me to thinking about Helmsman Spar Urethane. What appeals to me about this varnish is that it is fast drying, and supposedly more heat tolerant while drying. Are some of you putting on second and third coats without sanding so long as it is with a certain time frame (2 hours to 6 hours of prior coat)? I am planning a short overnight fishing trip this weekend and would like to dip this rod out in the next couple of days with 3 coats, is this possible with the HSU? (Kyle Druey) I use Helmsman spar varnish on my rods, and have not had a problem with orange peel. However, I don't dip my rods -- I spray them, and I don't sand between coats (if within the 2-6 hour window). I spray at around 65-75 degrees F. The only problem that I have is with lint getting into the varnish. (Roger Fairfield) When you say spray, what method do you use? Do you spray right out of the spray can, use an air brush, or a spray gun? I've used the spray Helmsman on the butt section to seal up the signature before final dipping and can't seem to get a smooth coat. I can sand it and get it smooth, just takes a little extra work. (David Dziadosz) I am curious too. I tried the spray can once. Talk about rough. It was really difficult to avoid orange peel. The droplet size was horrendously large. (Doug Easton) I have similar problems with MoW ever since their last reformulation which lowered the VOC's. I have not tried Helmsman but have heard lots of good things about it. After MoW's last reformulation to comply with the clean air crap, I found two quarts of the previous formulation. I used those quarts for sometime before it finally went bad. BUT, all the rods dipped with the older varnish came out fine. I tried sanding off all the old varnish on the rod dipped in "new" MoW and redipped prior to finding some older stuff, and the orange peel thing happened again. I can no longer find the older formulation and except for a few one ounce bottles stashed away, I no longer have any. Having said all that, Chris Lucker suggested a couple of varnishes to me and having tried them I am VERY happy with the result. I have switched to Interlux "Schooner". The VOC's, I believe, are higher than the previous formulation of MoW and produces a great finish. Check your local Marine hardware store for it. The varnish will tone your wraps nicely (unless you wrap with black thread LOL!) has a pleasant aroma when you crack the cap off your rod tube. (Mike Shay) I just dump a little mineral spirits into my dip tube. Basically, what you're doing is adding back the VOCs that California, in their infinite wisdom, has removed. The varnish comes off nice and thin with very few imperfections. Those that I find (usually dust and dog hair) get picked off, sanded out and the rod's ready for dipping again. (Dennis Haftel) I dip Helmsman also, it's easy for me to get and the can says you don't need to stir it. That sounded good, since I planned to store it in the dip tube. The first two coats are thin and one right after the other, then I wait about a week, sand it, and give it a final coat. If it comes out baby butt smooth I leave it alone, if not I sand and give it another. Sand paper seems to like to grab it, if it's not cured, then it's start all over! Too thick of coats takes a lot longer to cure and if there's any imperfections, you have to sand it anyway. I would think three coats without sanding would be way too thick and could trap imperfections in the finish. Some rodmakers are finishing rods with one coat and seem to be having good luck. (David Dziadosz) I'll have to stick my nose in here just for a minute. In my old ornamental iron business, I sprayed everything (paints, etc.) for over 17 years, so when I started making bamboo rods, it was only natural to spray the finish. I use the Helmsman in their spray cans. The spray as it comes out of these cans is definitely a larger spray droplet than I would get using my striping compressor driven spray gun; however, with patience, you can get a nice finish. One of the things you need to realize is that spray painting is like taking a brush full of paint and flicking it in the direction of your rod. The first coat will usually appear very spotty, with gaps between the droplets but, as you spray on additional coats the droplets fill in the uncoated areas between earlier droplets. One fortunate thing about Helmsman is that it allows recoating within a couple hours and this "window" of opportunity helps with the fill in coats. Of the rods I've seem done with and without spraying, the best quickest finishes I've seen are from nonspray applications, however, I just don't want to mess with nonspray methods at least at the present. I get a very decent finish by spraying and always polish the finish after it is totally dry (I allow a week in my drying box). The polishing I do ill get me any type of finish I want relative to shine, and for me is a normal activity although it does take time to do well. Just my two cents worth, and as with almost everything we do, there is no right or wrong, just different strokes for different folks! (Mike Shaffer)
It seems that the opinion on the curing time for varnish varies quite a bit. Harry B says two weeks minimum to a month, others say two weeks and still others say they have fished the rod the next day. I'll be curing the rod sections in a drying cabinet with two single bulb florescent lights. The ballasts provide ample heat. At least 80 degrees. Any generally excepted curing time for a single coat of MOW at that temp? (Wayne Kifer) I've found that apart from ambient temp and humidly affecting things as you'd expect the varnish will cure fast if you take it out and use it as soon as the finish is just hard enough to handle a bit of use. I suppose this is due to UV kicking it and possibly even extra air movement from all the casting. Here in Tasmania during Winter if I leave a rod in the unwarmed cabinet it may take about 2 weeks till it's as hard as if I use it after only a few days. (Tony Young) Maybe we need to narrow the terminology down here. Are we talking about fully cured or tack free? Do we mean hard enough to sand in preparation for another coat or as hard as the varnish is going to get? Just my experiences.... 1. I have not used polyurethanes in so long that these comments apply only to old-fashioned spar varnishes like Man O' War, Last N' Last, Epiphanes, and Ace Hardware Brand Spar. 2. All the above varnishes are hard enough to carefully handle without leaving smudges and fingerprints in 8-12 hours. 3. All the above are hard enough to lightly block sand in preparation for additional coats in 48-96 hours 4. All the above require approximately 1-3 weeks before they are cured enough to polish with 2000 grit sandpaper and 3M Finesse-It. 5. In spite of what the tech folks might say, these varnishes continue to cure and shrink for months. I consider it a "tightening" of the varnish. Take a look at how thin the varnish appears over the wraps of many classic rods. You KNOW they didn't leave the shop like that. Their varnish kept shrinking over time. Enough so that the wraps appear starved for varnish. (Harry Boyd)
I made a rod turning device that was originally for drying wraps. I have also used it for hand finishing with varying results. I think that I got the best finish when I applied Helmsman Polyurethane varnish from a spray can. I brushed color preserver and varnish on the wraps first and then sprayed on several coats of the final finish all while the device was turning. When I tried to brush various finishes on rods while the device was turning I had less satisfactory results. I think that was because I had to really load the brush with varnish and it was hard to get a uniform coat. (Don Sargent) I only apply the varnish to the wraps as the rod is turning. (Gary Nicholson) I think most folks who hand-brush finishes do it, while holding the rod section in one hand, and brushing with the other. Bill Harms, did a great demo on brush finishing at a Grayrock Gathering several years ago. Todd, video recorded the whole demo and has it on one of the Power Fibers CD's. The demo alone is well worth the cost of CD, not to mention all the other great stuff on the CD. I recently tried brush finishing and was amazed at how easy it was, and what a great finish it produced. Per Bill Harms, thin your varnish with mineral spirits, about 1:6 - about a 1/2 oz. of thinner to 3 oz. of varnish. After the section is varnished, just hang it up to dry - no need to put it on a turner. (Mike Biondo) I only make a few rods a year, but all of them have brushed finishes. I built a special drying stand that is essentially a short piece of scrap 2x6 with a few holes of assorted sizes drilled into it. I stand each section in the appropriately sized hole, and proceed to apply the finish. First I saturate all windings with a couple of coats, and when dry, apply a couple coats of finish to the whole section, brushing from tip to butt, working one wrap at a time. If I take my time, and work the excess out of each section, there are no drips, no runs, and the varnish levels out for a nice finish. I leave the sections in the stand to dry. Works for me. Your mileage may vary....(Paul Gruver)
I am looking for more motors to make drying units. I am looking for 20-40 rpm small motors like I used to buy from American Science & Surplus. Priced the same, too. I was getting them there for about $2.95 each. I have found that Ming Jong Technologies Co of Taiwan makes what I am looking for but I don't want to go overseas and deal factory direct and buy thousands of them. Anyone know where to buy their products in this country? Please, no suggestions to try rotisserie motors. Too noisy and very slow. I think I have looked at about every motorized thingamajig at Goodwill, etc looking for the one to strip out. Not really interested in DC motors, 110 AC will do just fine. (Steve Shelton) I've bought mine on Ebay. But you sure won't find them for $2.95. I think around $8 was the best I could do. Depending on how many you would be required to buy from the factory, you could go that route. Take out what you need plus a few back ups and sell the rest on ebay for a profit.Just a thought. (Will Price)
|