Bamboo Tips - Tips Area |
|
< Home < Tips Area < Morgan Hand Mill
For the MHM users, how have you mounted the aluminum angle for the MHM so that it is not permanently attached to the work bench and portable? My main workbench for canesmithing is about 24 inches wide, I thought perhaps I could mount the angle to a 4x6 so that the HM could be slid to the back of the bench when not in use. (Kyle Druey) I also have a small workbench, 21" x 7 ft so I had to deal with the same issue you raise. I mounted my handmill to a 2x6 that I mount to my workbench with 6 or 7 6" bolts. In addition, I also made a small platform (18" x 4 feet) that I can mount over the handmill so I can work without removing the handmill from my bench. The addition of the platform has been a blessing in that I use it with my collection of small shop machines and rod building equipment (Sherline lathe, router based beveler, binder, bandsaw, vise, grinder, etc.). I've even do some hand planing on the platform. (Bob Williams) I bolted the angle to the side of one of my benches, using T-nuts on the backside so the bolts could be tightened into the wood. Since wood breathes, it is sometimes necessary to tighten the bolts as the wood contracts, but the tolerance with which I drilled the holes and placed the T-nuts is such that it does not provide for much wiggle room. I cant remember for sure, but it seems as though I used 3/8" bolts for this. You could mount it as you said, then clamp the 4"x 6", or whatever, to the bench when in use, moving it out of the way when not. (Martin-Darrell) I bolted mine to a 2X6, and clamped it to my workbench with 'C' clamps. If I ever want to remove it, it will be a piece of cake. (Roger Fairfield) I mounted my mill on it's angle iron which I had mounted on the edge of my table. When it's not in use I remove the mill and use the angle iron as part of the work bench. (Hank Woolman)
How to set the Measuring Block for a MHM Put the measuring drill bit in the 61+ groove, The drill bit is .100". Set the measurement to .148. Remove the bit and see what it measures closed. It should be between .008 and .018. Record what you measure so you can just set you calipers to that measurement. The 73+ uses .134 The 91+ uses .121. (David Ray)
I do not mean to criticize anyone we all are searching to find how we like making our rods but I must speak in defense of the MHM. First it is not for everyone different strokes for different folks. There are plenty excellent ways to make a rod. The MHM has a 61.5 degree cutter, tighter corners and no glue starvation. Quads and Penta's takes only changing the cutters, a 30 second job. You never sharpen again with the cutter blades, just turn. It is fast, I have a friend who can go from a straight taper to final taper in a timed 101 seconds average with accuracy to .001 or less. This is with the Joe Byrd attachment that you may have seen in Power Fibers. As for me, I like a belt sander for the nodes and router beveler for the rough 60's and a MHM for the taper. But my best friend like to do it the old fashioned way, well not really most went to cutters and bevelers as soon as they could. He likes doing it the way the like to think of the old fashioned way, we both make a nice rod. Each way has it plusses and minuses each maker just has to find the way that he or she likes best. (David Ray) I know I caused some ruffled feathers on my comments on the MHM. I think the MHM is a very versatile tool. In fact, I think it is the most versatile tool you could get in rodmaking. I think that it makes a decent rod. BUT, I think the power beveller and planing forms give better strips for glue up, especially for quads. There is no comparison between a planed strip and a scraped one off the MHM. The planed strip is better for glue up, less fuzzy, and has less chipping at the nodes. I also enjoy the planing with a block or bench plane over the MHM. Maybe this is just for quads, but getting a set of quad forms to try is what caused me to get rid if the MHM. I must say, that I wish I could do pentas, but I can live without them. I agree with you completely on different strokes for different folks, so take what I say for what it is worth, but I would never go back. Three of my best friends are MHM owners, I still love them! (Bob Maulucci) I've been trying to track down the reason, but ever since I had my MHM planing unit retrofitted with the yoke I have been cutting wavy strips. The strips will actually vary by 1 or 2 thousandths between stations - that is the 5 inch stations will be set correctly, but there will not be a gradual straight rise between stations. It will dip - go down a thousandth, go up 3 thousandths to end up at the right measurement at the next station. So when the strips are glued up the blank ends up lumpy. If I grasp the blank between thumb and forefinger and slide down the length, I can actually feel thin and thick sections - it's lumpy. I don't think it is the plastic anvil, I have actually shaved down an anvil until I couldn't use it trying to correct this problem. My best guess is the rail - the center middle metal piece - isn't 90 degrees to the base all the way down so the planing unit rocks up on it's "feet" on one side or the other. That would explain why I didn't have this problem before the retrofit - the planing unit didn't follow the center rail as closely. (Darryl Hayashida)
For those of you that build quads regularly what do you do about the ferrules? a) Use a ferrule nearest to the flat to flat dim of the finished rod? b) Build up the flats with cane slivers and then turn a round ferrule station to take a slightly oversized ferrule? c) Do something else that you are prepared to write about ? (Paul Blakley) I use rod diameter times 4 divided by pi to figure out the correct size. So let's say the flat to flat is .156, I get .199, so I use a 13/64ths ferrule (.203). It usually works well with golf shaft epoxy or PowerBond PU. If the ferrule size is far from the next size up, the best method is to cut your strips long. Glue the extra lengths flat, enamel to enamel with the ferrule station and round the station to the right ferrule size. Of course, I have found out the hard way that the best way to put ferrules on a quad is simply to build a hex rod instead! LOL! (Bob Maulucci)
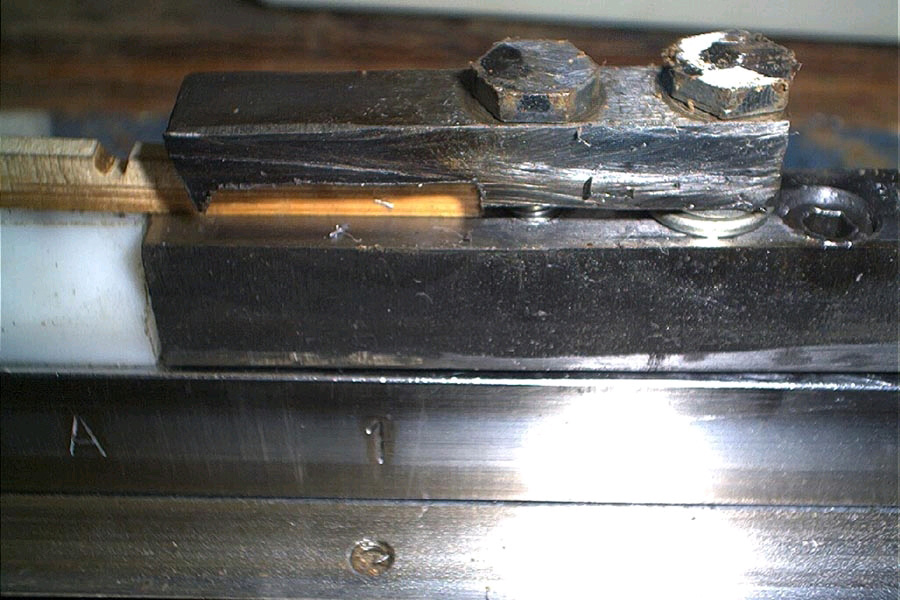
This is for MHM users or want to own. I have designed two hold downs for use on the MHM.
I like these far better than the screw hold down. I thought I would share the info. One is stationary at the end of the anvil. It has push pull adjustments so it can be adjusted to the anvil heights. It is a clamp hold down. Using the screw the strip has too be at least .200 wide to hold with the .100 drill bit. This way your strip can be any size. It is hard to bind the strips with a large end on it so the strips can be much smaller and or you can use a knife and cut them smaller before binding if necessary. Here is a picture of the stationary one I will send a picture of the movable one to those who ask. Sorry, no I don't sell them just wanted to pass on the info with the list so slow. Just notch the bamboo and clamp down. (David Ray)
What I have learned learned about the Morgan Hand Mill. I have made 50 or so rods on the MHM and I have always loved it but never quite satisfied with my results. At the nodes I was getting S curves. It would swoop one direction and then the other way. Also the nodes were not cutting smoothly I was getting nicks in the nodes. A third problem was the accuracy was not as good as I thought it should be no matter what I did. To correct the problem I tried harder and did more of the same and the problem got worse. Two people came to my rescue. First Tom Morgan, heard about my problems and wanted to help. Tom is a joy to work with, his only concern was solving the problem. He wanted me to mail some of my strips to him and also the plane so he could see what was wrong. The second person to the rescue was Joe Byrd. I spent the weekend with him and finished some strips on his MHM and when I started to plane he immediately identified the major problem, my technique. When I shared with with Tom, he agreed and after examining the plane, no problems with it, had several suggestions that I would like to share with MHM users and those who might buy one. 1. The first problem was my technique. I am 6' 1" and my MHM is mounted at 36". I would do my planing by pressing down hard and pushing down and forward to get the plane to work. In pressing so hard down I would rock the plane to one side which made my angle off. As I planed further I would put my arms out and the angle would be correct. According to Joe, and he is right, I should push more behind the plane with my right hand and just put enough pressure down to make sure it is flat on the planing surface. Next I learned I should stand more behind the plane rather than on top of it. Bend my back and started with my arms more extended. I should also have my head centered over the MHM so I can look down the anvil instead of on the left side to have more even pressure. I am not suggesting that everyone has to plane this way for it to be "correct" only this is what works for me. 2. The next problem, and Richard Tyree had this problem and I checked it out, was the alignment of my cutter heads. After a retrofit mine came back out of alignment and I did not know it. Make sure it is aligned and that you are cutting evenly on both sides without having the hold down shoe on. 3. The last problem was the hold down shoe. It is a great improvement for the MHM but it also can create some of its own problems. I leave it loose and lower the cutting head until the shoe firmly touches the anvil and then tighten. Next as you begin to plane make sure that you are cutting evenly, both sides taking off the same amount of cane. Adjust the shoe until it does. Having made these adjustments my strips are now all but perfect. The nodes are smooth and straight. The strips were very very straight. The finished product was straight as an arrow and my tolerances between sides, in most places is right on or off by only .001 - .002. The MHM is an amazing machine especially when it and the operator are in tune and working with Tom is a pleasure. If you have other techniques that work for you please share. (David Ray) My step-dad and I were fishing together some time ago. I noticed him vigorously scratching an itching back. His comment was "Oooh, it feels so good to scratch it, I'm almost glad it itched." Doesn't it feel great to see problems solved? That "challenge" of rod making is a big part of what makes it enjoyable. (Harry Boyd) I had many sleepless nights until I woke up one morning at 3:00 AM with that on my mind. I rushed down to the shop in my night coat, and planed some strips. Then I felt so stupid. It wasn't the machine, it was operator error. (Joe Byrd) That is pretty insightful, Harry. Other than the 3 people who never had any problem splitting, and the ones who won't admit it, who can't remember the first time they split a strip and it actually came out the way they wanted it to, or the second split, when you realize the first one wasn't an accident! If that wasn't cause for celebration, I don't know what is! Of course, that left about a thousand other challenges. :) (Larry Blan) Harry, you are right. It feels so good to get a problem solved that was bugging you for years. Joe was smart enough to figure it out on his own I just kept trying harder and making it worse. Let's see, insanity is continuing to do the same thing and expecting different results" I must honestly say I tried a lot of different things just none of them were correct. (David Ray) I agree! Great post! I've experienced all the same problems that David has on my own MHM. Never once have I even considered the points that he makes. I'll sure look hard at my technique now. Thanks VERY much Dave. (Winston Binney)
For those of you who use a MHM I don't mean to be critical but it seems it would be much more efficient to have separate milling and measuring devices, wouldn't it? Take a look at this gadget. I bought one today and I'm going to get another one tomorrow so I'll have one on either side of the anvil with a bridge between them to hold the dial indicator. Here is how they work: Separate on and off switch for the magnet(s). Each magnet has one hundred and ten pounds of pull both horizontally and vertically so it clamps to either side of the adjustable bed (towards each other) and downward clamping to the base at the same time with with a constant force of over two hundred pounds so that baby ain’t going anywhere. That gives me a dedicated measuring device and I don’t have to take the mill apart an put it back together all the time. In addition I bet it could be rigged so it would also allow the operator to run it up and down the base at any time to measure the thickness of the strip at any point; especially if you use a modified tip on your dial indicator much like the hold down shoe. (Dick Steinbach) I don't quite see the advantage. With the MHM, you are measuring incremental increase in height as you move down the anvil. Having the dial indicator on the mill and clamping the mill makes certain that the only difference in measurements is anvil height. If the gadgets are on the mill, it may work. But if you are sliding them down the anvil each reading will be completely independent of the one before it and you would have no idea "where you are". I think that you have hit on an issue with the MHM. Setting the taper takes much more time than when using a form, but you make up that time because you are milling both sides of the cane. The thing that would make the MHM must easier to use would be for long-head set screws that would protrude below the unit. You could start them by hand to guard against cross threading and no fishing for the screw head. I use a cordless screwdriver set on lowest power, and it is still a pain. (Jeff Schaeffer) I don't quite see the advantage. With the MHM, you are measuring incremental increase in height as you move down the anvil. Having the dial indicator on the mill and clamping the mill makes certain that the only difference in measurements is anvil height. If the gadgets are on the mill, it may work. But if you are sliding them down the anvil each reading will be completely independent of the one before it and you would have no idea "where you are". They don't slide down the anvil. They are on either side of the anvil and slide down the base which is constant. They clamp automatically to both the base and the bed when you flip the switch and are held in place much better than the mill is is held by the vise grips. Remember the vise grip pressure changes very easily and you have to be careful to be sure it is constant. With magnets it is always constant at 120 lbs or so. I tested it today with the two magnets and got excellent results. I then compared it with the mill method and the readings were within a thousandth of each other. For me the vise grips are really the weak link in the process. I think one could easily make a rig (from wood or plastic) which incorporates the necessary dimensions of the mill and the clamping power of the magnets into one unit. You could even have one gauge on either end of a rigid horizontal bar which would allow you to check or adjust two stations at a time. I have some high density plastic ordered and am going to machine a rig about the size of the mill and fit those magnets into it for clamping ease. One of the things I found that was really nice also was the ability to easily check my settings at any time during the milling process just by putting the rig on the base and slide it up and down and check with ease within seconds. (Dick Steinbach) Well since you put it that way ... That ought to work, assuming your base is straight. Which it should be. (Jeff Schaeffer) I long ago dispensed with using the vise-grips. It seems to me to be more accurate and speeds things up. It takes me about 5 minutes to set a taper. I then measure the dimensions of the first couple strips and tweak a station or two if needed. (Bill Lamberson) You just use the weight of the mill as is?? (Dick Steinbach) Yes, I put the dial indicator in place over the station, flick the contact point so that it is firmly on the anvil, squeeze the mill to the base once with may hand to make sure that it is seated properly and take the measurement and make the necessary adjustment. I start by loosening all the stations, make adjustments starting at the butt end of a strip moving toward the tip, then check them on the way back down. Often one or two will require a bit of additional adjustment, especially if there is a substantial change at some section on the rod. I then install a strip, plane it to the point that a shaving is being removed over the entire length, make a pencil mark at each station, remove the strip and take a measurement. If any stations are off by a thousandth or two, I tweak the station, but do so without reinstalling the dial indicator. It is pretty easy to do by feel. It then take a few more passes and measure again until the dimensions meet my satisfaction. Most of my rodbuilding is done in sessions between 5:45 and 6:15 am. That half hour is enough for installing an anvil, setting the taper and planing that first strip to completion. (Bill Lamberson) Thanks Bill, your explanation is quite helpful. I find that I have the same experience when setting the mill that on the way back from the tip end (13) that two or three stations have to be recalibrated even when I use the vise grips. (Dick Steinbach)
I know the height to width on a 60 degree is 1.15 but what would it be on a 61.5? I wanted to know to get more accurate measurements on my MHM. (David Ray) For 61.5 degrees the height to width ratio is 1.1899 For 60.0 degrees the height to width ratio is 1.1547 (Al Baldauski) The reason I asked was although I have made over 50 rods on a MHM and the rods are great I continually have over sized rods which is not a problem unless you want to get an exact match. I thought the problem might be the 3% difference which would be 6% on a glued strip difference. I tried adjusting my calipers and I get it closer but there I am adjusting thousands and not percentages, closer in some places than others. I thought that adjusting the taper from a 60 degree height to a 61.5 degree height would solve the problem with the width's the same on both. Bill indicates that does not solve the problem either. I would like to know from those who have a MHM and have measured before and after glue up to tell me what you do to get the exact target figure. Except for stupid mistakes I do not have a problem with glue lines but I do have a problem with hitting my exact target on the taper. (David Ray) I've attached an Adobe PDF file (virus inspected) of a drawing that may help show what happens when one planes the center apex of each strip to 61.5°. As you can see from the drawing on the right in my example, using dimensions at roughly the ferrule on a 7' 4 wt, the change in center angle results in just under 0.003 inch between the adjacent apexes. This is just about the thickness of a sheet of paper, so it's no wonder it would be hard to see any difference looking at the end of the blank. As to the oversized rods, if you are planing your final dimensions to match someone else’s (less varnish allowance), it may be the glue that is causing you problems. A glue thickness of 0.002 will cause the entire blank to increase in diameter by 0.004 - on your next rod, bind a rod section together dry and measure the diameter at several stations; then glue it up and when dry and scraped, etc., measure again and you'll know how much thickness the glue adds to your blanks. You can then adjust your tapers to account for that additional thickness. It would be interesting to have several of you do this, so we could see how much the different glues add to a taper - I suspect there are wide variations. (Claude Freaner) Actually the ratios are width to height. (Al Baldauski) Tom Morgan does have a conversion table in the book but it uses the 1.1547 not the 1.1899. What I want to do is to be able to find out how to convert a 60 degree taper to a 61.5. I took the 60 and multiplied by 1.1547 to get the width and then that width by 81% to hopefully get the proper height. But when I multiplied that height by 1.1899 I did not quite get the original width. If any of you math experts could just give me a formula to convert a 60 taper to a 61.5 so when I get glued it will be the same size as the original taper I would certainly appreciate it. The width of both strips would be the same but the height would be different. (David Ray) If you multiply the Height in your 60 degree table by 0.97 you will get the proper height for 61.5 degrees keeping the width the same. (Al Baldauski) I think I understand what you are wanting to do. The taper measurements would be the same whether you used the 61 degree angle or the 60 degree angle. Your apex angle will be more obtuse (this is a hairs breath) and the other 2 angles adjoining the enamel side of the bamboo are more acute. You are looking to close glue lines on the edges along the outside angle of the blank. You want to calculate the same as a 60 degree strip. You are dealing with amount of material less the the breath of a glue line. (Timothy Troester) To put it in another way, you want the strip to remain the same height. The extra width is going to close up the glue lines if you had any with the 60 degree cutter. (Darryl Hayashida) You may want to read the article "Bamboo Under The Microscope" on the Power Fibers site. It offers some very good insight on the pitfalls of trying to close glue lines using 61.5 degree angles. (Ron Larsen) I was concerned with the same thing before I got the 61.5 degree cutter head on my Morgan Hand Mill, but email discussions I had with Tom Morgan convinced me to go ahead and get it. To test it I made a section of a blank as I normally would and cut it into several sections. The glue lines weren't any different than a section planed on my planing form, at least to the naked eye. Perhaps the glue lines would look different under a microscope, but if the difference is that small does it make a difference in how the rod performs? I'm not disputing the pictures in the article, but I have to wonder if other factors come into play, such as binding pressure, or not planing of a bit of the apex before gluing, etc. Bottom line is I'm not so sure 61.5 degrees Vs 60 degrees helps that much. I don't have visible glue lines hand planing on my planing form. Maybe the Morgan Hand Mill has visible glue lines at 60 degrees. Perhaps we should check that out. Who has a 60 degree cutter head on their MHM? (Darryl Hayashida) When I first got the Hand Mill, Tom sent both cutters to try and let me pick which I liked better. I glue with resorcinol, and is seemed that the glue lines were slightly less evident with the 61.5 degree cutter. Examining cutoff sections with a 30x magnifier, I've not observed the irregularity evident in the Power Fibers article, except at the very end of a section where some sliding around can sometimes occur, at least with the binder that I use. (Bill Lamberson)
Just to satisfy my curiosity could someone explain (other than inventors statement that it would insure no glue lines) why strips are cut with a Morgan Hand Mill so that they 61 1/2 degree triangle when every piece that I've read on building a hex rod emphasized the importance of being as close as possible to the 60 degree equilateral triangle. Not understanding most engineering principles, it would seem to me that unless you refigured your taper to allow for this extra thickness that you wouldn't end up with the taper that you were building for. Any other reasons that 61 1/2 degrees is better than 60? Just want to learn something. (Will Price) It's an old woodworking trick that causes the outside edges of a joint to come together before the rest of the joint, resulting in a tighter glue line. (Steve Weiss) As Steve pointed out, the edges will touch before the apexes because of the 61.5 angle, leaving a gap at the apexes of approximately 0.001 inch. This gap is filled with glue and is so small as to not affect the characteristics of the rod. (Al Baldauski) This morning I trimmed the butt of a section that had been milled with the 61.5 degree head. I was thinking about your question as I did the trimming and even with a butt section with diameter of 0.300 it wasn't possible to really see the "gap" that you might expect to be left near the center. This rod had honey colored cane and was glued with resorcinol so there was substantial contrast. (Bill Lamberson) That being so, maybe we should modify our planing forms to 61.5 degrees? Not easy to do, of course! (Neil Savage) I have sure thought about it! Again, mathematically it doesn't work out, but, 1.5 degree isn't hardly enough for a "fudge factor". I see some potential difficulties in doing this but would surely like to try. Now, I know for a fact this is being practiced as we speak by some that have been among us in the past maybe they will speak up. (Timothy Troester) Any spline configuration that is not radially symmetrical (60 degrees on all three corners) will need two forms. That is the main reason I bought a Morgan Hand Mill. I can make pentas, quads, and the 61.5 splines all on the same machine with only a minimal (relatively) extra cost. Which brings up the question - machine shops not familiar with making planing forms have a difficult time putting the groove in correctly. Now complicate that with not only does it have to be 0.001 per inch, but 61.5 degrees. I've seen a lot of cutters, triangle files, scrapers, whatever, that are 60 degrees, but never any that are 61.5 degrees. I wonder if some of the tests, pictures, cross sections, etc. of the 61.5 splines showing the gaps are really 61.5 degrees. (Darryl Hayashida) The real question is: Does it make that much difference? On a rod with a butt dimension of 0.300 inches flat to flat the gap between the apexes resulting from a 61.5 degree angle will be about 0.0025 inches. At the middle of the rod about 0.0012 inches and at the tip 0.0006 inches. While I can believe the apex gap at the butt end could help to hide small gaps, I don't think the accuracy or our hand planing at the tip end is so good as to be within 0.0006 inches. A speck of saw dust, bamboo sliver, etc. could easily get caught in between strips and cause a problem greater than this. Furthermore, the apex gaps could allow strips to nestle so that two strips are in close contact leaving essentially double the gap on an adjacent strip. This would cause a step between the flats of about 0.005 inches at the butt end. Food for thought. (Al Baldauski) I'm not so sure that I agree with the doubling up theory. The binding will put pressure on the outer surface of each to create the smallest possible diameter and center up the strips at the same time. The strips will not want to nestle together in one case and leave a double-gap in another - that would cause an outer edge and increase diameter. The point "not making much difference" is correct from a functional standpoint. I believe that the goal of using the 61.5 system is to not impact function, but maximize the chances for elimination of minor glue lines. (Jerry Madigan) I agree with your idea about minimizing diameter. The only place that I ever see any indication of shifting is at the very end of a section. I bet that can occur with 60 degree angles, too. The other factor is the glue being squeezed out. I suspect that also tends to even out the positioning of the strips. Two aren't likely to nestle face to face because of the glue between them. (Bill Lamberson) I don't think I've read all the comments on this subject. This may have already been mentioned, but there's a detailed discussion of 61.5 degree and 62 degree strips in "Bamboo Under a Microscope" (page 14). The article includes an actual photo (figure 23 on page 12) of the cross section of a blank that nestled to form double gaps. Todd included the article with the last Power Fibers CD. I think it's available on the web site as well. (David Bolin) Yep, the PDF file of "Bamboo Under the Microscope" is available online. Go to <http://www.powerfibers.com> and click on the "Downloads" button. You should be able to get to it from there. (Todd Talsma) Actually, the "twisting problem" is demonstrated in photos of 61.5 (#27) and 60.0 (#34) sections in the article. Based on that, there is no proven correlation between the angle and the problem. I see no double glue lines in photos 27. Tell me if I'm missing something there. The author offered some DRAWINGS reflecting his conjecture concerning what problems could happen, but that is not the same as a preponderance of evidence that the angle is any incremental problem. At least one his drawings looks virtually impossible (#3 in figure 28) because that gap would be pressed closed in binding. makes me doubt the overall conjecture. Great article about bamboo, but it has taken on mythic proportions here in relation to the 61.5 strips. I particularly was interested in the photo evidence of heat damage. (Jerry Madigan)
Could someone please explain why, if the MHM cuts accurate 60's, which I believe it does, would you want to undercut the strips. IMHO, when you bind such strips the torque of the binder will skew the undercut apexes to one side and cause non parallel sides. I understand this can be sanded out, and probably makes little difference anyway, so again why? It seems this is just a coverup for poor craftsmanship (Jerry Foster) The splines do not skew to one side. If they were made of metal and had no give, maybe they would. But 61.5 degrees isn't much, and the bamboo has a bit of give and they press fit together straight. (Darryl Hayashida) I believe Tom Morgan made 61.5 cutters for his mill because that was the angle Winston cut there splines. (Olaf Borge) That makes sense since Tom was involved with Winston for so long. I'm guessing that Winston's original thinking was along the lines I indicated. (Jerry Madigan) I use a mill to cut my strips. From what I understand, the 61.5 degree cutters, were first made for use with cane milling machines. The idea being that with 60 degree cutters running at high speed on a mill, there will always be some vibration, which will cause the cutters to cut undersize strips. Say maybe 59 degrees. So, to take care of that problem, they designed cutters with a angle of 61.5 degrees, so that the cutters, with this slight vibration, would still cut slightly undersize, but would now cut closer to 60 degrees. I think a lot of guys are using 61.5 degree cutters in the Morgan Hand Mills, basically to help with glue lines. As I had a Hand Mill for a while and always had glue lines. So the 61.5 degree cutters helped some what with that. If you look back at some of the old rod makers, they used mills to cut they're strips and a lot of them used 61.5 degree cutters. Actually, I have cut strips with 60 degree cutters and also 61.5 degree cutters on my mill and don't really see any difference with the strips or glue lines. Go figure! (Dave LeClair)
I'm curious how many members on the list use the Morgan Handmill and of those how many use a power beveler for roughing their strips. (Wayne Daley) Wayne, I have 2 MHM and use a rough beveller. (Scott Grady) I am an enthusiast owner of a Morgan Hand Mill. (Marco Giardina) I've got an MHM and love it - wouldn't go back to a block plane and forms if you paid me. rough and finish planing on the MHM takes me a total of 10 minutes at maximum per strip (that's if I'm feeling lazy). (Chris Obuchowski) Just out of curiosity, how much prep time do you have per strip? From what I have read on this list serve it seems as though the strips have to be perfectly straight, no node bumps etc. Do you find that you spend more time on strip preparation than you would with regular planing forms? (Tom Mohr) I don't feel that the prep time of the strips is any different between the handmill or regular planing forms. In believe in both cases you want the nodes level and flat before final planing. I don't soak my strips either but use a Medved style beveler for rough planing. (Wayne Daley) I soak my strips after splitting, but before filing and pressing nodes, or planing. Filing and pressing nodes goes much faster with wet cane, and uses less heat so there is virtually no scorching of the cane (I use a heat gun, and 4" vise on my nodes). I also use a couple of Japanese tools called Tamegi, made out of small pieces of hardwood (see the bamboo rodmaking page, contraptions, straightening devices) Straight is straight, so I don't spend any more time straightening strips than I did when I used planing forms. (Chris Obuchowski) How much bamboo do you remove on each pass? Do you soak? (Frank Caruso) Yes, I soak for two to three days prior to straightening and planing. When I start rough planing, I may got as much as .020 per pass, then when I'm cutting cane along the whole width of each side of the strip, I ease back to .010, then maybe .006 per pass. After heat treating .006 per pass until the final cut on all strips at .004. Lately, I've been banging the strips down into the ballpark dimension wise (by eye balling them, not measuring) with a wooden roughing form and a Stanley block plane. Once they're triangulated and reasonably sized, then I move to the handmill. I also use a variation of John Bokstrom's splitting method and split my strips quite skinny to start with, tips around .170, butts maybe as much as .250 (though for smaller rods I'll split even the butts skinnier), so there is much less material to remove, and you can get a lot more strips out of each culm (I've gotten as many as 34 useable strips out of the tip end of a culm). (Chris Obuchowski) I have a Morgan Hand Mill, and beveler, but also have a set of planing forms that are 72 inches made of 1 inch bar stock. (Floyd Burkett)
I thought I would give an update on what has been happening here at the shop after the remodeling has been done. I planed out my first rod with the new Hand Mill this weekend, and sanded the blank today. It is a 7' straight tapered spinning rod for a friend's husband. In using the Hand Mill in tandem with the new Bellinger saw's straight strips, I have to unequivocally say that this is the best rod blank that I have ever been able to produce. The new (to me at least) hold down shoe and the Wandashin stop have alleviated all the past troubles that I had with the old Hand Mill. For a guy whose motto is "measuring is for sissies!', the stop is just what the doctor ordered. I am amazed at how fast I was able to produce a blank using these attachments. The numbers on the sections are the best tolerances that I have been able to keep, and I am still proud of all the hand planed rods I have made except for one or two. As for the Bellinger saw, it is the new power fed model. I know that some of you have seen in in the latest Planing Form leaflet. It uses three saw blades to cut two perfectly straight strips from a 1/6, 1/7, or 1/8 of a culm. Was it expensive, yes, but it is by far the best money I have spent in a long time. As far as run out goes, it is truly no more than I would get just by roughing and planing. Seriously, it is not anything near the horror stories that have been perpetuated in the rod making books. I think that George Barnes's new book is the only one that fairly discusses run out. The others all make it taboo. I am going to stick with this machine for a long time. I have no financial interest, but I am just too happy to keep to myself, and I figured this was the easiest way to tell all my friends what is going on with me. (Bob Maulucci) I am so happy that you enjoyed the plane stop. It was quite a while in the development stage, but well worth it. I too was frustrated somewhat at the quality of strips (especially the tolerances from strip to strip) that I was getting on the MHM. I pondered and pondered in what to do. Well, to make a long story short, I jotted down my ideas and Tom Wandishin has made it a reality. During the initial test phase, I was holding tolerances of less than 1/2 of a thousandth, and the speed from using the stop was good too. Welcome back to the world of the MHM. (Joe Byrd) P.S. I do have a financial interest in the plane stop for the Morgan handmill. Gee, Bob, it's too bad you don't like your new tools! Enjoy! Wish I could cost-justify some of the expensive toys, but I can't. (Neil Savage)
Why do the Morgan Hand Mills have the 6 strip cutters set at 61.5 degrees instead of 60 degrees? I thought they were a very accurate way to plane the cane, no doubt I'm over looking something. (Andrew Connell) The greater included angle ensures the strips come together cleanly at the corners and are not starved for glue. If you go to Tom's web site you'll see a description of the reason for it. (Mark Shamburg)
So, the cutting inserts used in the MHM were originally had the designation TPGH 321 C-5 from American National Carbide Company. I was talking to Dale Foote before he passed away, and he told me that he had found another type. These had the designation TPGC-321-JWS2. So, this leads to several questions. What cutting inserts are folks using these days? Is there a difference between the two types, and what is the difference exactly? I know there is a MHM list, but we have quite a few users here and that is where I would like to keep the discussion. (Jeff Schaeffer) The following is a quote from Tom Morgan; Wit-son Carbide Tool, Inc. Their carbide insert designation is TPGC 321J WS2. In the future I am going to purchase TPGW 321J WS2. The reason for the change is that the W designation means that it has a relief hole only on the top. These inserts are flat on top and are highly polished or diamond lapped. They are also not honed on the edges. These are the inserts that Tom now supplies. I get mine from him. (Winston Binney) I use these too and get them from Tom. (Scott Grady) Thanks for the info. I picked up a used MHM several years ago, and made one rod that did not turn out well. I put it away with a vow to get the tool working "some day". Every year was the same- I needed to make some rods and headed for the tried and true beveler/planing form route so I could get the blanks done by some deadline. This year I decided to forego any more rods until I get the thing going. The big problem was that I needed straighter strips. I can now get those on the band saw or by splitting oversize and squaring them up on a Medved style beveler (somewhat akin to sawing). And of course I could not stick to Hex tapers, but had to start messing with Pentas. The new cutters promise to work better, and I am going to try a soaking experiment. And this time I am actually reading the instruction manual. (Jeff Schaeffer) "But you didn't read the instruction manual did you? The instructions are in that plastic bag you are kneeling on." Red Green It's a guy thing! (Dave Norling)
Does anyone have the part number of the carbide inserts that come with the handmill. I need it to get a hold of wit-son carbide. (Don Peet) The part number is TPGC 321J WS2 Tom was talking about purchasing that particular design from Wit-son. Not sure if it happened yet or not. (Kurt Wolko)
I am looking to purchase replacement cutters for my MHM. Are these available in hardware stores or can they be ordered in bulk? Does Wit-son sell directly to the public? (Dan Noble) Buy them from Tom. You'd need to order a lifetime supply to get a better price than he gives. Wit son is the only place other than Tom that sells them. Their price is nearly double per cutter. (Don Peet) Tom Morgan sells them. Call him or email him. He is a really great guy to work with. He will send them out right away. (Doug Easton)
Having read several emails regarding the Morgan Hand Mill I am interested in more opinions, both pro and con. I would love to read more about them. (Phil Crangi) Cons... it's not motorized. Other than that I can't think of any. (Mike St. Clair) Not sure what you are wanting to know, specifically. I have used mine since 1998 and have been very happy with it. Pros:
Cons:
Yes, the math is a little difficult to setup originally, on a unique rod. But RodDNA will give you the settings for any rod in the database, in MHM form. (Another PRO) (Mike St. Clair) Be aware that in the hand mill manual, Tom mentions that the mill settings from RodDNA do not match his calculations. When I looked at this it seems that the RodDNA values were for 60 degree strips rather than for the standard mill angle of 61-1/2 degrees. You can get either 60 degree or 61-1/2 degree attachments for the mill for six strip sections. In any case, the math is not difficult. I'd say it's the least difficult step in making a rod. (Pete Bates) According to the manual, the Hexrod settings are correct. I haven't looked at Hexrod, but should do so, might eliminate a step in my process... have just gotten used to using RodDNA and calculating the settings from the rod dimensions using a spreadsheet. (Pete Bates) After some correspondence between Larry Tusoni and me and between Larry and Tom Morgan, the issue of the MHM values given by RodDNA has been resolved. The values given by that program are based on strip height values that are half the rod dimension(s). This is the same method demonstrated in the examples given in the MHM user manual. There has been past discussion about the dimensional effect of using 61.5 degree cutters vs. 60 degree cutters. There has been no clear consensus that it makes any difference on a practical level. I choose to make the 3% correction that seems logical to me. Many (probably most) others do not do so. This may well be superstitious behavior on my part. I wish I could say it's my greatest idiosyncrasy. In any case, I'm pleased that RodDNA is available, and works for users of the hand mill and look forward to Larry's new release. (Pete Bates) My first project on the MHM was a pair of matched rectangular quads: one solid and one hollow (even through the ferrule). I compensated for the geometry of the 92 degree angle of the cutters when I calculated the settings on the MHM. After I glued them up, the two rods were way off from the design measurements and from each other. I was baffled and ready to give up on the MHM. Then I realized that the two tip sections of each rod were very consistent with each other, and the errors from the design were systematic. I plotted tapers out in a spreadsheet and discovered that all the problems could be attributed to my corrections in setting the taper on the MHM. The hollow rod was undersized in both dimensions. The thickness of the solid one was spot on ( I had planed off the apex of the wide strips with a flat cutter to half the rod dimension), but the width was too narrow, more so than the hollow one. I made the rods a second time pretending that the cutter angle was 90 degrees and they both came out spot on in both dimensions. Since then I have set the taper for half the height of the rod section dimension, and have had no problems. By correcting for the angle of the cutters, you are essentially tapering the strips assuming that the rod dimension is determined by the width of the flats. Mathematically, this has to be true. However, in practice, I've found that the finished rod dimension for me is twice the strip height. It's the only situation I can recall encountering where mathematics has been wrong. Reminds me of the definition of an engineer: one who when confronted with a perfectly reasonable, elegant solution to a problem asks "Well it may work in practice, but will it work in theory?" (Robert Kope) I compensated for the geometry of the 92 degree angle of the cutters when I calculated the settings on the MHM. I'm not sure why this keeps coming up. The Morgan Handmill works the same as any power mill. The setting is in the differential between the fat and skinny ends, not the angle of the cutters. If you have a quad and a hex taper both of which measured .070 across the flats at the tip, and .200 at the ferrule, the anvil would be in the same relative position, regardless of the cutters. Using the example above, you would zero out your dial caliper on on the anvil at the ferrule, and adjust the anvil up .065 at the tip. .065 being the difference between half the rod thickness at the ferrule and tip points. (Dave Kenney) When I wrote that I compensate for the cutter angle not being 90°, I did not mean making any changes to the anvil settings. As Dave notes, those follow the dimensions of 1/2 of the flat-to-flat taper. My compensation is in strip height. For those who use planing forms and are not familiar with the MHM, it is possible to keep cutting your butt strips until they are the size of tip strips. As a result, there is a need to determine when to stop planing. In my case, I use the Waara V-block which Tom Morgan sells, so I measure strip height. Using 97% (of 1/2 the flat-to-flat taper) gets me spot on for the assembled blank, if all of the other possible gremlins don't do me in. (Tim Anderson)
Someone very kindly sent me a box of carbide cutters to test on my MHM a couple of years ago and I just got around to trying them on a penta strip this morning. I lost the donors email address so I am making a general announcement that the cutters proved to be very unsatisfactory for finish work. The two cutters need to fit exactly, which they did, but these cutters had rounded corners where the three sides meet so that there was a gap between them when inserted into the mill, thus producing a high thick ridge on the top of the strip which could only be removed by replacing them with the correct cutters. The cutters in question were from the Aloris too Co. in Clifton, New Jersey. They were marked ATPG-642 C2 10. (Dick Steinbach) You can buy those insert cutters with a smaller radius. Enco, McMaster-Carr and others will carry them. That should solve your problem. (Larry Swearingen)
I'm about to order a MHM and would like to get the opinions of other MHM owners regarding any accessories they find beneficial. I plan on adding the 73.5 and 92-degree cutter heads along with the standard 61.5-degree cutter head. TIA. (Lee Gomolchak) Personally for hex rods I like to 60 (60.5) degree head. I found it hard to convert the measurements accurately into final dimensions with the 61.5 head. I have never had a gap with that after glue up. The cutters for hollow building might be fun as well. (Ron Kubica) I would second the enamel leveling anvils, they do a wonderful job. If you plan to hollow, you might consider the hollowing cutters as well. (Marv Loopstra) If you use a power beveler to rough your strips you won't need the roughing anvils so you might want to consider getting an extra butt and tip finish anvil in lieu of getting the roughing anvils. I would get the enamel scraper accessory as well, as it is really important to get the enamel side really flat before finishing on the finish anvil. Otherwise you won't hit your taper dimensions. If you are going to rough your strips on the MHM then I'd be sure to soak them for a few days before roughing. It will save effort, time and cutters.I think you will really like the MHM. It produces high quality strips much faster than in planing in forms. It produces highly repeatable strips. Perhaps best of all is the very well written manual and true customer service attitude of Tom and Gerri. They are the best. Hope you enjoy your handmill. (Greg McGowan) I would second everything that has already been said with the exception of the roughing anvils. I use a power beveler for hex rods so as Greg said for those the roughing anvils are not needed. Tom has no problem substituting additional finish anvils instead of the roughing anvils if that's how you choose to go. You will need the roughing anvils if your going to buy the penta and quad cutting heads that you mentioned. Most power beveler's that I've seen won't rough the 73.5° or 92° angles so you'll need to rough them out on the MHM. In addition, I would recommend that you pick up the hex strip clamp for your pre-roughed hex strips if you use a power beveler... Kind of hard to drill that 1/8 hole exactly on the apex and the strip clamp alleviates having to drill the hole and possibly splitting a strip. (Mike Arnold) The Morgan Hand Mill is a wonderful tool, with great provenance and great customer service. But I'm sorry, I must come to the defense of hand planers here. I have made rods on both planing forms and MHM. The planing form is quicker for me. Much quicker if you include extra time required to straighten and flatten strips to the degree necessary with the MHM. Anybody wanna have a shootout? I'll straighten and flatten strips, set forms and hand plane six strips, you straighten and flatten strips, set the mill and hand mill six strips. Betcha I finish first. <G> I'll finish six tip strips or six butt strips in about 70 minutes. (Harry Boyd) Asking out of shear ignorance since I don't own an MHM, is accuracy improved using the MHM versus hand planing? (John Smith) Both can be very accurate. I have given up my hand plane and use only a Morgan Mill. I believe Harry has done the opposite. I am inclined to think that the learning curve to produce high quality, repeatable strips may be less on a Morgan Mill than a planing form, but that partly depends on your ability to sharpen your plane. That is key for producing good strips with a planing form, but not required on the Morgan Mill. (Bill Lamberson) Wow! Takes me about 7 days. Of course, I'm old and slow and after about 4 hrs of planing I start to get sloppy so I quit for the day and do something else. When I started doing that, my planing accuracy greatly improved.Fortunately, I don't do this for a living. (JW Healy)
I could use some advice from a MHM user who makes quads. Have you figured out a surefire way to keep the strip edges from breaking down? Plane wet, heat treat after finish planning, etc.? I sure hope someone has the magic pill because I love my quads, but I don't appreciate the glue lines the result from the edge feathers. (Tom Key (7/11/2016)) Use the flat cutter and make 2-strip quads ;-) (Robert Kope) I have a similar problem with hexes, any solutions out there? (Henry Mitchell) Are you hollowing with the MHM hollowing cutter? If so, the wheel hold-down can cause your problem. I found that out with hexes and changed from using the wheel for hexes to using the wheel for pentas because it doesn’t touch the edges. (Tim Anderson) Tony Spezio got me using a craft razor blade for a scraper on the final few thousandth. It will remove a lot of problems... (Terry Kirkpatrick) I use a blade from a utility knife. Sharp, strong & cheap!! (Paul Julius)
|