Bamboo Tips - Tips Area |
|
< Home < Tips Area < Reel Seat Spacers < Finish
I finally figured out what to do with all those reel seat blanks that were undersized. . . make pens. Though even during the pen making process, I find myself pondering about our constant endeavor to improve our art of making cane rods. I had the opportunity to us various products used to finish pen blanks from CA glue to solid wax based finishes. I must say I'm amazed at the ease of application and the relative durability of the finished pens. So my query is: Has anyone applied the methods of finishing of pen blanks to reel seats? Is it durable enough for our use? For those unfamiliar with the process, there are several One is to apply CA glue (super glue) until it coats the blank - then polish it up. This leaves a hard CA surface on the blank. Others include a lacquer/alcohol based friction finish that is applied to the blank. I especially like the HUT product PPP polish. It comes in two flavors for different levels of polish. Apparently it is a carnuba wax based product with abrasives and it is applied with friction to the blank It literally takes a few minutes to apply these finishes and if people have had positive experiences with these methods, then I'll consider switching. (Mark Lee) I've used the CA glue trick. Makes a striking reel seat. I've used it over Cocobolo even, though I did wipe down the insert with a solvent to remove as much oil on the surface as possible. Haven't tried the other things you suggest, but I did think of using the HUT PPP. Just one of the many things I haven't had the time to try. (Martin-Darrell)
I've got some Black Walnut Burl I just turned some seats out of, when I turned them, I got some small pits in the wood. This is what I do and it does a nice job. Once you have the blank turned to your finished diameter, spray it with super glue accelerator and let it sit for about 30 seconds. Then while the lathe is rotating, apply super glue to the entire blank. It will set right up in just a few seconds. Then, with your lathe carriage/cutter still set where you made your last and final cut, make another slow pass over the blank. You will be removing only the super glue on the surface and your voids will be filled. Some times you have to do this twice, if they are really bad. Make sure you spray the accelerator onto the wood and let it dry for a few seconds before putting on the super glue. Don't put the glue on the wood first and then the accelerator, as the glue will set up too fast and turn white. You want it to stay clear. (Dave LeClair)
After turning your wood reel seat filler with your final grit sandpaper, take a piece of brown paper bag and buff the surface. It'll give a nice, highly polished finish. (Chad Wigham) (Chad said he found this one in a woodworking source.)
I just picked up some nice maple for seats. One of my clients loves the Leonard Hunts ands wants me to make a few look-alikes for him. Only thing is, when I finish maple it turns out a boring gray color, not the nice golden hues I've seen on Hunts. Did they stain, ammonia fume or just use an amber finish I wonder. Anybody know for sure? (Rob Hoffhines) They used butternut not maple - to get the rich yellow color they cooked the reelseat in the oven with the cane strips for a couple of hours - then finish normally. If you want to stain/dye maple, then that is another issue. (Chris Bogart) What I use most of the time on maple is a stain/dye that we make by melting steelwool in acid. After this is rubbed into the wood it is heated by a torch/heat gun to bring out the nice reddish-brown color I get in my gunstocks. The other guys on the list who also have gun building experience will concur that maple is best stained/dyed this way. (Bret Reiter) I'm not so sure. I really like the look that Chromium Trioxide gives to maple with any figure at all in the wood. (Harry Boyd) What acid are you putting the steel wool into? I recall reading somewhere that one old timers trick was to put rusty nails into cider vinegar to get the stain. (Mark Babiy) Ask Bailey Wood he knows what REC used to color the wood inserts for Leonard. The original inserts were cooked with the cane and was butternut. After cooking the color was a nice light brown. (Hal Bacon)
I have been messing with finishes for reel seat inserts, and found two techniques that are too interesting not to share: Walnut: sand with 400 grit, then apply Bartley dark paste wood filler. Scrape off excess filler and let dry. Sand again very lightly, then several coats of Birchwood Casey Tru-Oil. Maple. Sand with 400 grit, then paint on concentrated nitric acid into which you have dissolved some steel wool. It will turn the wood bright red. Neutralize with baking soda, rinse, and let dry. It will turn brown as it dries and the grain will be raised. Don't sand it! Apply either Bartley dark or light wood paste filler, scrape off the excess then dry overnight. Now give it a light sanding followed by coats of Tru-Oil. The dark filler gives a brown aged look with gold highlights. The light filler is actually red/brown, and the end result is a pleasing reddish color that seems to go well with many traditional wrap colors. Every little grain and swirl picks up some color. Both Bartleys and Tru-Oil can be had at woodcraft. Bartley seems to really fill the pores much better than anything else I have tried, and the Tru-Oil is well known as a gun stock finish. The nitric acid may not be needed, but I think it darkens the curl of tiger maple and seems to provide a darker base color that matches the reddish glaze. I cooked this up because I wanted to match the look of some flintlock rifles I had seen. Thanks to Bret Reiter for the nitric acid trick. (Jeff Schaeffer)
I have just finished turning a stabilized burl for a reelseat insert. Its turned out just gorgeous, the prettiest one I've done. However, some of the small cracks in the wood although narrow, extend a 1/3 around the insert. Is there a finish one can use to fill these cracks and still retain the luster? As I said the wood is stabilized. (Rich Teeter) A friend who turns bowls uses super glue to fill in hairline cracks in what he does. Possibly that would work. (Tim Wilhelm) The best for burl that I have found is CA glue. Start with thin, then follow with medium or thick depending on how wide the crack. Squirt with accelerator and sand. CA makes a good final finish also. (Tony Creasy)
I spent a day this weekend making reel seats and inserts and ran across a puzzling dilemma. After making about 40 reel seat inserts I realized that I don't have a suitable routine for finishing two specific woods -- box elder burl, and olive. With just varnish or Tru-Oil, Box Elder turns a funny yellow color. I don't want to have the wood stabilized or impregnated because of the weight that adds. But I can't find a suitable stain or dye that gives me the true brown I like. Most of what I've tried turns a funny grayish color that isn't attractive to me. Any suggestions? Olive wood seems to be so dense, or oily, that it will not hold varnish well. Tru-Oil takes about 10 times as long to dry on olive as it does on maple. What suggestions do you have for finishing olive? (Harry Boyd) All of the light box elder that I had, I soaked in the oven at 350 for about 45 minutes and it all turned a pleasant brown color. I thought it was a definite improvement. (Jerry Young) Have you tried Pro Custom Oil Hand Rubbing Gunstock Finish in the Clear Gloss? Nice stuff. "A professional tung oil-urethane hand-rubbing finish" Product number 642-9. (Chris Raine) I will finish some of the oilier woods by buffing with carnuba wax. I bought a cake of pure carnuba, which is a very hard wax, from Woodcraft. I load the buffing wheel with it and buff it into the wood. I get a nice finish, which is water resistant, and can always be waxed or buffed. (Steve Weiss)
I just recently started turning my own reel seat inserts, and I'm playing with finishes. Has anyone used Danish oil? I like the look and I understand that it gets tougher with age, but how are it's waterproofing qualities? (John Kenealy) Danish oil is nothing more than a thin varnish. That is, it may contain from 9 to 16 % resin. The remainder being drying oils, maybe UV blockers/scavengers, and driers. They are considered a "low build" product. You'll need more coats to get depth to your finish. It is no more water resistant than regular varnish. It is easy to apply with a cloth. You can make your own by adding drying oils to a regular in amounts that achieve a 10 to 15% resin concentration. If you want it "hotter", add some cobalt dryer. (John Zimny)
I received a beautiful double slide band reel seat from Tony Larson, it's unfinished Oak, what are some ways to finish and seal. (Pete Van Schaack) I have several of his. Sand it to a satin smooth finish first, then I stain it with a light maple stain. After that I hit it with several coats of polyurethane. I have found that Minwax Fast-Drying varnish dries to a very hard finish that holds up well to the slide band. (Larry Puckett)
I protected the fillers for my last reel seats by dipping them in a 2-component varnish (3 times). It came out pretty good, but i wonder how others do? Are there some better or simpler possibilities and what kind of special sauces are you guys using? I heard about melting acrylic glass in acetone for impregnating the reel seat spacers. Does anybody have experience whit this or other processes? (Markus Rohrbach) You can impregnate reel seats with a soup of Plexiglas dissolved in acetone. Make it about as thick as maple syrup, and center bore your filler and turn it down to close to final dimensions. Then submerge it for a couple weeks. Then turn it down to final dimensions. You can tell if impregnation has been successful if little whitish flakes come off the cutting too. Impregnation is cool, but it makes it difficult (if not impossible) to stain the wood. So you need a wood that is highly figured, or close to the right color. I prefer to stain, apply a wood filler, then finish with Birchwood-Casey Tru-Oil. Put it on in thin coats and steel wool every other coat until you get the look you want. (Jeff Schaeffer)
For the first time, I varnished a Cocobolo wood reel seat insert. And 36 hours later it is still tacky. It has been in a warm environment with circulating air for 12 hours. The other wood reel seat inserts dried in 24 hours, were sanded, and received a second coat of spar. What is happening with the Cocobolo wood? I know it is dense and oily, but glossy finishes get applied to them every day by commercial reel seat manufacturers. (Perhaps they use thinned multiple coats) I dipped it and extracted it slowly, like the other wood inserts that received their second coat today. Where did I go wrong? If it is tacky tomorrow, I will remove the finish, and proceed with plan "B". (What ever that may be.................) (Edward Miller) Cocobolo is notoriously hard to finish. You'll wind up removing the varnish. Try buffing it out on a wheel with white rouge, then several coats of good wax. It'll shine like new money. But it will always be heavy. (Harry Boyd) Use a rag wheel to buff out the wax as well. You'll like the result. If you want to try a different finish, wipe it with acetone, and use multiple coats of Deft. It's very thin, so you'll have to build up a finish if you use it, but it will dry much easier than varnish, since it's more of a lacquer than a varnish. (boy, my elementary school English teacher would have a field day with all of my comma splicing) (Greg Kuntz) Did you wash it with acetone first? That's the usual way before gluing or finishing teak, I'd guess it should probably be done with any kind of oily wood. Anyone else have a comment? (Neil Savage) I once used some varnish which aims to suppress ooze of wood, so called ooze stopper. I know the name in my language but I am not sure in English. It says like, Neo lacquer varnish? It will dry into a clear color and prevent the ooze from touching with next varnish. After dried, apply such varnish like Polyurethane or clear lacquer, etc. It worked. But is it better to varnish such nice woods like rose wood, or Cocobolo? (Max Satoh) I've not used exotics for reel seats. My woodworking experience is mostly from building a 27 foot sail boat. I'd think an oily wood would be naturally fairly waterproof, and we don't normally soak our reel seats anyway. I guess the only way to find out would be to experiment. Try buffing and see how it looks, splash some water on, wait a while and wipe off, and see if there is any apparent damage. I DO know the dust from some of the exotic woods is poisonous. You'd have to look in a good reference to find out which ones. (Neil Savage) I believe that teak oil (not tung oil) is the recommended finish for oily tropical woods like rosewood, Cocobolo, etc. (Rich Margiotta) I've used teak oil for some non-rodmaking purposes and even tried it on a scrap blank piece. It looks great (on wood) and is easy to apply. Any excess left out dries out hard as a rock. However, the label claims that the product offers UV protection, and perhaps it does to some extent. But I watched two teak chairs on my deck go from a nice hand-rubbed finish look to a gray spotty sun-baked finish over two central Texas summers. The chairs had three coats of hand-applied finish. I suppose it's somewhat like those deck water-sealant products that you have to maintain each year... (Oy! I'll get off on a rant about those things after stooping and crawling over my deck for two days!) While most reel seats unfortunately don't get exposed to the elements everyday 24/7 for years, I'm not going to use teak oil on a reelseat without adding something with beefier UV inhibitors. (Eric Koehler)
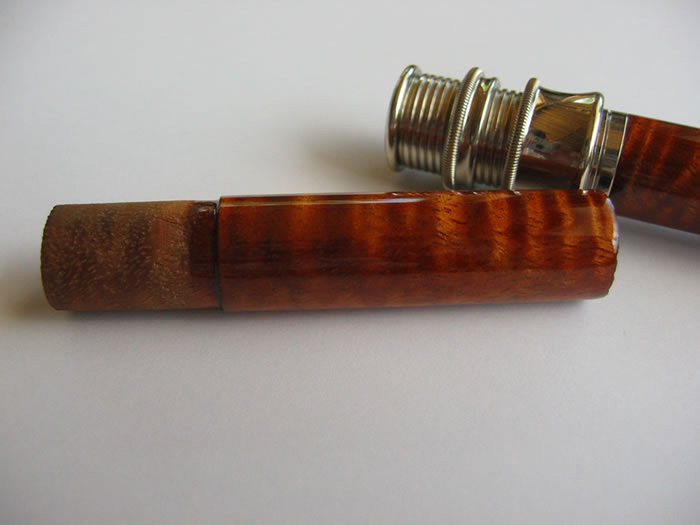
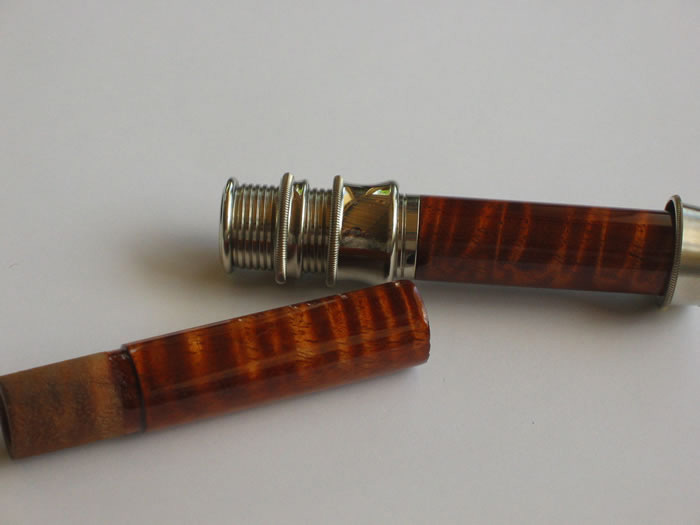
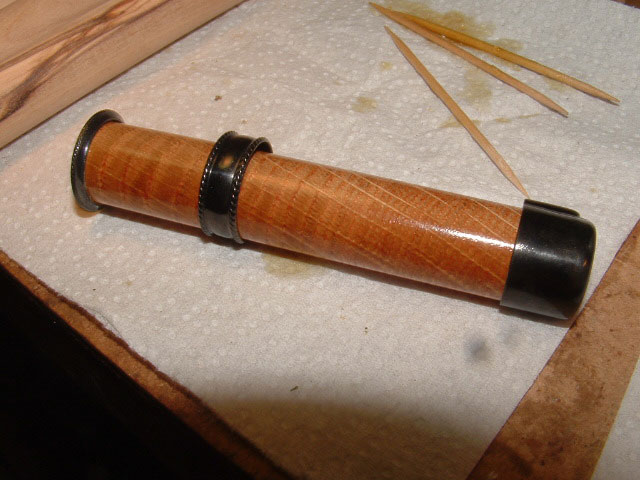
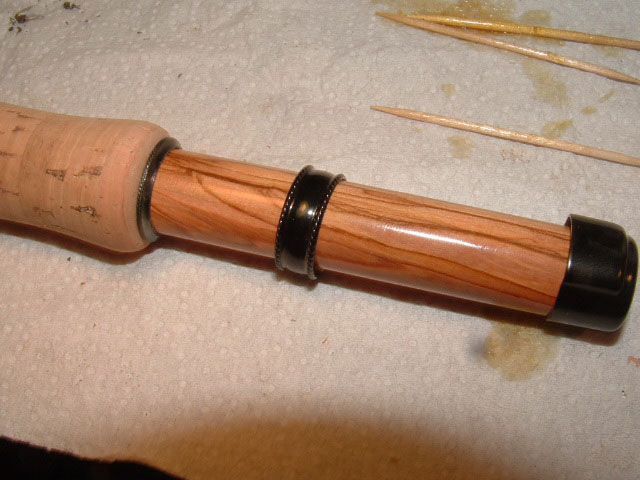
What kind of finish do you use on your wood reel seat spacers? Has some one any experience with HUT Crystal Coat friction finish made from shellac and Carnuba wax? (Olaf Kundrus) I tried the Hut and they came out beautiful but I was told they would not hold up to getting wet. I recoated them with Helmsman. (Tony Spezio) But Helmsman takes a long time to dry. (Olaf Kundrus) The Helmsman spray varnish takes two coats and comes out just great. (Gordon Koppin) I use Helmsman. Either spray or Dip 2 coats. (Dave Henney) When you dip a reel seat, how do you suspend it into the dip tube? (Tom Peters) I haven’t had any trouble doing it by hand. Just dip in the can and pull it out kinda slow-like. Haven’t seen any runs or sags in a dozen or so attempts. (Jason Swan) I like to build it up in several (7-10) coats all brushed on. Between each coat I then take it almost back down to the previous coat using steel wool. This fills in any imperfections in the wood and gives a very smooth and deep finish. (Larry Puckett) I use Crystal Coat for pens, and I’m not sure I would use it on reel seat spacers. It makes a pretty hard finish, and if it got scratched on a rock or something, it might start to flake off. Also, from my experience, after lots of handling the finish dulls, requiring additional polishing to keep the pens shiny. I just did these two reel seat spacers for a friend.
I used Helmsman spar urethane. It took four coats (on top of a wood dust/cyanoacrylate slurry sealer), sanding with 600 grit between coats, to get the finish I like. Really smooth and glossy. These were my first spacers out of Koa (BTW, the photos don't do these spacers justice), and the wood is pretty porous, so some other species of wood may not require as many coats to get the finish to be nice and smooth. Also, a good quality sanding sealer may do the trick, only requiring one or two coats of Helmsman. Also, I used straight urethane. I have tried to thin the stuff (perhaps mineral spirits is not the right thinner) and I get odd results. Generally, it comes out dry in some places and smooth in others. The straight stuff does take a while to dry. I wait 6 hours before sanding. And I have to clean the sandpaper frequently because it clogs easily with the soft Helmsman. But, the finish is really nice and extremely durable. Hope this helps. I also hope you don't mind the photos. The only real reason I’m sending them is because they turned out so cool I wanted to show them off, and your question gave me the chance. Thanks! (Jason Swan) Minwax, fast drying polyurethane. Made for finishing floors and dries to a nice hard finish. (Larry Puckett) I dip straight into the can with a mini dip setup. No motor, just manual-old fly reel. (Brian Smith)
I went to a pen making demonstration at Woodcraft and when he started finishing the pen he would put a light coat of a fast CA glue on then smoothed with 400 grit sandpaper then he used Woodcraft version of the Crystal Coat heat set finish. He suggests that you get the Crystal Coat, or theirs, he said it was the same, very hot and may have to use an oven mitt to keep from burning your hand when you apply pressure by squeezing the pen with a rag. He said the finish is very durable. He said that the base of super glue made it work. I thought if it worked on pens it might do the same on reel seats. Thanks to everyone who got the list going again, you don't know how much you miss it until it is gone. (David Ray) Got any thoughts on how you could finish one with a reel foot mortise on it? (Dave Norling) I am not sure how with a mortice except the same way, or I may use a buffing wheel. You do have to get the Crystal Coat very warm to get the best finish. When I make another reel seat I will try and do it like I do on pens. I know it works great on pens, I made two today and it is a great finish. Tony tried just the Crystal Coat and it did not hold up very well, if remember correctly. I am hoping the super glue base will make a difference. I don't know if this way will hold up or not, I just like to pass on info that looks promising. (David Ray) I have applied Crystal coat on mortised inserts by doing this, Sand the sharp edges on the mortise as not to catch the polishing cloth or cut your fingers. Apply the Crystal Coat as you would without the mortise, I ran the lathe in high speed. Good idea to wear a work glove. There will be some bumping but It will not be too bad at high speeds. After the Crystal coat is applied, there will be a narrow area along the inside if the mortise ridge. I polished these out with the polishing cloth by rubbing real hard in those areas. It came out all right but I don't want to do a lot of them that way. You mentioned using super glue then using the Crystal Coat over it. I was doing a insert the other day. I did just the opposite. I applied the Crystal coat then applied the Super Glue over it to protect it. It was posted on the list that Crystal Coat would not hold up under use. I personally have not had any Crystal Cost treated reel seat inserts in enough use to know if they will hold up or not. I will be doing a demo on these at the SRG. I will give it a try. (Tony Spezio)
I have a few stabilized wood reel seat spacers which I will be turning down to fit the reel seat hardware. What would be recommended for final finishing and polishing of the spacers? (Walt Hammerick) There are a number of ways to do it, but the bottom line is that you will finish stabilized wood using some sort of polish. Progressively finer grades of sandpaper, ending up with 2000 grit. Then polish with any of the well known fine abrasive polishes. Finesse it, Meguires swirl remover, Hut plastic polish, etc. One list member applies the polish with a strip from a paper grocery bag. Then buff it with a soft cloth until it glows. (Jeff Schaeffer)
I have some questions on how the members finish their wood reel seat spacers. 1. What finish do you use? Varnish etc. 2. How do you put the finish on? Brush, dip? (Tom Peters) I think it's pretty much what you're comfortable with. There was a thread a few weeks ago about impregnating them with something like Minwax wood hardener, some varnish, I like Birchwood Casey etc. If you have a finish that works FOR YOU, use it! (Neil Savage) I also make pens and the best finish I have found on pens is to use a Medium CA (super glue). Apply it with a paper towel and after it dries finish to 12,000 microns with micro mesh. It gives a hard beautiful shine. But in the end it all depends on what you want it to look like, shiny or satin. Tru-Oil is always a favorite also. (David Ray)
I have started making reel seat spacers and am now working on the finishing using Tru-Oil. I have put on about 4 coats and have noticed that Tru-Oil does not fill in the small grain holes because it just puts on a thin coat. Some suggestions have been using a Sanding Sealer to fill in these gaps and was wondering what other people are using to fill the gaps and get a very smooth surface. (Tom Peters) I usually end up with about a dozen coats, sanding lightly after every 3 or 4 and after next to last, then polish the last one with Meguires Scratch-X. Kind of depends on the wood you use, among other things. If I were using something like oak or ash, I'd look for some kind of wood filler/sanding sealer to use first. A coat of shellac might work too, but try it on a scrap and make sure the Tru-Oil works over shellac. (Neil Savage) I use super glue or any CA glue applied at high speed. makes for an incredibly smooth and durable finish. (Jeff Fultz) Does the CA glue work well as a finish on mortised reel seats? I can't see how one would fill the corners of the mortised area.... (Harry Boyd) For a mortised spacer I turn and finish the wood round first. Then I cut the mortise and apply CA glue to the cut area by hand rubbing vigorously. I've used this method on most wood types and stabilized woods as well. (Jeff Fultz) I've been using Cocobolo and don't put anything on it, just buff it to a high gloss. The result is a higher shine than anything else I've tried. If it gets dull, which it won't, just buff it. This wood is heavier than most but I don't build rods less than 8' The additional weight of the wood isn't all that much with a 3/8" hole through it. Remember, if you are turning or sanding Cocobolo, it's toxic. Take proper precautions. (Don Schneider) Before applying Tru-Oil I use Bartley's wood filler. Got mine at Woodcraft if I recall. It comes in neutral, light and dark. I use the light color mostly. It does a real good job of filling voids and "canyons" as you might get in a piece of burl as well as simply filling pores. Give it overnight to dry and apply Tru-Oil as you normally would. (Mike Shay) I've found with using Tru-Oil on my reel seat inserts that I need to lay the first few coats on fairly heavy, then sand back to the bare wood. After a few thick coats of Tru-Oil and sanding between coats, the pores fill up fairly quickly. (Mark Wendt) I have never used Tru-Oil. However, I have made lots of reel seat fillers and I dip them in unthinned spar urethane (this also works well for mortised seat spacers) for the first two coats. It goes on thick and I sand with 400 and 600 wet-dry between coats. I have not used oak or ash (which have significant grain pores), but I used Koa and other types of dark wood with smaller pores. After the second coat and sanding the surface is uniformly smooth and produces a really glossy finish (or a matte finish with rotten stone, or whatever) with the thinned urethane I use next. A urethane base would be compatible with whatever else you want to put on top, as long as you don't want it to get into the wood. My question, though, is why would you want to use Tru-Oil over a sanding sealer? Isn't Tru-Oil used to penetrate the wood? Most sanding sealers are like a shellac, aren't they? Don't they prevent top finishes from penetrating the wood? I have thought of using sanding sealers, but have not tried yet. But, I don't worry too much about finish penetration in the wood. A good hard top coat is all I'm really looking for. Does Tru-Oil create a hard surface finish? (Jason Swan)
I have some really nice box elder burl, but haven't found the key to making it look just the way I want. Left natural, it's a little too light and too yellow for my tastes. I'm looking for something that will stain it a medium brown. One can burn up a lot of wood, time, and money trying out different stain and finish combinations. Have "y'all" found a good wood treatment for turning this beautiful box elder into useful reel seats other than having it impregnated? (Harry Boyd) Look into a product known as "Bartley" wood paste filler. I believe I bought it at Woodcraft. It comes in a "Light", "Dark", and "Neutral". Since I don't believe that the list will allow pic's or attachments, I'll send you a couple of before and after pic's.
Personally, I have settled on the "light" for most of my uses. The dark can be very dark. The neutral is interesting as it is made to have a stain or color added to suit your own needs. It is a filler as well as a stain and will fill voids in the surface. I have used it on some cherry burl that really had some canyons left in after turning. One of the plus' is that it has some form of plastic and seals the insert nicely as well as coloring it. I don't recall who it was that recommended it to me some years ago but they were on the list. Good stuff, easy to use, nice color when finished. (Mike Shay)
I learned a lesson the hard way last night. I was polishing the reel seat on a rod I use quite often. The buffing compound left a little residue and I was going to lightly wipe it away with denatured alcohol. Bad idea. The alcohol hardly touched the wood insert, which was finished with Tru-Oil, and the finished bubbled away in less than 2 seconds. Be careful with anything finished with Tru-Oil and denatured alcohol. (Harry Boyd) Use mineral spirits or better yet, naphtha. (Rich Margiotta) I can add to this denatured alcohol warning as well. I posted about the mistake I made while signing on the wrong flats last week. Today I have attempted to fix the problem by sanding the sigs down to where they start to disappear. At that point I used the DA to remove the entire signature. It acted like a stripper and took varnish and all. I then used it to do the other inscriptions, revarnished a coat, resigned on the proper flats, and will apply another coat when dry. In my case the varnish removal was OK, but watch out if you use this to clean between coats. You could be removing some varnish and not know it. I have been using spar so it affects that as well as Tru-Oil. (Bill Bixler)
Once again I want to try something inappropriate. A friend of mine gave me some Lignum Vitae which is one of the densest woods found. It has been used as propeller bearings for ocean going ships and turns beautifully. The piece that I have has green and brown striations that would make a lovely reel seat. The problem is that it is very 'waxy' and does not polish up enough to show off the grain. 5 days after dipping it in varnish, the varnish has not yet begun to set. Does anyone have any experience/suggestions as to how to get it to accept a gloss coat that can be used as a reel seat. (Ralph Tuttle) Have you thought of baking it in the oven to sweat out some of the waxes? if you have enough you might test a a small piece to see what happens. (Timothy Troester) I'm not sure about Lignum Vitae, but I know Teak needs to be wiped down thoroughly with acetone in order for either glue or finish to work on it. I suppose now you would have to remove the varnish, but it sounds like you may have to do that anyway. (Neil Savage) Wash it with petrol. (Tony Young) I suggest that if you do use it you use Coleman fuel or white gas. You never know what's in that $3.75/gal stuff :<) (Doug Easton) I haven’t worked with Lignum Vitae but recently I made a sign out of Ipe. It, too, has a high oil content and even though I “washed” my board with lacquer thinner the varnish didn’t set up normally. It did cure after a week, though. Maybe you need more time or some guys have suggested using Japan drier to speed the cure of some oil finishes. Maybe that will work. (Al Baldauski) I'll betcha a dollar to a donut that you can sand that Lignum V. down to 2000 grit, then polish it out on a buffing wheel and get a beautiful high gloss finish. (Harry Boyd) That's the beauty of using Lignum v. for any project. It's a beautiful wood when left natural. If you really love working lumber, get some rotten stone and finish it buy hand with no power tools. It's as sweet as, I dream, shaving bamboo is. Then again, workin' wood ain't for everyone. (Ren Monllor) Ahhh, the beauty of natural wood. Can't argue with that Ren. That's the first approach I took. Successively finer grits followed by pumice and rottenstone and when that finished to a dull grayish tone that hid the green and brown feathering that the blank contained I tried some really high grade waxes that further hide the beauty. Then I tried Finesse-It, Finesse-It II and Perfect-It. Same result. Any handling of the piece after each stage left smudges and continually degraded the luster. Hut's Crystal Coat did not adhere, nor Varmor. Therein lies my quest to find another approach. This is a wood that has no business being used on a light weight rod in the first place. It is one of the heaviest woods in existence due to the amount of resins contained. Bamboo is beautiful in it's natural state and yet we see flamed and browntoned and even stained and tinted varnished rods. Since it is for my own personal use I feel free to experiment and try to find methods to obtain the results I wish. I have had four different responses to my question that I will pursue and report if any of those are successful. Thanks for offering another approach. (Ralph Tuttle) You can also try soaking the reel seat insert in a jar full of alcohol for a few days. Sometimes that will draw enough of the oils from the wood to allow a finish to cure over top of it. (Mark Wendt) Alcohol, in general, is not a good solvent for oils. It does work on some plant oils but something like lacquer thinner or mineral spirits would be more effective. (Al Baldauski) Time to report who wins the kudos for getting Lignum V to accept a varnish: Great suggestions from everyone, thanks. First what didn't work: Scrubbing down with acetone and, before the oils have a chance to resurface, quickly varnishing with 50-50 mix of varnish and VP&M naphtha with a dash of Japan drier. That one is still tacky after two days in a drying cabinet. What I didn't try: Same as above but heating until the oils start to run first. Hitting it with a coat of lacquer first and then varnish. What did work. Thanks to Jason Swan. Acetone the blank, hit it with thin cyanoacrylate, let dry about a minute or two. This goes on pretty even. Sand back. Apply at least one more coat, this goes on a lot more unevenly and dries in about tens minutes. Sand back to smooth. I only did two coats but Jason suggested more with a final coat of the flexible version of cyanoacrylate if you were still on a lathe. I dipped in Varmor and put it in the cabinet yesterday afternoon. This morning it is dry. No grayish film and the browns, greens and yellows all show nicely. Thanks Jason. HTH someone else. Okay Larry, now you have no more excuses, get to work. (Ralph Tuttle)
I put a mortised Cocobolo reel seat on a rod I was restoring and after 24 hours Tru-Oil was still tacky which was quite a shock to me because everything I've ever used Tru-Oil on was hard to the touch usually no more than 2 hours later. OK, I sanded the Tru-Oil off and used Helmsman spar urethane thinned with mineral spirits to about the same consistency that I would for the first coat on wraps. 56 hours later it will still take a fingerprint with almost no pressure. Is there an oil present in this wood that retards set up time of finishes or am I possibly doing something wrong? What should I be using for a finish on this wood and is there any special method I have to follow? (Will Price) Welcome to the club. Yes, Cocobolo is a very oily wood and does not take a finish well. Most consider it's natural state very beautiful and just use a wax buffed. If you have a year it will eventually cure a finish but if that's too long you can use thin cryo (super glue) in three coats each sanded back. The pores will be filled and a finish can then be added on top. It may still chip though so be careful and try it on another scrap piece first. (Ralph Tuttle) Teak oil (not tung oil) is the woodworker's preferred finish for oily tropical woods. Some folks report that desiccating the surface with acetone and then applying a varnish works, but that's extreme in my view and can't be good in the long run. (Rich Margiotta) What kind of finish do you end up with using teak oil? Is it similar to a tung oil, where you can get either stain or gloss? (Mark Wendt) Teak oil leaves kind of a satin, semi-gloss kind of look. Very nice. The bigger mail order woodworking houses have it, such as: http://woodworker.com/cgi-bin/FULLPRES.exe?PARTNUM=117-086 http://www.woodcraft.com/product/146954/watco-teak-oil-pint.aspx Marine supply centers may also carry it. I've only had to use it a few times. (Rich Margiotta) Thanks for the link and the info. I'll have to look into getting me some of that stuff. I see the link from Woodcraft, which just so happens to be one of my favorite toy, uh, tool stores. (Mark Wendt) Soak it in denature alcohol for a couple days then let dry then it should take a finish that’s how I did it. (Dave Henney) You're going to find that the oily, exotic woods like Cocobolo are going to do that to an oil finish. I just finished up a Cocobolo reel seat insert myself, and to get a finish to cure, you need to seal the wood first. Best thing I found for that is a couple of coats of super glue rubbed into the wood. I used the thin stuff, which kicks off pretty quick if you're not careful. I've heard of other folks using the medium super glue, which gives you a little longer time to smoothen out the glue on the wood. After the glue kicks off, sand down the bumpys, and it only takes a few coats of tung oil or whatever finish you want to put over the glue. (Mark Wendt) I've found I can't get a better finish on Cocobolo than just buffing it. Makes life easy & it only takes a minute or two. (Don Schneider) Here's what I came up with from the hints and methods for finishing this wood. I did one reel seat with the epoxy and sanding method and it turned out pretty decent though it was rather time consuming. I did one with the teak oil finish and then just waxing. Got a nice satiny finish that was plenty acceptable to me, but I imagine if one was selling rods they would find most customers want that glitzy high gloss shine. I had a wild idea that I thought might give good results so I called my brother up and asked him to mix up a batch of auto clear coat with the fastest drying agent he could find that would be compatible with the clear coat. Asked him to get his air brush out and I would be there in 1/2 hr. I took my last 6 reel seats down with the idea that if it worked I would just have him do all of them at once. Wow, it worked in spades! Just like a great metal flake paint job on a hot rod that looks like you can see right down into it, is how the reel seats turned out. Total time for 6 very thin coats and 6 finished reel seats, about 45 minutes! I would imagine that with an aerosol can of fast drying clear coat would work just as well although a little slower than with an airbrush. At any rate, I wanted to share this with the list so you could add it to the arsenal of ways to deal with oily wood. (Will Price)
I am just about to finish my first rod after two years of reading, gathering information, building, acquiring tools and supplies. It has been quite the journey and I am very excited about completing my rod and starting another. Which brings me to a few questions that I need help with to finish the first rod and start the second. I am going to be using the balloon method to varnish my rod and am using Helmsman spar urethane how long do I need to wait before I wrap the guides. I have heard that the guides and wraps can for lack of a better description melt into the finish causing a less then desirable result. What is the best way to coat and preserve a reel seat? I have made a few out of cherry, maple, black walnut and popular. I have a culm that is greener than straw colored. Is there a way to make to it turn that nice light color. Right now I have it sitting in the sunlight, but where I live the sun doesn’t shine everyday!! Last but not least. I live very close (less than a mile) to a couple of steelhead steams in PA. So I do quite a bit of steelhead and then bass fishing in the summer. I am looking to build a rod that would roll cast well since the steelhead fishing in this area is mostly dead drift nymphs, egg patterns and streamers - weighted and sometimes with a float indicator and if possible might throw a popper, hair bug or small Clouser for bass. I am thinking in the 8 to 8 foot 6 range. A six or seven weight. Any suggestions? This is my first post so I am not sure of all the etiquette. I hope this is not too many question to ask in one post. Any help would be greatly appreciated!!! (Rick Barbato) See my answers below--Larry I am going to be using the balloon method to varnish my rod and am using Helmsman spar urethane how long do I need to wait before I wrap the guides. I have heard that the guides and wraps can for lack of a better description melt into the finish causing a less then desirable result. Do yourself a favor and do some test runs with cane garden stakes just to get the feel of this method before messing up your blanks. What is the best way to coat and preserve a reel seat? I have made a few out of cherry, maple, black walnut and popular. I use Minwax Fast Drying Poly and apply about 8-10 coats and take it almost back to the previous surface between coats using 4-0 steel wool. If I ever find any True-Oil I plan to give it a try. I have a culm that is greener than straw colored. Is there a way to make to it turn that nice light color. Right now I have it sitting in the sunlight, but where I live the sun doesn't shine everyday!! You might try UV lamps but I don't know if you can beat the sun. (Larry Puckett) Where in the world do you live that you can't find Tru-Oil? Sporting goods section of Wally World, Dicks Sporting Goods, Cabelas, Gander Mountain, the Internet and on & on. (Will Price) I live in NVa just outside Washington D.C. I have checked every gun store, Dick's, Wally, Kmart, etc. in the area and they don't stock it. Same problem with varnish: you can get any kind you want as long as it is made by Minwax/Helmsman but just try to find Varathane, MOW, or other brands and you're out of luck. I did finally track down a pint of Ace Spar yesterday at a small ACE stre--it was hidden behind all the Minwax/Helmsman's cans. (Larry Puckett) Try this if you have a wish to. (Joe Arguello) Try WATCO Danish oil (oil/varnish liquid, flows like tru oil but builds and protects better). (Chris Obuchowski) Another option is Daly's Sea-Fin Teak Oil. I've only done one rod with it, but so so far (several trips to the saltwater) it seems to perform well. (Tom Bowden) Congratulations on your progress. You're almost there! Larry gave you some good advice. Practice the balloon method on a hardwood dowel that you have sanded smooth as a baby's bottom. Once you get your technique down, go ahead and finish the rod sections. But don't throw out the varnished dowel. Use it for practice wraps. When the varnish on the dowel is hard enough that the wraps don't dig in, hard enough that you can still wiggle 'em around easily with a thumbnail, you're ready to go on the bamboo. My guess is a week to ten days. I'd suggest the same varnish on your reel seats, but I'd thin it down and wipe it on. Keep that culm in the sun. That's the best way to get it to change color. Or, you can flame the greenish bamboo and no one will ever know it was not straw colored to begin with. As for a taper, sounds like a good case for a Para-15. And yes, folks, ol' Harry just recommended a parabolic taper. Wonders never cease, huh? (Harry Boyd) A shame that you are North of what I take to be the Grits Belt, but perhaps my sense of geography fails me. The grits mob, I mean the HEAVY grits mob are taught these things by their mothers, apparently. If you are going to varnish the blank before wrapping the guides then put any non-guide whippings on first. I find that it helps to use a slightly heavier gauge thread on the ferrule tangs and just ahead of the shoulder collar. You can always tip these off with the ring color in fine or any other color you fancy. The old trick of wiping the first coat with a hard finger after about 5-10 minutes doesn't half improve the finish and it's easier than buggering about with spirit lamps. Polyurethane hardens quite quickly if kept warm, so two or three coats will do, it doesn't hurt to rub it down with color restorer car polish. The stuff we use is about the most expensive UK make, but it will be different Stateside, I guess. You can use Tru-Oil on the reel seats, mine are all dried by a wood stove for ages, but if in doubt you can always boil them up in some suitable oil, like Tung for instance. You really do need a suitable thermometer for this as you don't want an oil fire. You could use a stainless steel chip fryer, that way you don't get so fat. You are being impatient, just leave it out there for about a year, it will go yellow! Just for fun you can try a three piece, Luke uses a Payne Canadian Canoe for that sort of thing. If you can't find the tapers you can fish them out of one of my Hexrod libraries, I think its in the one called Robin. There was an improvement on it somewhere, as the tapers are a bit straight on the original, but I suspect I printed it and forgot to save it. (Robin Haywood)
What do folks use for finishing wood reel seats? Varnish, tung oil, shellac, wax, etc. etc; Anyway, just curious as I have been trying all of the above. What finish is the most durable and lasting? Curious. Thanks in advance. (Frank Paul) Depends on the wood. If it's a very tight grained wood I like to use a few coats of a fast drying polyurethane. For a more open grained wood like walnut spar varnish works well. All my seats get a coat of "antique wax" and a stiff buffing. (Mark Shamburg) Tru-Oil, multiple coats, easy to apply. (Bob Williams) I have heard of people using super glue, spread evenly and dried. Then while still on the lathe it is buffed to a super high shine using very high grades of sand paper and finally the back of the paper. I heard about it on rodbuilding.org a while back. I don't have a lathe, so I have not been able to reproduce it but the pictures were of a very high gloss and durable finish. I have a friend who makes pens with his lathe and he said this is an old trick. (Scott Bearden) You can do the same using a drill press. (Tony Spezio) Any wood insert that is commonly used on gunstocks i.e. walnut, maple, curly maple birdseye maple etc. I use Tru-Oil. The oily woods like Cocobolo, bocote etc. I have had the greatest success using automotive clearcoat. Anything else I just use good ol' Helmsman Spar urethane. (Will Price)
I want to stain a bird's eye maple reel seat insert and having mediocre success. What type of stains have you all had best success with on very hard dense woods. (Timothy Troester) If you have trouble with oil based stain, try aniline dye, it's soluble in alcohol and penetrates more effectively than oil. Google for it. (John Channer) It also gives you bladder cancer. It's a classic example of epidemiology for medical students. Always wear gloves; nitrile are the best and most chemical resistant (and you might want to check the MSDS as to whether you need a chemical mask). (Chris Obuchowski) Do you have a link to the MSDS that says that? Are you sure it's the dye, or could it be the reducing agent added to the dye? Just curious. Always a good idear to wear gloves while working with dyes. Besides what might happen as Chris mentioned, aniline dyes are very persistent - IE: brown hands for a couple of weeks. (Mark Wendt) No, I don't have the MSDS (though nearly all are available on the net, as long as you know the name of the product you are working with). I just remember the discussion/lesson from first year medical school, it's the first epidemiology lesson they taught. (Chris Obuchowski) I use water-based aniline dye from Woodcraft. After it dries, hit it lightly with extra-fine sandpaper (360). The background gets lighter and the bird's eyes are more prominent. I use the same procedure on curly maple. Also, the water base raises the grain and the sandpaper then smoothes it. Raising the grain is an old process and is used a lot on gun stocks. (Steve Weiss) I have an old Crossman air rifle with a tiger maple stock, very light color. I wanted to darken the stock but keep the "tiger" effect. Maple does not take stain uniformly and per all the "experts" on the internet, don't try to stain it. (Bob McElvain) Some time ago I read of an old timer's method of staining tiger maple gunstocks dark. I don't recall all the details, but it involved filling about half a coffee can with really rusty nails, etc, then pouring vinegar over them and letting it sit for a couple weeks, Maybe someone can elaborate further. It was supposed to produce the effect you want on curly maple stocks. (Tom Smithwick) I know Bret Reiter has done a lot with gun stock finishes, so I asked him what he used. Here's his response: "It is not vinegar, that will just make the stock smell like pickles. It is acid that you can get at the pharmacy. Take this & melt steel wool in it. You put this on the stock, it will turn a funny color but you hit it with heat from a heat gun or torch & it darkens up. This is what I use on guns & my maple inserts on reel seats. I'm not sure what type of acid it is. I always have to ask the pharmacist. I think maybe sulfuric or hydrochloric. The pharmacist only has one he can sell you anyway." (Todd Talsma) Both sulfuric and hydrochloric can be very dangerous if you don't know how to handle them. I think Bret may be talking about nitric, which is a bit more benign, in milder concentrations. It's the stuff that used to be used in wipe on tan lotions, and stains skin brown. Vinegar is a mild acid, BTW. No pharmacist would sell anything without putting a label on the bottle. What Bob would need to know is the type of acid, and the concentration % of the solution. Heavy concentrations belong in a lab with proper safety equipment. Even mild solutions should be handled with gloves and eye protection. (I used to be a tech in a chem lab). I would be interested in the details, as I understand it the dissolved iron reacts differently to the light and dark portions of figured maple, turning the dark portions very dark, and having a lesser effect on the light portions. I have seen some early Pennsylvania rifles that must have been treated this way, and the effect is stunning. (Tom Smithwick) Dave LeClair gave me some of this stuff a year or two ago. It's nitric acid with iron and I believe this is referred to as "aqua fortis" or "strong water." The stuff I have is heat activated. Wipe it on, let it dry and wave a 180 degree heat gun over it and viola! Contact Dave. He may know. (Eamon Lee) That's why I love the list. Here we have the answer to "I don't know which kind of acid to use." Thanks for the update Eamon. (Todd Talsma) Vinegar is Acetic Acid. Photography Supply houses have Glacial Acetic Acid in powder and liquid form. My Dad used to own a Photographic Supply house and I used to deliver for him when I was in High School over 45 years ago. (Dick Fuhrman) Yes, that's the acid. Nitric Acid and dissolve steel wool or nails, etc. in it. (Dave LeClair) What concentration is the acid? (Ralph Tuttle) I used the Nitric Acid I have here in my shop, but it is from a lab and is really too strong. I used it for stripping nickel plating from hand guns. It is the pure stuff. I don't know what concentration you should use, but you definitely want something weaker than what I have here. You may want to check with a drug store and see if they do carry a grade of Nitric Acid. (Dave LeClair) At least in the past Dixie Gun Works has sold small bottles of the nitric acid for darkening maple gun stocks. The effect is quite stunning. (Bill Lamberson) Nitric Acid is NOT BENIGN. I don't know about wipe on tanning lotions, but we use the stuff in the machine shop to dissolve out broken taps. It's often used in very low concentrations to burn off warts. It will also form organic nitrates with just about any organic substance it comes into contact with, some of which can be powerful explosives. Putting nitric acid on wood will create nitrocellulose, which may be a safe compound when you buy it in a "Bullseye" can off the shelf and your local reloading supplier, but can be extremely dangerous when you accidentally make it yourself. In it's raw unprocessed form, its highly impact sensitive and contains a LOT of energy. Both hydrochloric and sulfuric acid are commonly available in reasonable concentrations, and are much safer to handle than nitric. When I was working on a geology project at Colorado School of Mines we would often go to the drug store and buy small bottles of 20% Hydrochloric acid, they just call it Muriatic acid. The simple fact is Bret gave Todd some dangerous information. There are thousands of different types of acids commonly available from the grocery store or pharmacy or auto parts store, many of which can be dangerous if improperly handled. (Mark Shamburg) Point well taken Mark. Benign was not the word I should have used. I was trying to make the point that even dilute acids should be handled with care and understanding, and concentrated ones don't belong in the home at all. (Tom Smithwick) Let me add my 2 cents worth on this as Muriatic acid is something I'm quite familiar with. I make my living as a mason. Mortar between brick should be allowed to cure a minimum of 72 hours before the wall is washed down to remove stains, dirt and mortar droppings. Muriatic acid is the most common acid used to wash down most types of brick. Diluted (20% solution?) or not it is still cut approximately 10 to 1 with water before it is sprayed on the walls. I've seen wash down men to lazy to scrub and scrape the walls try to get by with not cutting it enough with water. The smoke rolls off the walls and I've seen it actually eat the mortar joints out completely if left on the wall too long before rinsing down. Anything that wrecks havoc on hard masonry mortar won't have any trouble at all in eating soft skin. (Will Price) Nitrocellulose from solid maple! The gunsmiths of the 18th and early 19th century sure had there hands full staining all those beautiful Pennsylvania rifles with nitric acid. How many gun stocks do you suppose blew up? Anybody have any sound information to that effect? Nitric acid treated maple is one of the more beautiful ways to highlight the grain and figure. We do need to be careful with a lot of the material we use to make rods and hardware to be sure. None of what we do is without risk. If you don't want to assume the risk of an operation, then don't do it. (Jerry Drake) I use the Natural #209 stain made my Minwax and leave in on only for a few minutes or so. What I try to do is just bring out the features of the wood instead of darkening it with other kinds of stain. Works for what I am trying to achieve. (Scott Bahn)
I'm making a reel seat insert out of pauferro. I've worked with other exotic woods before, and some accept a finish well, and others, like Cocobolo do not, due to their oiliness. Has anybody worked with pauferro before, and will it accept an oil based finish well, or is it close in behavior to the oilier woods like Cocobolo and teak? (Mark Wendt) I've never even heard of it!!! I must live a sheltered life. (Will Price) I had a typo above, it's actually called pauferro, or Brazilian Rosewood. It's used a lot on musical instruments as a fret/sound board. Apparently the hardness of the wood has quite good musical qualities to it. Same as Cocobolo. (Mark Wendt) I have heard Brazilian Rosewood used, just never heard it called pauferro before. Course I've said this before but I'll repeat it. Being the son of a carpenter I sure don't know very much about wood or the carpentry trade. (Will Price) I refinished a teak rod tube recently with automotive clear and activator with a huge amount of uncertainty about the finish having a reaction to the oils in the teak wood. A gamble that paid off. No problems what so ever and a beautiful finish. Some of you may have seen this at the Catskill Rodmakers Gathering. Automotive finish can be dangerous to anyone that doesn’t use it properly but so can play-dough. As long as you handle it with latex gloves, wear a well fitted respirator with up to date filters in a well ventilated garage, you will do just fine. I’ve been spraying for 28 years and by best friend has been spraying for over 40 years both without any respiratory problems. The paint fumes don’t kill painters…the smoking does. (Wayne Caron) On that same note I am curious if such oily woods can be impregnated, or would their oily nature provide adequate protection with reasonable exposure to the elements? (Scott Bearden) The truly oily woods like Cocobolo only need to be buffed, polished and waxed. I haven't turned the pauferro blank yet, but from what I've been able to gather so far, it is a tad oily. According to one web site, water based finishes are supposed to work okay on it. The luthiers use some kind of lacquer, but most lacquer finishes for wood don't hold up terribly well in the environment that a reel seat insert lives. (Mark Wendt) Cocobolo & pauferro are used as the back & sides on guitars. Fret boards are usually ebony (now there's a hard wood)or rosewood. Sound boards are usually Sitka spruce (at least in American made instruments). All guitar woods are kiln-dried to an emc (equilibrium moisture content) of 10-12%. Most factory made instruments are finished in some form of nitrocellulose, sprayed on. I'm sure there is a filler or sealer used on the oily woods. At least that's what my son the luthier tells me. He's glad he's making guitars. He thinks the ol' man is nuts to make bamboo fly rods. (Paul Julius) I had my brother mix up a very fast drying automotive clear coat and airbrush it on 1/2 dozen Cocobolo reel seats. The 2 I've put on rods are holding up well after almost a year of fairly hard use. Those 2 plus the 4 still sitting on a shelf in the room I work on rods have not leached any oils in that time. (Will Price) I'd thought about that, but I try to avoid the two-part automotive finishes, mainly because of the problems they can cause in the human body. They can have some pretty nasty after effects. (Mark Wendt) While we are on the subject of wood/reel seats, a rancher friend of mine just gave me quite a bit of California Buckeye Burl wood that appears to be green, so I was wondering the following: 1. How to dry it with minimal checking and 2. The best way of finishing it (i.e. impregnation, varnish, oil etc.) I also have some ancient Whitebark Pine (over 300 years old) that is very dry and hard and was wondering the best way of finishing it also. (Larry Tusoni) One year of seasoning per inch of thickness used to be and still is a good rule of thumb. Write your cut dates on the slabs so you'll remember when it's time to turn them. I have 6 and 8 inch bowl blanks I won't be able to turn until 2011. I'll probably be dead by then. If you can slab out your chunks and give them a coat of Pentacryl it will go a long way for the good. I would still only coat the end grain of your slabs though. Pentacryl will leave an oily residue you might be able to turn through. It works well though, as does paraffin. I wouldn't try and rush the curing process. If you want to push the timeline up, consider building a home kiln. Really not that hard to do. Neither is letting it sit in the corner of the shop for a few years. A homemade impregnator isn't hard to make either. While certainly not necessary, an impregnator can stabilize almost any type of wood. I still wouldn't turn it until the needed time has passed to cure it though. After all it could end up on a customers rod and you don't want weird things happening to a customers rod! Ask me how I know! If you do make an impregnator, consider it a stabilizer, not an impregnator. You'll be happier. It will draw liquid and vapor from a piece of wood and, hopefully, replace it with your chosen material. (Mike Shay) Drying with minimal checking? If you have an unsplit trunk section go ahead and split it. Just like bamboo it'll split itself if you don't do it first. Take your sections and coat the end grain with something like paraffin to slow down the end grain checking. Otherwise the moisture comes out of the end grain faster than the long grain. It used to be a rule of thumb to air dry at 1 year per inch thickness. To speed things up you can go ahead and cut to rough blank size. (Larry Swearingen) One of the best things I've found for treating green wood to stabilize (not a true impregnation) it and keep it from checking and splitting is Pentacryl. It's available from Woodcraft. Here's a link to the stuff. It saturates the wood, and if necessary, allows you to turn the stuff sooner rather than later. Depending on the wood and how porous it is, it can take anywhere from a week to about three weeks. Buckeye burl is a fairly dry wood (non-oily) so just about any finish that is UV and water resistant should work just dandy. (Mark Wendt)
How are you guys finishing wood spacer made from oily woods such as Cocobolo. Varnish won't adhere and Tru-Oil fish is a pain because you have to keep reapplying to keep a decent finish. (Mark Dyba) I buff Cocobolo. It's so oily you don't have to put anything on it. (Don Schneider) Teak oil seems to work pretty good on the oily woods. Some guys are using super glue as a finish too. (Mark Wendt) I buff at slow speed with a soft flannel wheel and carnuba wax. (Steve Weiss) I haven't finished oily woods, but woodworkers use teak oil on them. It's either linseed or tung oil with resins added. (Rich Margiotta) You need to remove the oil from the surface of the wood. I've used white vinegar on my edges of my kitchen table that have 2” x 2” x 45" long pieces of East Indian Rosewood. Cocobolo is a species of rosewood, along with many others. I then finished the top with a poly finish that's lasted over 25 years, wonderfully. FYI, the finish was Carver-Tripp Liquid Plastic. Anything to break that oily outer surface should do. Then finish in a moderate period of time before the oils seep up or the project gets handled too much. (Jeremy Gubbins) You cannot apply finishes to many woods in the rosewood family, as they are so highly resinous that nothing can adhere or dry on them. But it can be done, if you use this trick. Take your Cocobolo insert and place them in a container of denatured solvent alcohol. (I use a small empty can of energy drink) Let them sit in this alcohol bath for a couple hours. Wipe dry with paper towel. Then rinse with a fresh wash of new alcohol. Let dry overnight. You'll now notice that the wood will be much lighter in weight and color, as much of the resin has now been removed. Apply your Tru-Oil in the usual fashion and you'll find that your Cocobolo now handles and finishes just like any other wood. (Ron Hossack) I had the same problem the first time I used Cocobolo. I got my brother to spray a 1/2 dozen reel seats for me with the fastest drying automotive clear coat that he could find. It worked great and the finish was stunning. It gives an illusion of depth ,almost like you are looking down into the grain. An added plus is the clear coat is hard enough to stand up to marring better than varnish. (Will Price) Is this clear coat not suitable for finishing the whole cane rod . . .? (Ted Godfrey) There are 1 or 2 rodmakers that are clear coating their rods. Wayne Maca of Beaverhead Rod Co. uses a clearcoat on his bamboo rods. But then everything he does is radical, from glues that he used in the snowboard building industry to hollow building. His hollow rod sections can be looked through from one end to the other. No dams or even solid sections at the ferrule (he can get away with this because he uses graphite ferrules allowing the rod to bend through the area as though it were a 1 piece rod). His method of testing the finish was to put a blank in the back of his pickup truck and let it there exposed to the elements for a year. He tests the power fibers in his culms with ultra sound equipment before using it in a rod. He is so confident in the toughness of his rods that he only builds 1 tip rods and from what I understand from people who know him personally, he flat out refuses to build a 2nd tip when requested. He is that confident in the toughness of his rods. (Will Price) Thanks much! I guess each maker tries some new approaches. I feel rather hide bound in my own efforts! (Ted Godfrey) There was some discussion of clear coating a while ago. The down side seemed to be you need a fair amount of sophisticated spray equipment (spray booth, exhaust fans etc.) to do it safely. Maybe that's different now? I don't know. (Neil Savage)
I have a couple of REC stabilized burl reel seat inserts and they are a very dull finish. I would like to put a Tru-Oil finish on them to brighten them up. Will it adhere to the original finish? If not, any recommendations? (Ken Gaucher) Probably. You might rough it up a bit with 4/0 wool first though. Before you do that though, consider buffing out the finish with Brownells 555 if you want it shiny. If that doesn't work then you could apply Tru-Oil to it. (Mike Shay)
Does anyone have experience with using unstabilized red cedar for reel seats? I plan on using a Tru-Oil finish. Will it swell in high humidity, if so how much do you have to allow on the diameter? (Dennis Bertram) I made one with unstabilized cedar. The rod is and will be unused for several more years. I made it for my grandson shortly after he was born. Since it is locked away, I don't know how humidity will affect it in the long run. I made a reel seat with moose antler. It is on a rod I use all of the time. When I fish it in the rain, I cant get the reel off of it, the band wont slide. I never dreamed antler would swell, so it has a couple of coats of varnish on it and that's all. Since the reel stays on it, it's not a problem. If antler will swell that much, I can only imagine what cedar would do. I stabilize all my reel seats (including moose antler) now either in Penetrol or dissolved Plexiglas depending on how much color change I can live with. Red cedar soaked in Penetrol for a few weeks turns an amazing looking dark red. Plexi leaves it almost pink. (David Atchison) I believe Eastern Red (aromatic) cedar is pretty stabile dimensionally. Don’t know about western red cedar. (Brian Creek) I made one eastern red cedar reel seat, with a matching red cedar handle. It looks nice, but it has several challenges. The biggest problem is how soft and brittle the wood is. For the reel seat, it was almost impossible to turn without splitting it. You can't use much pressure when you clamp the blank in the mandrel. All woods expand and contract with moisture, and I haven't found the cedar to be significantly worse than walnut. The few thousandths that it expands won't interfere with the locking mechanism. I used several coats of Tung Oil followed by several more of Poly Urethane to finish the reel seat. For the grip, I used a couple of coats of clear Thompson's Waterseal. The softness of the wood makes it mar easily, and the lack of give in the grip takes some getting used to. I probably won't do another cedar handle, but the reel seat does have a nice color. (Paul Gruver) Does anyone have experience with using un-stabilized red cedar for reel seats? I have found them a tad bit hard to turn and pretty soft so watch the pressure you apply both on the mandrel and cutting. I have a friend who went to the middle east somewhere and brought me some cedar that is almost white. If it did not smell like cedar I'd almost swear it's something else. This stuff is so soft it doesn't turn worth a darn. If I have a few to do I use my pressure pot and use either a mixture of MEK and White Foam or Acetone or MEK and Plexiglas to stabilize them. If I have one or two (cedar and spalted wood especially) to do I use what I call an "epoxy martini." I drill the blank out with my 3/8" bit and then I take some 30 minute epoxy and mix it with DNA until it's the consistency of milk. (real thin) I then take one of those dark grey foam brushes from HD and begin to coat the insert. It's amazing how much this the insert will drink up a lot of that mix. I have some 1/4" dowels wrapped with plumbers tape and just place it on there to dry. They will now turn very nice and finish nicely also. (Ron Hossack) I drill the blank out with my 3/8" bit and then I take some 30 minute epoxy and mix it with DNA until it's the consistency of milk. (real thin) I know one definition of DNA, what's this one? (Steve Weiss) Sorry Steve, DNA is denatured alcohol. (Ron Hossack) I have a friend here that is fiber glassing a canoe using System Three "Clear Coat Epoxy", we took some of the "Clear Coat" Epoxy, thinned it with 50% Lacquer thinner and soaked several of the spalted Maple blanks I have. It was like a SPONGE. I have not drilled or turned any yet but it looks real promising. Curing time is seven days. (Tony Spezio) I have a rod that is over 75 years old with a cedar reel seat insert. Go Figure. (Ralph Moon)
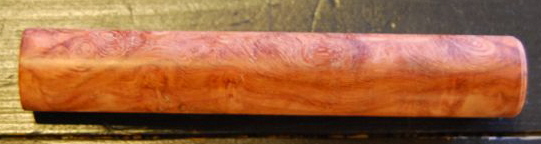
I have a quick series of questions about a stabilized piece of Amboyna burl that I turned for a reel seat. Before I turned it, the blank was a nice deep brown. After turning it is an unattractive orangey-pink that no longer matches the flamed blank. Not having used this wood before, I am unfamiliar with its characteristics. Is this normal with Amboyna? I bought the blank already stabilized, so I don't know the process that was used. Does the stabilization have a hand in this? Any thoughts on how to bring the normal color back? Lay it in the sun maybe? Heat?
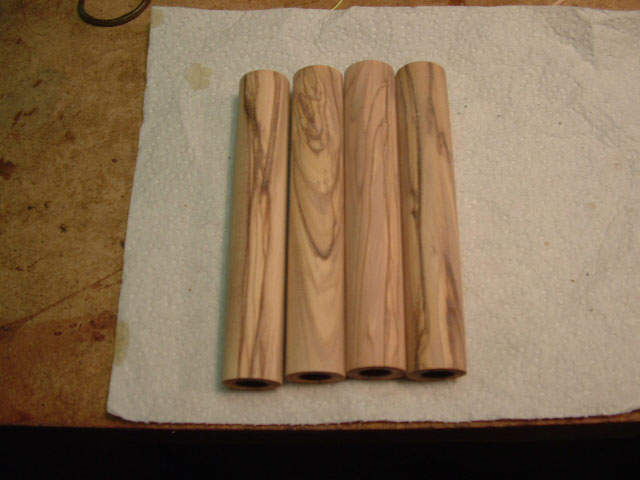
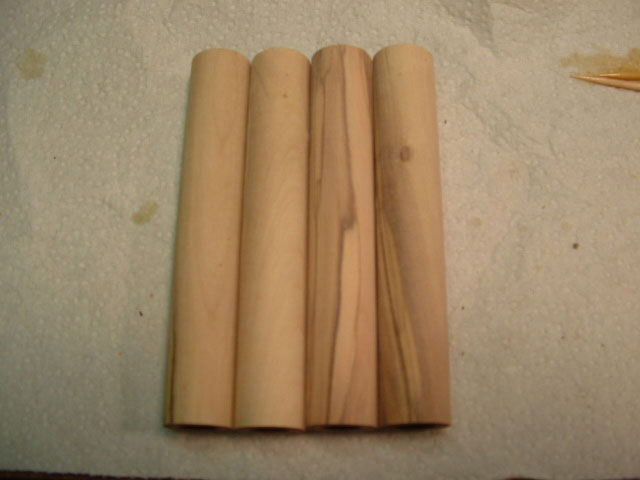
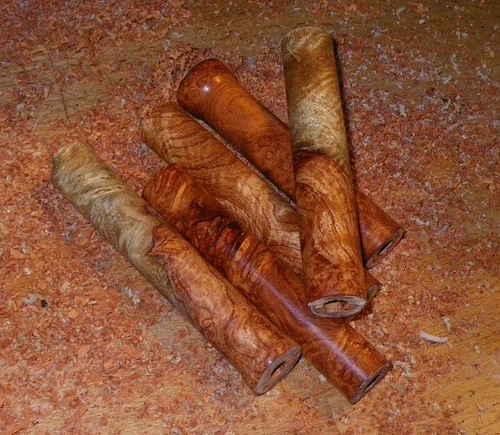
Pink reel seat phobic. (Tyler Beard) One thing that I do when I turn a reel seat to tell what it's going to look like with finish is simply wash/wet it with mineral spirits, this will darken it to the color it will be with finish on it. (Joe Arguello) Wipe it down with denatured alcohol. That'll raise the grain, and give you a smoother final sanded finish. (Mark Wendt) Actually, the normal color is a brick red to rusty red or maybe your orange red. Spalted color is a light brown, kinda like maple. When you finish it, the blank will darken up a bit. If I can find some picture on my Iphone, I'll send them through. (Jim Lowe) Here are the seats!
(Jim Lowe) Beautiful seats Jim! Thanks for posting them. I would definitely be satisfied if the color of my seat matched those. Mine is definitely more in the pink realm than it appears yours are. I'm going to try to take a photo of mine to aid in the discussion. (Tyler Beard) If that blank doesn't change colors I would be interested in buying it from you. I am building a couple of rods to donate to Casting for Recovery and the color scheme is based on the pink breast cancer ribbon. The wraps are pink with the purple tipping and I have a nice agate guide that goes well. The pinkish color of the wood might be the final piece. (Ron Elder) If I determine that this seat is definitely going to stay pink, I cannot think of a better use for it than your rod. I'm going to experiment a bit, and I'll be in touch. (Tyler Beard) Pink Ivory is a good turning wood that can be VERY PINK . . . and would make a nice seat for that rod. (Chris Obuchowski) Rub it with some Tru-Oil or Penetrol and see what happens. I use regular Amboyna and it darkens considerably when finished. I don't much care for stabilized wood, it always seems needlessly heavy to me. (John Channer) Regarding the pink amboyna reel seat I inquired about yesterday, I have news to report. With nothing to lose, I decided to lay the seat out in the sun today to see if the UV would make a change. What do you know, it DID! The reds in the seat darkened toward brown, moving the seat decidedly away from the realm of pink. It is still a little orangy, but with all of the change from today I would expect that a few days more will result in the color I was initially expecting. Yay! (Tyler Beard)
For those of you who finish your wood spacer with super glue, what is the technique? How do you apply it? How do you finish it? How durable is it? Thanks for the info. (Walt Hammerick) Walt, here is a nice video on applying the CA finish on a pen blank that shows what I was trying to explain... It shows using BLO which I didn't $mention that I use on all my turnings. I use Brasso to polish the insert. (Ron Hossack) What is the BLO mentioned with the CA pen blank finishing video?? (Mike Stillman) BLO is Boiled Linseed Oil. It makes the grain in the wood 'pop' and acts as a mild accelerator (as does the paper towels) in curing the CA. (Ron Hossack) As an alternative resource you might want to check out the Pen Turning guys who use CA a lot. I've learned a bunch from the ones I know - including doing Rattlesnake reel seats (encased in Acrylic). Here's a link to their forum. On second page there is a link to their library index with several references to CA finish. They say that using a paper sack to buff is the equivalent of 12,000 grit - interesting. (Darrol Groth)
I remember seeing posts that describe the technique to apply cyano (super glue) as a wood finish. A few questions for anyone that does it --
Maybe this will help. (Joe Arguello) I have just started making my own inserts but haven't tried super glue only because I don't quite know how to apply it to the mortise area and get a good result. Applying on the lathe probably isn't the right answer. Anyone out there use CA on mortised seats? (Rick Hodges) I apply it to turning stock, let it set. Turn the blank till I come to soft wood and apply again. When down to size I apply it as a finish while turning. I have some spalted Maple that is like a sponge, It takes quite a bit to fill that. On that type of wood it takes several applications. (Tony Spezio) I remember seeing posts that describe the technique to apply cyano (superglue) as a wood finish. A few questions for anyone that does it-- How do you apply it? Greg ... they've pointed you to my post sharing how I do it. Let me be the first to say that there are as many ways to apply CA as there are brands of CA. This works for me. I've done a few hundred (pens and reel seats) this way and pretty much like the results. I did a fast job here and left out some steps that I'll try to update. If you're applying to turning stock, do you let it heat up, or do you want to avoid heat build up? NO HEAT! Heat (and water) is what cures CA and if you get the CA starting to cure you'll have the paper towel start sticking to the surface and then you'll have to sand back down and start again. I sand to 400 or 600 grit depending on the wood. Clean with some alcohol to get all the dust off the wood. Then the first thing is to fold a sheet of the Paper Towel until it is about 2" - 3" then I tear off a piece and fold that in half again. With the lathe on SLOW speed (no idea of the rpm but if you are slinging CA it's too fast) Put 4-5 drops on the folded paper towel and quickly wipe across the surface back and forth 1 - 2 times and pull he paper towel off quickly. If you don't have accelerator just let the blank turn for 60 seconds or so and it will dry so you can apply coats 2 - 6 or how many you like. How do you avoid an uneven finish? I'm going to recommend that you use THIN CA to possibly avoid this until you are comfortable doing this. Don't apply too big of a puddle of CA. 4 -5 drops is plenty. We're not trying to build a plastic thick blank but put a protective finish. You probably will get wrinkles like potato chips and if you do just let it sit for a couple minutes and take a small stick and wrap some 320 sand paper around it and sand the ridges off. Start applying your CA again. Any special precautions, other than being careful to not glue your fingers together or to the wood? Yes ... I confess. Many times I just use my finger tip and use it to apply the CA to the finish. Smear it back and forth quickly and lift my finger in the air for 60 seconds or so (I won't tell you how I learned NOT to touch or pick up anything when the finger is wet with CA). When the CA is dry, apply more CA and lift the finger again. When I'm finished I peel it off. The only one who protests at this method is SWMBO but I don't let a little thing like that deter me. Otherwise, latex gloves or the Nitrile Gloves from Harbor Freight are excellent. A mask or respirator of some sort or work in an open area with good cross ventilation. I think when I first told Tony about this way he had some kind of allergic reaction to the smell/odors of CA and I sent him some Odorless CA to try and can't remember how that worked for him. Glasses and or a face shield to protect your eyes because you will sling the CA. (Ron Hossack) This is how I have done it works best if the reel seat is round - NO mortise. Makes for a really nice finish. There are some other videos if you dig around on YouTube for pen blank finishing. (Rick Barbato) As the insert is turning on your lathe, and you are rapidly rubbing the CA on in a horizontal direction; therefore, the mortise should not be a problem. (Frank Schlicht) Greg, and others working with CA who fear gluing your fingers to something, this concern is apparently unwarranted. Yes, you CAN glue objects to you fingers. or vice versa, but the remedy is apparently very simple. Some years ago, one of the major woodworkers on his Saturday TV show addressed this issue. He intentionally glued his thumb and index finger together, and demonstrated that they were, in fact, glued together by trying to pull a standard wood pencil through the bond. NO GO! He then took the same pencil and had an assistant apply Vaseline to the pencil, which he proceeded to pull between the tips of his fingers with very little effort, just a quick "snap", and the bond was broken. I have never had the need to test the technique, so cannot say from personal experience whether or not it works, but one never knows when the tip might come in handy. The closest I have come to date was several years ago, and prior to seeing the tip, when a friend super-glued a pair of pliers to his hand! Oh, for pictures of THAT! (Frank Schlicht)
I'm sure this has been discussed prior but I am having a hard time finding any discussion about it on the tips site. How does everyone finish their mortised reel seats so they preserve the nice channels for the fingernail? I would like to get a glossy finish. (Greg Reeves) I have been finish cutting my reel seat inserts and then soaking them in sanding sealer until they don't float anymore, and then drying them. Then when I want to finish one for a rod I just apply either Formby's or Helmsman with sanding between coats to fill the pores until they reach they desired sheen. Generally, Formby's if I want a lower sheen and Helmsman if I want a high, tough sheen. Sanding along the mortised lip keeps the finish from building up - though I really don't care as much about that anymore. Also, I've found the mortise "lips" can be sanded to even them out a bit so I don't have to be so fussy about centering the bit. Hope this helps.. (Darrol Groth) I haven't made a whole lot of them, but the ones I have were finished with CA glue. I turn them under size, finish with CA, then re-cut to size and polish. The mortise is done the same way: cut under size, CA, re-cut and polish. It doesn't take all that much longer than dipping the finished insert in something like varnish, and the CA is really hard and scratch resistant. (Larry Lohkamp)
Have never been a wood turner, but have just lately turned a couple of reel seat inserts out of Huon pine, a local timber which is very well thought of as a cabinet and boatbuilding timber - and which, by the by, makes your workshop smell fantastic. I am told by my friend Nick that if I coat the blank with cyanoacrylate let it dry and soak in, then chuck it up and spin it polish it with a soft rag, I will get a good finish. Somewhere down in the part of my brain that has scales on it I seem to recall that somebody had a different technique where you turned the C/A before it sets and sort of "hot polished" it with, what, cloth, fine sandpaper ????? I think I saw the description from someone who was talking about turning pens, but wouldn't swear to it. Also, if you do it wet, do you get 1000 rpm super glue sprayed all down your front? If I am going to turn into a wood turning old geezer, I might as well try all the idiosyncratic variations. (Peter McKean) I was kinda thinking the same thing a while back so I put the question to a forum, I have since tried this with pretty good success. Here is the link to a tutorial and in it a link to a Youtube video. Have fun. (Joe Arguello) In addition to that there are many videos on you tube that show the technique in great detail(although it is shown on pens instead of reel seats). I think it makes a great looking very durable finish. Most of the ones I have seen recommend a final polish using a piece of a brown paper sack (bag). I believe they mentioned that it was equal to 12,000 micron polishing paper. (Will Price) I saw a YouTube clip some time back of a pen blank finishing technique that works really well for inserts. Basically:
Voila! (Steve Dugmore) Question....It seems to me this process would be tough to apply if you make mortised inserts. Is there a trick? (Tom Key) You are right. On the ones I made, I cut the mortise after applying the Super Glue. Then apply the SG to the mortise and rub like crazy to get the shine. I think you have seen some of them when you were here. I quit using SG, it irritates me too bad, I have no way to vent the area where my lathe is. (Tony Spezio) From Wikipedia and from my personal experience :-D : "Applying cyanoacrylate to materials made of cotton or wool (such as cotton swabs, cotton balls, and certain yarns or fabrics) results in a powerful, rapid exothermic reaction. The heat released may cause minor burns, and if enough cyanoacrylate is used, the reaction is capable of igniting the cotton product, as well as releasing irritating vapor in the form of white smoke." (Marco Giardina) I am quite familiar with the U-tube video and the guy uses paper towels, and he puts the BLO and the CA on the paper AT THE SAME TIME. It works, as I have used it numerous times. As noted below, STAY AWAY FROM THE USE OF CLOTH FOR APPLICATION. Using cloth could be very hazardous to your health and well being! The video was done by a pen turner. You might check the various pen turning videos on U-Tube. (Frank Schlicht) You are correct, it should be PAPER TOWEL not cotton cloth. My apologies. I have not had any problems with cotton cloth so far but will take heed of the warning and use paper towel from now on - NO COTTON CLOTH. In the YouTube clip I saw the BLO and CA were put on separately. That is how I do it. Here is a link to a clip. It is not the same one I saw but similar. (Steve Dugmore) I need to correct, and apologize for, an error in my previous post on the subject; and express my thanks to Steve Dugmore for causing me to discover it. Thanks to Steve, I was able to find the youtube video that I based my comments on (have been looking for it for several days). The very first coat is BLO only, to get the grain to 'pop.' The second coat is CA only. All subsequent coats are a mix of the two components. I have, out of curiosity, applied both at the same time as the initial application and can see no differences; but then, that is just me. (Frank Schlicht) I recently repaired a Dulcimer (given to me in pieces in a plastic shopping bag). It was 50 years old and appeared to be all one color brown. As I stripped and sanded I realized the soundboard was butternut and the body was walnut. The butternut was considerably lighter in color (sometimes called white walnut), but had been totally obscured over the years by the browning of the finish. Likely BLO had been applied to pop the grain, as was the custom in those days with these instruments and followed by varnish. The oxidation of the finish over the years had completely changed the color. I suspect the same thing will happen to the pens and reel seats which use BLO. BTW my 86 year old friend who had built this Dulcimer when he was in his 30s, said to me one day " I used to have a Dulcimer that looked just like that".{8^) (Dave Burley) I don't make my own reel seat inserts (don't have a lathe). Is there any reason I couldn't do this super glue finish on someone else's unfinished seat using a drill or drill press and a mandrel? I have trouble with my varnish-finished seats looking like crap after a couple years. (Frank Stetzer, Hexrod, Taper Archive, Rodmakers Archive) For the super glue thing to work, sufficient heat has to be produced to "set" the glue. (I never have heard of it getting hot enough to smoke until today) I wonder if the drill setup would spin fast enough to produce enough heat? It might but the heat is not from a lot of pressure against the wood. The sandpaper is held in just enough contact with the spinning wood to sand & polish. I use sandpaper on a roll, tear off a piece long enough to go around the object with several inches additional on the top and bottom to hold onto. I keep the paper moving back and forth as I would sanding any object. You don't need to apply a lot of pressure if the lathe is spinning at wood working speeds, definitively over 500 rpm. The surface is durable and used on a lot of waterfowl calls. It holds up in that environment well. With sliding bands and reel feet, I don't know though it doesn't have a surface buildup like varnish. (Rich Jezioro) For the super glue thing to work, sufficient heat has to be produced to "set" the glue. (I never have heard of it getting hot enough to smoke until today) I wonder if the drill setup would spin fast enough to produce enough heat? The heat isn't generated by the speed it's turning but by the CA curing. I turn slooow as I don't want to be flinging the CA all over the place. Cotton is a big no-no unless you don't mind having your fingers glued to the cotton and I will guarantee you that you will feel the heat. Paper towels and dress batting work well. What I do is put a small puddle on the paper towel and then wipe rapidly across the wood a few times and then hit it with accelerator which cures it immediately. A drill press will work just fine but I think you will have better luck taking a 3/8" drill and clamp it down so you are turning horizontally. Make a pillow block for the mandrel to fit into and finish that way. Vertically you have the chance of the CA puddling up at the bottom of the insert and creating a collar. (Ron Hossack) Although I don't use it anymore, I've used CA for reel seat finishes before and it does make a great looking and durable finish. The only problem arises is mortises... not the "saddle" type, but the ones cut with a fingernail bit that have "rails". No way you can spin those on a lathe and get it in the grooves along the rail. The ones I did were with my hand cut mortises which do NOT have the grooves and they transitioned on a slope at the handle end. Those were easy to do on a lathe, but I used the back of a piece of wet and dry sandpaper instead of cotton cloth. Never tried the boiled linseed oil trick with it. Actually never heard of it until this thread. If I still made that kind of reel seat insert, I'd still be using CA, but I can't get a good even finish on the ones I make now. The problem with those is that I have a fingernail shaped termination to the reel seat mortise on the handle end (very much like a Payne reel seat insert), so it was hard to get that covered well. I really like the CA finish for both it's appearance and toughness, but I like the fingernail shape termination better, so now I finish the reel seats with polyurethane... Helmsman, actually. Not near as tough, but it sure does look good when you get three wet sanded coats (2000 grit) on the wood then polish them out. Super thin finish, but looks like they're dipped in glass. This actually takes MUCH longer to do than the CA finish. In my experience, in an hour you can have a great looking CA finish on a reel seat... the 3 wet sanded coats of helmsman takes at least 3 days. As far as long term durability, if you'll polish the inside of the reel seats sliding band as brightly as you might the outside, then it won't scar the wood up so bad. Also, I use a tapered mandrel to put a very slight, almost imperceptible bell, on both ends of the sliding band. This helps keep it from digging in and the poly or varnish finishes will stay looking good for many years. I'm restoring a Divine right now that had spar varnish on the filler. This is a 1920-something rod. A little wear and tear, but the spar varnish finish on the reel seat still looked pretty good for a 90 year old rod. The inside of the sliding band was VERY finely polished out. (Bob Nunley)
I know this comes up time and again but there is one piece of info I haven't found looking back through the archives. I am planning on using Helmsman Spar Urethane to finish my reel seat inserts. For those of you who do this, how much undersize do you turn your insert and how many coats of varnish does it take to make up the difference to get a good fit with the hardware. I have a set of hardware that is .685". Should I turn it to about .680" and then dip until I get the desired thickness? I know that trial and error would get me to the right results but I'm trying not to reinvent the wheel so to speak. (Greg Reeves) I use rubbed on Gorilla Glue to finish my inserts - it's gives an amazing finish that is hard, dries quickly and is VERY thin. (For details how to apply this finish refer to Tim Anderson's article in the January, 2010 (Volume 38) Power Fibers). Since learning this technique (thanks to Larry Tusoni) I've used it exclusively to finish inserts the past year and have found the inserts to hold up very well with use. What I like most is that the coats can be built up quickly because the layers dry very fast. The only down side is if you prefer a high gloss look, which I don't, you may not be happy with the semi-gloss look this process gives. (Tom Key) I undersize mine .005". There is a lot more varnish on my reel seats than there is on my rods. My caps are 0.685, so I cut my filler to .680" to allow for the varnish. How many coats it will take you to get the finish that thick is a crap shoot. The method of finish I use, three coats gives me .005", Helmsman may do it in 2, may take 5... that is something you'll just have to experiment with and see what it takes. Sorry, but that I know of there is no quick and dirty answer that applies to all finishes... and even if there were, that thickness will change depending on humidity, temperature, draw rate, wood prep (Do you seal the wood before the first coat or does most of your first coat "soak in"... makes a difference). All that said, I do use Helsman on my reel seats. NOT on my rods, but on my reel seats. It's tougher than spar and doesn't scar as easily with the reel foot in place. Even though I use Helmsman, I can't give you a stock answer for your procedure. I rub several coats of boiled linseed oil into every reel seat before I finish it, then I hand rub 2 coats of 3 pound cut super blond shellac on top of that, then I dip three coats of helmsman at 70 degrees and trying my best to keep the humidity in my varnish room under 35% (a challenge with the normal humidity here) and a half an inch a minute draw rate. I sand the coats of shellac and Helmsman with 2000 grit between coats. Still, that's not going to help you much on getting dead on a .005" coat... too many variables. I can't describe how I sand or how much exactly I take off when I sand... it's an individual thing and the way I do it works out good for me. Your method may have to vary... different shop, different temperatures, different humidity, different sanding pressure, etc. Hopefully this can give you a baseline, but you're still just going to have to experiment with your set up and see what works well for you. (Bob Nunley) Interesting discussion, but I'm puzzled regarding 'finish' beneath the hardware. Doesn't that interfere with bonding the metal parts to the insert? My method is turn the insert ends to suit the hardware, tape that off and dip or brush just the exposed wood, then glue and pin the parts later. Is that unnecessary? (Vince Brannick) I'm not going to say that it's NOT necessary, (hate doing that, because sure as hell, someone will change how they do things and lose a butt cap in the river) but in 22 years of making fly rods, I've never taken down the varnish under the hardware, never pinned a ferrule or a butt cap and haven't lost one yet. I've restored a large number of high end rods (several Leonards and FET's and 3 Paynes among them) and while most of them were pinned, keep in mind that they were using either a hot melt (not even in the same class as modern epoxies for adhesive qualities) or White Lead, which isn't a glue at all, but merely fills space and makes a near press fit very tight so it won't rattle; however, they did not take the finish off of the filler under the butt cap. (Bob Nunley) Me neither, never pinned a ferrule or a butt cap and have never lost one. In fact, I have never seen pinned ferrule on a UK made rod and know of no UK rodmakers that pin, such are modern adhesives. (Paul Blakley) "To pin or not to pin, that is (NOT) the question" The question is/was whether gluing hardware over varnish didn't interfere with good bonding. So far as ferrules are concerned there's no question that a pin hole reduces the cross sectional area of an already small area. With a butt cap, that isn't a problem, and as unlikely as it may be, there is always a remote chance of its coming off ~ away goes the reel? Just an insurance policy, one might say. The fact is, that the only part I pin, is the butt cap. (Vince Brannick) The fact is, that the only part I pin, is the butt cap. Well it would be counterproductive to pin the slide band, wouldn't it? (Larry Swearingen) If it were a slide band fitting. Should have stipulated a down-lock screw arrangement. Don't know if it would be counterproductive to pin the threaded sleeve, but don't, mainly because it would necessitate filing the pin ends to conform with the thread(s), and the only advantage I can see is to prevent any rotational movement of the sleeve. It certainly isn't in any danger of 'flying off'. (Vince Brannick) The bond between metal and wood comes into question only where glue meets the metal. Bonding to wood will always be better than gluing over varnish, but both surfaces will be "good enough" for a butt cap. The problem (when there is one) is always the glue's ability to "grab" the metal surface. This is a function of the glue's own mechanical properties, but it depends even more on preparing the metal surface properly. (Same with ferrules, where varnish isn't an issue.) Other folks' anecdotal experiences are what they are, but you need to be sure of what's critical. (Bill Harms) As Bill Harms says, if you "don't prepare the metal surface properly" the epoxy will not bond the butt cap to the wood insert - just my experience. (Frank Paul) Seems to me uncoated wood under a metal covering in a watery environment is not that good of an idea. For sure I would at least seal the wood. (Dave Burley) I doubt that you will ever get a better sealer for the wood than the epoxy you use to stick it to the metal. When epoxy is used over bare wood in cedar strip canoe/kayak building to cover with fiberglass cloth it becomes completely waterproof. It then becomes part of the wood and it will not delaminate as will polyester resin. (Don Ginter) But, it's not uncoated when epoxy is applied. Or for that matter, any other adhesive. It's only uncoated till the adhesive, then the hardware is assembled. (Mark Wendt) Just to throw some gas on this fire.... I try very hard to make sure I don't get adhesive under the butt cap section where the reel foot will be. The last thing I want on that section of the insert is a layer of uneven adhesive that may hinder the smooth sliding of the foot. I always finish the insert, dry mount the cap to locate where the foot will be located, mark that section then rough up the rest. Work for me and I can assure you the 15 minute epoxy I use holds TIGHT.....I only know this because I've been forced to undo my mounting once (maybe twice) after brain farts. (Tom Key) In the past 30 years, I've had a couple of butt caps come off when the epoxy failed, I put a screw through the bottom of the cap now. Stainless screw for bright and brass for blued. Maybe the epoxies are better now that <20 years ago. (Don Anderson) I suspect the bond failures may have more to do with your colder seasonal climate change than the qualities of the adhesive. Thermal stresses can play havoc on the metal/wood bondline which is tenous to start with. Well...I went through a lot of glues, including hot glues, pliobond...(ugh) and others for glueing ferrules. Every ferrule and butt cap failure I've ever had or encountered always was under the same circumstances. Moved from a nice warm cab of a truck into freezing outside temps. Instant failure. Much the same could be said of me, the guy who was in a nice warm truck cab outside into freezing weather. It's simple thermal shock. Much the same as putting something straight into a hot oven from the freezer. Something is going to give. The bowl, the glue, the owner/operator. Pinning is no big deal, simple easy insurance, and easy to repair if need be and you won't have to sit and tend the fire while your buds are off fishing...just saying...of course they have nothing to complain about if the booze is gone when they get back if they can stick thier butts over a nice hot fire and get warm...ask me how I know. Now...having said all that, I do believe 'hot glues' are the answer to all these problems as if something does give up on you a flick of the Bic is all it takes to fix the problem at least for the weekend. But I don't use it...and who cares? (Mike Shay) Well that splains it!!!!!!!!! I use epoxy and over varnish and never have I had a failure! But then again being a dry fly fisherman and only go out when the temperture is above 60 degs. I have had no problems. Ah yes, yet one more reason to fish dries! OK, let me have it!!!!!!!!! (Joe Arguello) Pinning? No. It creates a weak point but that may or may not be negligible. Epoxy? Yes, but it must be done according to the gap specifications of the epoxy. If a ferrule is applied to a rod I think that you don't want it to come off, period. But if it loosens for some reason then you don't want to have to deal with a pin. And of course, if you want to remove a ferrule with epoxy under it then don't try to do it with heat. (Don Ginter) If epoxy resins died that readily, how come my graphite spinning rod which never comes outta the truck or airplanes that are now mostly super glue and epoxy are still flying. The epoxy glue in each case just slowly gave up the ghost. No big catasprhoic failure. Over time the butt cap just oozed off the real seat insert. [ the insert is bare wood @ cap glue point - wood is usually Zebra]. (Don Anderson) If you do turn/sand the insert to less than .685" make sure you don't turn the area under where the hardware is mounted/glued onto much less than .685", otherwise, you'll have a loose, sloppy fit. Most adhesives don't adhere well to finish - you're better off leaving bare wood where you apply the adhesive. (Mark Wendt) Most adhesives don't adhere well to finish - you're better off leaving bare wood where you apply the adhesive. Sorry, Mark, but I have to disagree with you on this one. In over two decades of putting these things out the door, I’ve never tried to make sure I had bare wood under the hardware. As a matter of fact, every piece of hardware that I've made in my shop has varnish (or epoxy, or cyanoacrylate, or Clear Coat or whatever phase of finish I was going through at the time) under the cap and the cap is glued straight to the varnish. They aren't coming off and I really don't recall ever having to replace a butt cap because the glue failed there. (Bob Nunley) While the finish may give a decent substrate for the epoxy to adhere to, and may adhere well enough for keeping the butt cap on the insert, you will still get the best strength when the epoxy is put on the bare wood. Finish can pull away from the insert, and the wood would actually have to shear away from the underlying wood for the bond to break. Only time I ever had a cap come off (without being pinned) was where I'd epoxied over varnish. (Mark Wendt)
I noticed Bob Nunley posted he used boiled linseed oil on inserts followed by his finish. Does anyone use BLO under Helmsman Spar Urethane on blanks? Guess this is to "pop" the grain? (Dave Kemp) I have been chasing this topic around for a while on the instrument maker forums. Some makers use BLO under Tru Oil, seemed like a good idea. Others have warned that the BLO never really dries out after letting it sit for a week or so and then you have not quite dry BLO under your finish which will come back to bite you. So what to do. A quick coat of shellac will dry in minutes and will "pop" the grain as well if not better. Just what I have read, so you can take it for what it is and make an informed decision. I have a reel spacer sitting with BLO Tru Oil combo on it I will keep it on the shelf and see what happens, in the meantime shellac is really much easier and faster so I am going with that. (Ron Petley)
Last year at a show I was told that the finish on my reel seat fillers was too shiny, that I should make it flatter, I guess. At that time, I was using polyurethane or helmsman spar urethane. Now I am using Tru Oil. I wondered what others experience is in this regard? It's not hard to use a little 4-0 steel wool to get that look, and while I subscribe to the plain hardware is best school of thought, I wondered if this fellow's suggestion was the norm? (Dave Kemp) Your query kinda reminds me of the old Sufi story of the old man and his grandson taking a donkey to market. Quite independently I decided my r/s inserts were too shiny, yet I wanted that hardened surface. I have settled on Minwax, spray, fast drying, semi gloss, PU. I like the satin finish, spraying and quick dry works great to speed up work. Kinda wish there was a $ interest, but, alas, none. (Darrol Groth) NO! opinions are like a*******s. Everybodys got one. I discovered a long time ago if I was going to build rods, I needed to please myself. If I build a rod at someone else’s request, they can tell me what they want, and I will maybe comply. You want to please someone but sometimes experience tells me what they will be happy with in the end. My opinion. (Timothy Troester) You will find much disagreement about how much shine a rod and its components should have. There are those who think the flash from a shiny rod will scare fish, those who think the flash does nothing to the fish, and everything in between. Then there is the view that shiny attracts only the fisherman (with perhaps the connotation that such a fisherman is naive). I like rods and rod components with finishes varying from shiny to satiny, but do prefer careful, blemish-free finishes. The end point of no shine may well be spraying a rod and its components with camo paint! (Tim Anderson) I think we are venturing into an area of personal preference ... I personally like shiny and I do a spit and polish job on all my reel seats so they gleam. Thanks to you folks for your responses. I think I am going to stay with what I'm doing, although on rods I've done in Deks Olje. I do believe a satin finish on the filler looks better. Now if anyone else tells me that my rods are too tip heavy, I'll just suggest they lean back a little! (Dave Kemp) I had a graffite guy tell me recently that my new 3wt Baby Leonard was heavy. I knew then that some things are issues of perception and some people’s perceptions are off. (Timothy Troester)
I have a reel seat that I turned from European Red Stag antler that I had used a PU finish on. Unfortunately, after a year of playing with steelhead, the finish appears to be flaking off, Although the antler surface is pretty porous, the PU doesn't seem to want to stick, but only in places. There are areas where I couldn't blast it loose. I'm looking for an alternative to use that would let me overcoat both the bare sections and the areas where the finish seems to be holding. One idea is to seal my seat threads off with Teflon and electrical tape, and dip it or turkey baste it with a 2-part wrap finish. Any thoughts? Any suggestions welcome. (Greg Kuntz) I wouldn't have use PU. I would have used pure cordoba wax (if carnuba can be called pure). Carnuba wax is used on bone and antler pipe stems. Thought it might be a comparable situation. (Timothy Troester) Bone reel seat finishing, sounds cool. I would think to impregnate it with a resin. And then after it dried do a French polish of the resin. Minwax wood hardener or Smiths A/B. (Tony Bellaver)
I have to refinish a stag antler reel seat. The previous finish appears to be a poly of some sort, but it flaked off. The prior coat had not penetrated the surface of the antler, and the exposed surface is pretty coarse, as you'd expect from bone or antler. I'm looking for a finish to accomplish two goals:
Any suggestions? Would a flex coat or some other 2-part finish work, or would it flake off in a year? Thanks in advance. This time I promise to print the responses and post them on my bench (Greg Kuntz) I'd recommend either Waterlox or Birchwood Casey. Either one will provide the penetration and build that you are looking for if you will ensure the original finish is entirely removed. You can build either product up to a very glossy finish and leave it that way or buff it out with 0000 steel wool for a Matt finish. Bone pipe stems are finished with carnuba wax if that my help. (Timothy Troester) Many, but I see more often cyanoacrylate, but this is also a function of need to do gap filling. (Dave Wilson)
|