Bamboo Tips - Tips Area - Wraps |
|
< Home < Tips Area < Wraps < Finishing < Shimmers
The "shimmers," as I call them, you know, micro bubbles, whatever, are making me crazy! So far I've tried hot varnish, a drop of thinner on them first, 2 coats of Damar varnish followed by another of spar while still wet, flooding the wraps with varnish then hitting them again in as soon as the first coat soaks in, all to no avail. While each of these has helped some, the bubbles just won't go away! I mostly use 3/0 YLI, and find that MOW causes the least problems with it, but I'm wondering if anyone else has had any outstanding success with any particular combinations of thread and varnish. Please don't tell me that I'm going to have to break down and learn how to get along with Gossamer or spend 10 bucks a drop on some special varnish formula! And why doesn't nylon get these bubbles when you put epoxy on it, and it does when I use varnish? I've been staring at G rods till I'm cross eyed, and I don't see shimmers in them at all. (John Channer) Just a thought, it works on Epoxy. Run a hair dryer over the wrap after applying the varnish. This warms the trapped air and makes it come to the surface and out of the epoxy. What I do with the Gudebrod finish (water base varnish) I use is saturate the wrap then wipe the wrap with a paper towel. That removes the excess finish. This leaves the wrap real smooth. I don't get any fuzzies from the paper towel. It should work with regular varnish too. I also use 3/0 YLI thread for most rods. (Tony Spezio) I used a rod turner and MOW spar thinned with mineral spirits. One part mineral s to four parts spar. I then applied the varnish as the rod turned using those Stim-U-Dent tooth picks that you can get at a drugstore. Put on about 4 coats and they come out like glass. I found that I had more "shimmers" when I tried to use a small sable brush. I will also add that there are a lot of suggestions in the archives on how to do this. I have only built 2 rods so far but this worked for me. (Bill Bixler)
I just put the first coat of spar on my wraps and a persistent problem has shown its ugly face again. I'm having problems with bubbles/air pockets when I finish my strippers and crowned ferrules. I always start from one end and work to the opening but I can almost count on an air pocket somewhere on the stripper or the ferrules. Any tricks or suggests are most welcome. (Dennis Aebersold) If you are using a brush you might try using a needle to apply the varnish. I use what is called a yarn needle (small size) it has a blunt tip and they are very smooth so they don't catch on the silk thread. Just put a drop of varnish on the needle and apply to the wrap. I use a device that rotates the rod and I just hold the needle in place to spread the varnish. Apply more varnish until the wrap is covered in varnish. Let the rod rotate for about 1/2 hour then dry in drying cabinet. It is rare to have a bubble form using this method. I have tried a toothpick to apply but I found that the wood would sometimes catch the thread and cause a fuzzy spot. If I have any imperfections after drying I use a double edge razor blade to carefully shave off the imperfection and then recoat. (Tom Mohr) I know one fellow who uses a dental pick to apply varnish to wraps. I've never tried it. I use the brush that Golden Witch sells, and that works FOR ME. It's a flat brush with very short bristles, and I use it on edge on my rod turner. (Neil Savage) What I do is apply a "wet" first coat, let it soak a short while, then wipe it off as the rod is turning, This smoothes out the wrap, kills any bubbles and smoothes any fuzzies. Let it dry before applying another coat. I find doing this helps smooth the wraps for the second coat. Makes for a lot less sanding on the wraps. (Tony Spezio)
As an aspiring rodmaker working on his first rods I'm too ignorant to give advice but I've plenty of questions and more coming up all the time. I find answers to most of them in my books, the rodmakers archives and from the tips archive I've been compiling for some time from the posts of more experienced makers. There will be some problems however, this being one of them, that I can't anticipate and seek for a solution for. The first rod I actually finish will not have glue lines and will have the best finish I'm capable of applying. Accordingly, had I finished that rod and found the infamous "shimmers" on my wraps I too would have had the vapors. While I do appreciate you're genuine concern for new makers with small budgets, I'm one of them, I'm glad you posted a complete explanation of the issue. I will be looking forward to any posts from any makers that have found solutions to this problem. (Wayne Kifer) I think the thread has more to do with it (or at least as much) as anything... Some may have contaminates/additives from the manufacturing process... Some Silk/Nylon goes trans with Spar and without shimmers, some do not... Here's the tricky part, use those that do..."-) One of the biggest favors you can do your self is getting a YLI and/or a Gudebrod Catalog, pick out 10/15 colors you like and do two cane sections with test wraps, one on flamed, one on blonde cane... Mark the color number next to each wrap, then put on a rod turner and LOAD the wrap with Spar... You will be very surprised what some of these colors will do... Flex Coat works very well also for the first coat but there are still colors that get shimmers, plus I have had "chatter" in the guides from epoxies so do not use them much any more. The "chatter" is a squeaking sound coming from the guides, I believe the epoxies is not flexible and produces the noise, some say I'm hearing things. (Dave Collyer) Dave's workmanship with his thread wraps is of the highest quality. Any new rodmakers will be well advised to take his advise. Some experienced guys might also listen up. (Jim Bureau)
I'm seeing what I've heard called "shimmers" in some of my wraps on a test section I'm setting up for colors . What causes these? Is the cane not flat under the wraps? I'm using MOW high gloss straight from the can. (Frank Drummond) Those shimmers are air bubbles in the wraps, your MOW is not penetrating them and therefore not displacing the air. You need to dilute it some or use Walnut Oil and Amber varnish to fully saturate the wraps. I use the walnut oil and it results in perfect wraps. (Larry Puckett) Here's Mike Brooks instructions on this. The original stuff can take weeks to dry but Mike says that overcoating it with MOW or a 50:50 mix of MOW and Japan Driers will kick it overnight: (Larry Puckett) Mike Brooks here....one of the many hints from the forthcoming book by Steve Kiley, maybe Gnome, and myself..... Make your own walnut oil varnish. Here is the formula. Buy a 4 oz. bottle of Walnut Oil Medium (NOT straight walnut oil, this is a mix of Alkyd resins and walnut oil - I like Graham Artists version but Winsor & Newton, Shiva, and several other companies make this, also, and all work just fine; cost around $5). Mix this 50-50 with your MOW in an 8 ounce bottle. Stick this in a pan of boiling hot water (capped, of course) and allow it to just sit there until the water cools. Stick this on a shelf for two or 3 days. Shake and use. If you want to be really authentic and use the EXACT same formula that is sold as "amber and walnut oil" at $30 plus for a 1 ounce bottle, forget the MOW and just mix 1 ounce of amber OIL (buy from Kremer or other artist supply house; it will cost you around $20) and mix, heat in the boiling water, etc. as above. Then, you have five ounces of genuine amber-walnut oil varnish. The plain varnish-walnut oil mix works the best for me. To apply. Brush on a good, thick coat using a brush. Then, cleaning the brush in lacquer thinner and drying it on a clean rag, wick up all of the varnish that you possibly can. Really be fanatical about this and leave the wraps just barely damp, not wet. Repeat all of this in a couple of hours (1 to 4 hours later). Then, just leave it set overnight. Do this again and let set overnight. Then, simply coat with straight MOW or any other good grade of spar varnish. The wraps will be dead clear, no bubbles, no frosting, just perfect. In addition to clear wraps, this makes for gorgeous translucent colored wraps if you use fine, lighter colored silk thread for wraps. Try Pearsalls Gossamer Hunt (looks like red candy when done), or YLI #100 Rose (turns a gorgeous deep burgundy). If you want to duplicate that transparent olive color seen on many older Leonard's, use it on YLI #100 pale olive thread. It looks like I'll be expanding the learning curve a bit. Now explain this to me. Every time I get to a new step in my first rod I can count on spending more $$$ on tools, supplies, and general stuff. I guess it's unrealistic to expect this to ever end. Is it??? (Frank Drummond) Now you know why a bamboo rod costs as much as it does. (Larry Puckett) Yep. For those of us who like to tinker, and make or purchase more toyls, it's a never-ending saga. (Mark Wendt) Once you have the basic tools, I figure a rod costs in the neighborhood of $200 with nice fittings. Not counting your time... Less if you turn your own reel seat insert, maybe even less if you get into making ferrules and reel seat hardware. Therefore if you make 8 or 10 rods you should at least break even. That depends, of course, on how much you would normally spend on rods if you didn't make them yourself. (Neil Savage) I think making your own ferrules and reel seat hardware adds to the cost of a rod in time spent unless you have CNC setup and the materials available. I seldom make ferrules and hardware any more other than my own rods because of time and the cost of materials. I use a small amount and by the time I add shipping costs it is not worth it to me. You are in the ballpark with the 200.00. (Tony Spezio) And I convinced myself I would save $$$ if I made it myself. Kind of like tying flies to save $$$. Is this denial? (Frank Drummond) I have finally come to a time in life where I have too many tools and tying materials, no place to put any more. It is time to start letting some of this stuff go. It is like removing yourself from friends. LOL (Tony Spezio) Now Tony, Mark Wendt said you CAN NEVER HAVE ENOUGH TOOLS!!!!!! (Will Price) I know Mark well enough to know he don't lie but sometimes he "MIGHT" stretch the truth. Then again, he is not as old as I am. Youngsters need their toys. I know, I have been there. (Tony Spezio) I'm shocked! Shocked I tell you! Might stretch the truth? Might? =8^Þ (Mark Wendt) Also, remember: "He who dies with the most toys, Wins" (Dave LeClair) I'm in your camp Dave. But remember, it's "toyls" not toys. (Mark Wendt) Toyls me boy, toyls... ;-) A term coined by our own Larry Blan. (Mark Wendt) Yep. (Mark Wendt)
Another option at this web site. (Bernard Elser) A lot of times it is something very simple that causes the shimmers. Not getting penetration because the wrap is too tight. Harry solved this for the list a good while back by stating that if you can't wiggle the guide after it's been wrapped then the thread is too tight. I've had good luck by making sure that the wraps are not too tight and thinning Helmsman spar urethane 50/50 with mineral spirits for the first coat. Very seldom have a problem with the shimmers. (Will Price) I find you get better results if the blank is varnished first also before you put the wraps on. (Gary Nicholson)
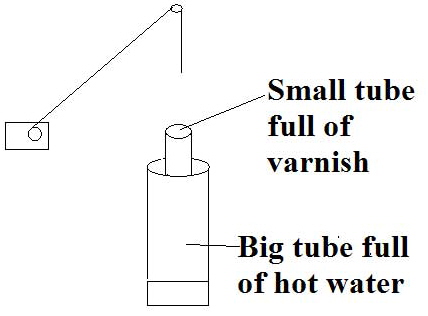
I think I might have come up with an original idea that seems to kill several birds with one stone. I put the first coat of varnish on the wraps with the dip tube, meaning I dip the whole works with dry (unvarnished) wraps. Using this method I have eliminated all (99.9%) "shimmers". As a bonus this also puts the first coat of varnish on the rod section. I've only tried this twice but had good results both times with literally NO extra work trying special finishing methods with weird varnish cocktails. Here's exactly what I've done: First: Thread- the two rods I've done this way have been wrapped in brown thread-one rod with Pearsall's Naples Chestnut Brown and the other with Gudebrod OO brown silk. Don't know if this matters but I thought it would to someone. My rod wrapper is a rough copy of the Sully's wrapper but my thread tension devices are not nearly as good so I have no real control over thread tension but I would say my thread wraps are pretty tight. Second: I get my varnish nice and hot. Some people have suggested heating a small amount of varnish in a can and then applying it to the wraps so I heat the whole dip tube with hot water. My 1-1/4 inch PVC tube of varnish sits inside of a 4 inch PVC tube that has the bottom capped. I fill the 4 inch tube with hot water (about 150 degrees F). I put the tube with the varnish into the 4 inch tube and wait about 20 minutes for the varnish to get hot. I dip normally, stopping at the bottom of each wrap for a few seconds to help eliminate drips. The hot varnish seems to push out what ever air is trapped in the thread and it just bubbles to the top where I can pop them before they become problems. A word of caution - make real sure there are no sparks or open flames or cigarettes (right or left handed cigarettes) around while you're doing this. I use Helmsman Spar urethane and the can says it has a flash point of 120 degrees F. I also do not know if I am damaging the integrity of the varnish by heating it like this so take what I say with a grain of salt. For all of those who know better-If I'm all wet with this idea please tell me so. (Bill Felter) Since writing this I've done 1 more rod this way and so far no problems. I'm still using Helmsman Spar Urethane. My complete varnish regimen goes like this: 1. Dip section in hot varnish with dry wraps, let it dry over night. 2. Dip section again in hot varnish, allow to dry for 2 days 3. Apply third coat of varnish to wraps only, allow to dry for 2 days 4. Apply fourth coat of varnish to wraps only, dry for at least 5 days 5. Sand wraps, scuff the entire section and dip in hot varnish for the last time 6. Now I have 3 thin coats on the rod and 5 coats on the wraps 7. Let the rod dry for a week and then polish out with rottenstone powder and finish up with 3M machine polish. (Bill Felter) How do you heat up your varnish? (Todd Talsma) I heat the varnish with hot water. The attached highly accurate drawing:
This will show the gist of it. (Bill Felter)
I have finished a dozen rods or so now. I started out with white Pearsalls Gossamer and thinned flex-coat and then transitioned to colors and Amber varnish and spar. Then the last few rods I tried the larger threads again. I have been using thread in the 00 sizes and started having problems with bubbles developing under the wraps as it cured. Now I know it is VOC's boiling off but how can I fix the end result. When I used thinned FC, I had trouble getting consistent results from bad mixes to shimmers. I talked to Mike Brooks about a year ago and switched to Walnut Amber varnish and enjoyed good success. Now I am looking for perfection! Seems like after 1-3 days, shimmers or bubbles appear. The Pearsalls was less problems with bubbles but more problems with gaps in the wraps. I like the color of my Gudebrod gold and have a rod mostly finished but am having fits with the trim and stripping guide wraps. Have redone them four plus times. Spent all Sunday afternoon putting layer after layer of spar only to find shimmers on Monday morning. On Wednesday morning bubbles starting forming under the stripping guide wraps along the foot. My procedure has been this.......wet the wraps with the amber varnish and a T pin slowly wicking under all the wraps and pushing the bubbles out from along the guide foot. Give it an hour or so to blow all the bubbles off and then apply spar thinned 25%. I add two to three layers as quick as possible to get thickness. Usually recoat every 4-8 hours. I know this is going to shrink as things cure, but how do you keep the bubbles and shimmers from showing up????? (Barry Janzen) Maybe putting on so many coats in a day is not allowing the bubbles to disperse or come to the top. I only put one coat of Spar on wraps a day and it is a very thin coat each time. After several coats over the course of a week and another week to let them cure, I sand them flat and am ready to dip. (Greg Reeves) Tell me, what exactly do you mean by "thin" coats - do you mean that the varnish itself is well thinned with turps or thinners, or do you mean that you use the stuff full strength but brush it on very sparingly? Or doesn't it matter? I am interested because after some years of dipping before wrapping, I have finally gotten sick of trying to wrap Gossamer over a base of varnish and am going back to the other approach. With some small degree of trepidation, as I recall what a tedious job it was getting the wraps filled enough to varnish over. However, what a joy to be able to snug up errant wraps with one's thumb without having the bloody things burrow themselves down into varnish, never to be moved again! (Peter McKean) Sorry about that. I do use MOW thinned with Turps on my first few coats on the wraps. I fill a small bottle about ¾ full of MOW out of the can and then top off with Turps. After about three coats of the thinned varnish, I go full strength for the next couple until I am satisfied that it is built up enough to sand flat. (Greg Reeves) OK, so here's the secret I told myself I would take to the grave! I wrap the guides on then simply dip the whole mess at once, no varnishing the wraps first! One more thing is that I lower the wrap down into the varnish very slowly so that the varnish is actually wicking itself up the wrap, this forces the air out and you only have to do this on the first dip. I always dip once in the morning and then again before bed or the other way around. I don't even look at the rod between the first 2 dips. Now I let that set for at least 24 hours and I can take care of anything I don't like. (thread tags, dust, drips, etc.) and if I need to I can then build up the wraps before the third and last dip. Using this method I can make the finish as nice as I want to. (Joe Arguello) I have to agree with Greg. I use Mike's method too and I wait several hours (about 4) between the walnut oil and amber coats then let it kick overnight. You also need to add some Japan driers to the walnut oil and amber to get it to kick -- MOW by itself just won't do it anymore. Mike said to add about a tsp of Japan drier to a one ounce bottle of the walnut oil and amber. Also, I wait 24 hours between MOW coats. (Larry Puckett) I don't have shimmer problems, even on clear wraps. I use thinned varnish on the wraps VERY heavy, then wick off the excess after it's sat for a few minutes. If you're going to have shimmers, you can see the problem areas while the varnish is still heavy on the wraps. I just take an agate burnisher and gently tap the areas where those micro bubbles are and they'll work out of the thread. Also, I've heard some have had success with Thread Master instead of flex coat. Flex coat cures to a yellowish color. From what I understand, ThreadMaster cures crystal clear. I've seen rods done by others with Thread master, no shimmers, no bubbles and very impressive looking finish. If you want to try the varnish thing like I do it, get some Last and Last Marine Door and Spar Varnish by Absolute Coatings and thin it about 10%. I've also had good luck on my impregnated rods with Helmsman, thinned about 25%. I do NOT heat the varnish, but my varnish and finish rooms stay at about 75 degrees all the time. I have heard that one rodmaker, slightly heats the varnish, but also takes a heat gun or hair dryer and slightly heats the wraps on the rod before he applies finish to them. I have never found that necessary, but it might help if you're still getting shimmers. (Bob Nunley) Part of your problem stems from the diameter of the thread. 2/0 thread holds and traps a lot more air than the 6/0 thread you started with. It takes more effort to get all that air out and particular attention goes to the air trapped under the wraps and along the foot. The seal coat can be a wide range of products. The three most important qualities are low viscosity for rapid penetration, fast gel time, and final clarity. I am not a great rod maker. I probably never will be as good as most of the makers on this list, but I do know a few things about coatings. I tested a few systems on Size A nylon and 3/0 silk before I got to where I am now. The best was a mixture that Dave Bolin has on his blog under secrets. It is thin, fast, and the clearest I've found. Others will work though. I successfully made translucent wraps with 50/50 FlexCoat with alcohol, the original Walnut mix, 50/50 Ace Spar, the same mix of two different pollys, and straight Penetrol. Two coats makes it harder to miss something and removing the excess helps speed drying. Fast dry really helps. You may not be using the same product for the build coats as you will for the seal. Reasonably complete cure of the underlying coating helps prevent incompatibilities that could take forever to harden up. Leveling coats are another compromise of speed and function. Take Ace Spar, a traditional varnish. It has a very high solids content, so it builds fast and hugs the corners better than thinner mixtures. The down side is that it has a 48 hour re-coat time and needs to harden for many days before addressing defects or polishing. Polyurethanes like Helmsman re-coat in 4 hours and polish in a couple of days, but it has a much lower build rate (solids) and tends to pull more from the corners. From your description of what you are doing, you want speed, so polys are where you should be working. Even with them you are not going to be able to slather on so much, so quick. The coatings engineers design varnishes to balance solvent evaporation, gel time, and leveling. They design for single coat, or a few coats spread over time. The re-coat specification can not be ignored without having problems, nor can you get away with more than a few coats in rapid succession. Because gas diffusion through the hardening film is necessary for cure, making very thick films take exponentially longer to cure. It is more time effective to apply 2 coats of poly and let it kick for a day or two before adding more, than to try to get away with 6 coats a day. Tony Spezio has a good system that fairly balances time... 2 coats then harden, 2 coats then harden, ... 6/0 thread takes about 4 coats, 3/0 about 6 coats, 2/0 will probably take 8 to 10. So use the thinnest thread you can, find a seal coat that you can rely on and use enough of it to displace all of the air, and slow down the build rate. You might also want to invest in a test dowel or two. The more times you cut wraps off and mess with it, the more chance you're going to muck something up. (Larry Lohkamp) I acquired some Shellac Flakes and denatured alcohol. It comes in three flavors, Orange, Blonde and Garnet. I have all three kits from Rockler, but been busy in the rod metal shop and haven't tried it yet. Would that work for this propose?? (David Dziadosz) I know using some guides on bamboo rods sometimes cause a gap along side the guide foot. Would a small syringe with an insulin needle help get the air out?? I'm Type II, so I don't have the tools to try it! (David Dziadosz) Something we all need to do is use the correct terms for the look we want. Transparent means that regardless of the color one can see a sharp image through substance (glass clear). Translucent means that light will pass through a substance (muddy image if any). Shellac is more of a color preserver it tends to make wraps become more opaque and only slightly translucent when coated with varnish. A number of the "old masters" including Jim Payne used it. It tends to have real darkening effect on some of the lighter threads. (Doug Easton) I have talked to several (chemical) engineers employed by the makers of varnishes we use. What I have been told is that the bubbles (that appear after the wraps are perfectly coated) are actually voids caused by solvent entrapment. The volatiles are trapped in the film, are not allowed to migrate to the surface, and the solids absorb the thinner, and the solids don't flow into the void created by the absorbed solvent. The problems don't seem to occur if the thread is absent. Pile on the varnish with no wraps and the worst you come up with is wrinkled varnish. I would love to find an near-filled/unopened can of varnish at a garage sale that was bought in the 30's 40's or 50's and see if that product made a better coat on wraps. I have been told by some engineers that solids in the varnish are a different ratio now a days, so the spar is different. Now a days. Heavier/thicker silk seems to make the problem worse. (Chris Raine) I use nylon wraps and it don't seem to matter what varnish I use or how I apply it; I never get bubbles. I wonder if the silk vs. nylon might be an issue?? (Dick Steinbach) Seems like I have been lucky and have not had this problem with varnish, I don't know if this might help. When I was building Graphite rods and coating the wraps with Flex Coat, I would get bubbles. I used a hair dryer at low heat at a distance to apply a bit of heat to the wrap as it was turning. This brought the bubbles out and the Epoxy would flow smooth.. Just a thought, it might work with varnish. I apply the first coat of varnish, wait several minuets then wipe the first coat off ( pressing the varnish into the wraps) with a Bounty paper towel, let this set for a couple of hours then apply a coat from the can. It takes about two coats from the can to completely fill the wraps. I use YLI 100 and Helmsman. I do not thin the varnish. After drying a couple of days, the wraps are steel wooled with 4/0 steel wool and then gone over with a Sally Hanson Sand Turtle. The Sand Turtle flattens the varnish on the flats to give the wraps more of a Hex look. I get real nice smooth filled finished wraps. (Tony Spezio) To prevent the bubbles try thing your epoxy a little more, or try starting at the foot and brush your epoxy to the root. If you work from the root brushing to the root you can trap air under the raps and you will miss the seeing it trapped air until its dry. (Jim Moore)
I was riding in the car the other day, my mind wondering, and a couple things occurred to me on the subject of "shimmers" and "wrap gaps", it being an occasional topic recently. I recalled my own experience with the issues. There are three things I did to deal with the problem that seemed to make the biggest difference. 1) I cut my varnish as much as 50% on the first application. There are varying opinions about that. 2) I lessened the tension on my thread while wrapping. At first when I wrapped the guide feet i was thinking the tighter the better. It ain't true. I think that stretched tight thread doesn't soak up the varnish very well. 3) I used a device to put tension on the thread spool instead of using a tension device to pull the thread through. I think the latter type device bunches up the thread in spots and does not allow the silk to lay well together. Anyway, of all the suggestions that were discussed most recently I do not recall these in particular mentioned. Just thought I would throw it out for those that might still be struggling some. Well, struggling with these particular issues. (Timothy Troester) To add to Timothy's comments, I was talking to Andrew Chan a couple of weeks ago on this very subject, and his suggestion was to add some Penetrol to the brew, which he said works very well for him. I agree, too, with the tension thing. (Peter McKean) I started out, Gang, with the idea that thinning would enhance penetration. I mentioned this in passing to Jeff Wagner, he of the superlative hexagon and still better varnish, who said," Where do people GET this stuff?!?!?" (he disagreed) Translation: while the extra solvent does indeed penetrate, once the invading solvent takes the high ground, somebody's gotta hold it. It was Jeff's feeling that diluting the solids left fewer 'air displacers,' if you will, and that left the door open for air to sneak back in after the volatiles had boiled off. My answer is still the Norling wrap, utilizing thinned Flex Coat, since the epoxy apparently is all solids once it kicks over. All I can tell you is that I have had zero -- as in, none -- shimmers since I started doing this, although I know that some o' you magical guys do this with ordinary spar. I think Bob Nunley talked about tapping the wrap to encourage the exodus of air from the fresh varnish, and I know Jeff does that, too. Most of the solids content, in my own case, is betwixt mah ears, so anything as foolproof as Flex Coat has a certain appeal. (Steve Yasgur) Not sure if you remember me, we met at the makers day last month. Did you get a chance to try the Threadmaster Lite epoxy yet? I forgot to mention, both parts have to be mixed equaly and its fussy, it won't set properly if they are not close to equal. Also, a small trick to prevent shimmers is to pour the mix onto some alumnium foil taped down to a flat glass plate and let the mix sit for a bit. This allows trapped bubbles from the mixing process to escape before you work it into the wraps. Hope I'm not telling you how to suck eggs.......I know you've probably made about 500 rods more than me. It's not an original idea of mine though, I think I may have read about this trick on "Clark's" or the Rod Builder's forum. It may in fact be one of Chris Carlin's tips. (Norm Knieriem) When I was building Graphite rods I would use a hair dryer on low heat passed over the wrap after applying Epoxy. This would warm any air bubbles and they would dissipate. The Epoxy would smooth over and leave a nice smooth finish. Just passing this on, it might help on removing bubbles. I found it also works with varnish though I seldom have to use it. (Tony Spezio) When I first started building graphite rods I was told by the premier custom rod builder in the metropolitan Houston area that the trick to getting rid of bubbles in Flex-Coat was to simply slowly blow across the bubble. His contention was that it was the co2 that did the trick. It has worked quite well for me, but have never tried it with other types of finish. (Frank Schlicht) I was the one who recently started this discussion.....THANKS for all the suggestions and help. I have been messing about with just about every suggestion to see how it improved things. I concluded that several issues were compounding on me. First of all-----Temperature.....I ususally build in the winter. Temps are 15 deg. warmer. Second of all------ Switched to YLI from Gossamer....larger volume of varnish needed. Thirdly------ was not rushing the varnish applications and allowing more drying time. Fourthly ---- Switched to Snake Brands guides.....Larger gap then my highly ground feet. I tried and tried and tested and tested most of the suggestions and none fixed my problems. I would still get a void under the wraps by the guide foot. I came to the conclusion that completely TRANSPARENT wraps were not possible at this time with any of the varnish concoctions I have available to me right now. I have gone back to Thinned Flex Coat and allow it to cure for 48 hours before finishing with varnish. I haven't perfected it yet and still have a few shimmers but I will stick with that for the time being. All the gaps/bubbles by the guide feet are gone and I will keep with it for the time being. (Barry Janzen) Did you try this one? (David Bolin) Yes.....tried that. Tried straight Walnut Amber oil first like Mike Brooks does. Found that it shrunk when cured and left an air pocket by the foot. If it didn't.....it wasn't cured. I removed wraps several months later to inspect and found a pocket of "gel" by the guide foot. I think I like something that cures firm and stays put without shrinkage. (Barry Janzen) I've tried all the concoctions and every make of varnish I can get around here and none of them were fool proof. The best results I've had have been with epoxy thinned with alcohol. I've used both FlexCoat Lite and Diamondite, Diamondite dries harder and faster than Flexcoat but doesn't work on white thread, it leaves a blueish tint that shows up in day light really bad, colors seem to be fine. Epoxies have their own set of problems though, you must be careful measuring and they have their own type of bubbles that are even worse than shimmers, mix well, et sit for a few minutes then add the alcohol, alcohol seems to drive air bubbles out of the mix. Apply generously then wipe off the excess. Too much epoxy left on the wraps will tend to make the rod rounded where the wraps are and it's a PIA to sand it flat, better to get it off wet. (John Channer) You are right...epoxies have their own problems. I however have several years of playing with West Systems and know some of the problems you can run into. A couple of years ago I gave up on FC because of them and poor mixes. Now I have gone back and this time I mix on a grain scale for accuracy and mix the two parts thourghly first and then add the thinner. I was not being careful before and adding thinner later as it blew off. If done right, it will be clear. Milky is bad and was where I ran into problems in the past. Still don't have it perfected but am closer than I was before. It is all about the learning experience.....right???? (Barry Janzen) Yep! do things, make mistakes, screw it up, do it over. (John Channer) Did you use a 1:1 mixture of "Walnut Alkyd Medium" (not walnut oil) and "Waterlox Original High Gloss Finish"? Sorry to be so specific. But this formula has been modified replacing Waterlox with other varnishes and it didn't work. The only combination that has worked consistently for me is exactly as described on the blog. (David Bolin) Are you burnishing the wraps before applying varnish. This will smooth the wraps a lot and will relieve the tight spots. It will also pack the threads together. It is my opinion that the Shimmers are caused by uneven tension on the thread and shows up more when the varnish is thinned. I mentioned I wipe the varnish with a bit of pressure after the first good soaking coat. This presses the varnish into the thread wraps. If you have not tried this, give it a shot and let me know how you make out on it. I just stripped a rod I had done this way because the colors did not come out like I thought they would. The varnish was hard all the way into the guide foot void. Had to do a lot of scraping to clean up the areas. I went from Gossamer to YLI, I like the YLI better. (Tony Spezio) I am only recently working on burnishing my wraps. I haven't needed to because I tried very hard to pack them each turn. Very time consuming but hey....what are we doing here? Actually I had heard just the opposite.....that burnishing sealed the wraps and kept the air from breaking the surface. I am really amazed that you found hard varnish.....truly amazing based on my experience. (Barry Janzen)
Just a simple question, what exactly are shimmers? I have seen references to this, but, obviously, I have not experienced this since I have to ask the question. (Jon Holland) You'll see "shimmers" in clear or transparent wraps where air has displaced the varnish or whatever you are using to finish the wraps. Looks a little like it's been frosted. (Mark Wendt)
I’ve been experimenting with a scrap butt section testing wrap coatings to minimize shimmers. The cane is flamed dark wrapped with Gossamer Straw. I get a really nice shimmer free wraps with 50/50 mix of MOW and Walnut Medium. The wraps are shimmer free except that about 50% of the time there is an air void near the guide foot. Using minimum wrap tension I flood and dry the wraps 2 to 3 times before leaving it over night (guides down). The guides look perfect when I leave but very consistently there will be a void near the guide foot in the morning. Any suggestions? I’ve been getting consistently good results with warmed spar but I’m hoping for better. (Ray Taylor) One thing I've found that helps to eliminate just about all of those problems is that while the wrap is still flooded with the walnut oil mix, gently rub your burnishing tool on the wrap so that it forces the walnut oil into the thread and into the spaces and works the air bubbles out from both the thread and beneath it. (Mark Wendt) Of all of the ways that I have tried to do away with the shimmers the one that works best for me is to use Tru-Oil for the first coat. After that I use my normal varnish. It works for me. (Hal Manas) When I started messing with bamboo I was fascinated by the clear wraps, and spent far too much time experimenting with concoctions. A lot of materials will produce translucent wraps, but two characteristics seem to be the most important. The first is obvious, it needs to be water thin in viscosity. Those materials tend to wet well and penetrate quickly. The problem I found with very thin products and mixtures was the aggravating trait of turning frosty over time. I believe that it is trapped solvent diffusing to the surface and leaving the film. A 50/50 mix of varnish will have a solids content of about 25%. 75% of the material wants to leave, but the surface skins rapidly and retards its exit. If the resins/oils harden before all of the solvent has left, then there will be gas pockets left when it does. The problem is aggravated by forced drying, which skins the surface more rapidly. The higher the solids content of the fluid, the less likely delayed frosting is. Low solids content materials like Penetrol frost badly, while very high solids content materials like epoxy don't. High solids materials do have a significant drawback, they usually don't penetrate well. Getting good results is mostly the balance of penetration and solids content. The WAM mixtures that are popular. They combine a drying oil with a low viscosity varnish that probably has a solids content near 75%. The other highly effective material is epoxy mixes with high volatility solvents that near 70% solids. It would seem that a low viscosity epoxy with 100% solids would be the best material. I tested some epoxy designed to restore rotted wood, one with no solvent thinner. It worked well, except that it cured to a brittle hardness that to micro crack on the corners of the blank. My current favorite is Flexcoat lite with DNA for a 66% solids content. It penetrates well, doesn't out gas over time, is flexible enough to live with rods stresses, and cures quicker than the WAM mix that David gave me. Clean silk, light tension, low viscosity, high solids, and flexible cure. (Larry Lohkamp) I am glad you are having success with your method. Some additional thoughts about surface blemishes, which are not necessarily related to this problem, but your comments suggest they might be. When spraying nitrocelluose lacquer on musical instrument bodies and other areas, and especially in humid weather, I have seen a surface "blush" appear which is thought to be due moisture being trapped on the surface or the rapid cooling by evaporation collects moisture which interrupts the surface gloss A commonly applied solution is to put about 2 ounces of "Lacquer Retarder" in a gallon of nitrocellulose lacquer. Not much, but the slower evaporation of the retarder is thought to keep the surface open long enough to establish equilibrium and the water evaporates. The other technique is to just spray the surface with lacquer thinner with the retarder at twice this level. In the case of epoxies and other high solids coatings into which solvents have been added, the addition of a small amount of higher boiling solvent may cure the blush problem you are experiencing. (Dave Burley) I have tried to fix these problems and have come full circle after trying multiple tactics.... My solution is to use thinned FC lite for the first two coats. It floods the wraps, CURES in 24 hours or so, and doesn't shrink over time. I tried the spar, walnut oil, amber varnish... All works well but two to three months later, it always has shrunk and left voids at the guide feet. It all just comes down to chemistry...... IMHO..... That is what has worked for me. (Barry Janzen)
I just finished my first rod. Very proud of the bamboo work. Wrapping looked great until second coat of varnish when the shimmers appeared. A couple of questions: For those of you who use Tru Oil as I did for the bamboo, what is your formula for finishing the wraps? Luckily the problem surfaced before my second tip was varnished and I used someone's suggestion of using Tru Oil for the first coat of the wraps on the second tip. I also theorized that perhaps the rod turner created the bubbling, so I did not use it for the second tip. It does appear that I am not getting the shimmers on the second tip. Was it the use of the Tru Oil, the non-use of the turner, or just dumb luck? Can anyone de-bunk the rod turner theory? Last, is there a best way to remove the bad varnish and at the same time preserve the wraps? (Doug Hojem) For kicks, check out Chris Carlin's tutorial on accomplishing transparent wraps. Here's the link. (Bernie Elser)
OK, I have a problem. I find that when I do epoxy wraps on bamboo that I seem to be fine but when I do guide wraps on fiberglass rods that I get micro bubbles in the finish........I think it's called "shimmers". I use the same method, namely a nylon micro brush and I put a thinned coat on first, wiping most of it off with finger pressure and then a thicker coat the second time around. I have used both Threadmaster and Flexcoat Lite. Any hints, please? (Tom Lucas (10/13/2016)) I’ve had good luck on epoxy using a pencil torch or similar with a quick swipe of the flame across the epoxied wrap. The bubbles just pop as pretty as you please. Of course, you have to be quick to not burn anything and be aware of the heat thinning the epoxy so it may drip/run. I have not had good results with an alcohol burner. It seems to me that the hotter flame applied quickly with the torch takes the bubbles out better. Just my 2 cents. (Matt Woods) Are all epoxies the same? The reason I ask, as I've never had an issue. I mix the crap outta the components, bubbles everywhere and have used both a sharp piece of bamboo and a brush to put on the finish. Never had bubbles. I use Flex Coat Lite for most work but have on occasion used other epoxies on my own rods. These include 5-minute stuff and 1-hour stuff that I got at the local hardware store. These epoxies worked just fine and I've had no issues with them. Some have been in place 10+ years. Sometimes speed is of the essence. There is fishing to be done. A loose guide, some thread and 5-minute epoxy and I've back on the water. (Don Anderson) The problem *may* lie in the way you mix the epoxy. I used to mix epoxy by hand and had some troubles with bubbles. If you use the bristles of the brush when applying epoxy, that may introduce bubbles as you apply the finish epoxy. I use a small motor to turn my cup of epoxy to mix it. I have a PVC end cap mounted to the motor to hold the mixing cup. It's mounted on a 45-degree angle. I put s proper sized ball bearing in the epoxy to roll and 'stir' the epoxy as the cup rotates. The ball bearing I use is heavy enough to not turn with the cup, but not so heavy it rides at the bottom. If the motor is turning the mixing cup counterclockwise, the ball bearing rolls and stays between the 7 and 8 o'clock position. I let it run for 5 minutes. The finish epoxy comes out very clear with no bubbles. (Brian Greer)
|